
Your red dot sight is useless if it’s not properly zeroed—but you don’t need a range trip to get it dialed in. Thousands of shooters waste precious ammunition and range time chasing zeros when they could have achieved precise accuracy from their garage or basement. With the right approach, you can zero your red dot at home in under 30 minutes, saving dozens of rounds while ensuring your firearm performs exactly when it matters most.
Imagine heading to the range confident your first shot will hit exactly where your red dot appears. No more wasting expensive ammo hunting for your zero. This proven method works whether you’re sighting in a pistol red dot for competition, an AR-15 for home defense, or a shotgun for hunting. You’ll learn the exact techniques professional shooters use to establish reliable zeros without ever leaving your property.
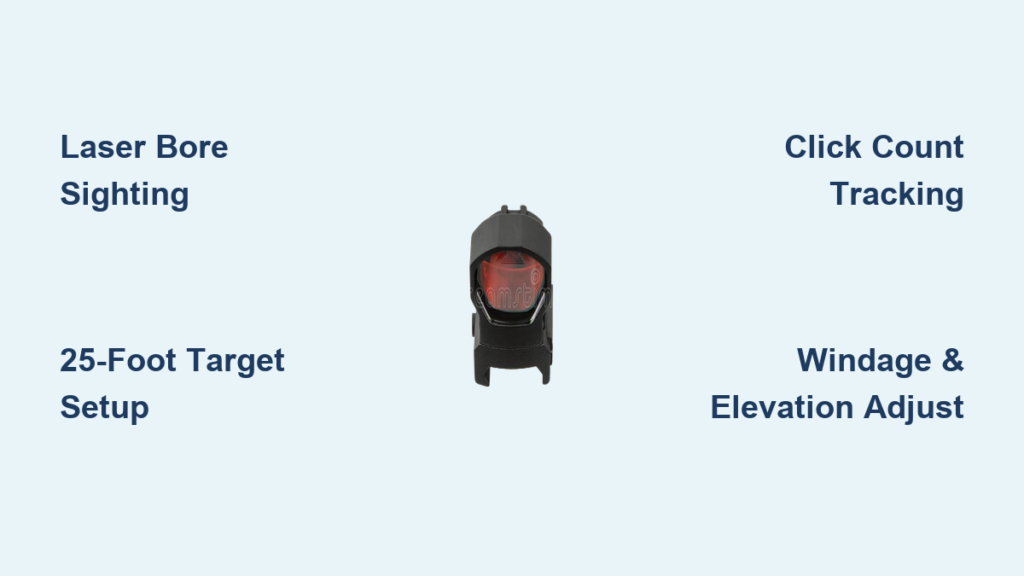
Essential Zeroing Tools You Already Own

Laser Bore Sighter Method That Actually Works
Skip the expensive professional services and use a $25-50 laser bore sighter to achieve professional-grade results at home. Magnetic models attach securely to your muzzle, while cartridge-style lasers chamber like a regular round for absolute precision. When activated, this tool projects a visible laser dot exactly where your bore is pointing, eliminating guesswork and saving you at least 20 rounds of ammunition during initial zeroing.
For best results, choose a model with adjustable brightness to work in various lighting conditions. Always verify the laser’s alignment by rotating it in the barrel—if the dot circles, your bore sighter isn’t seated properly. This simple verification step prevents hours of frustration chasing an inaccurate reference point.
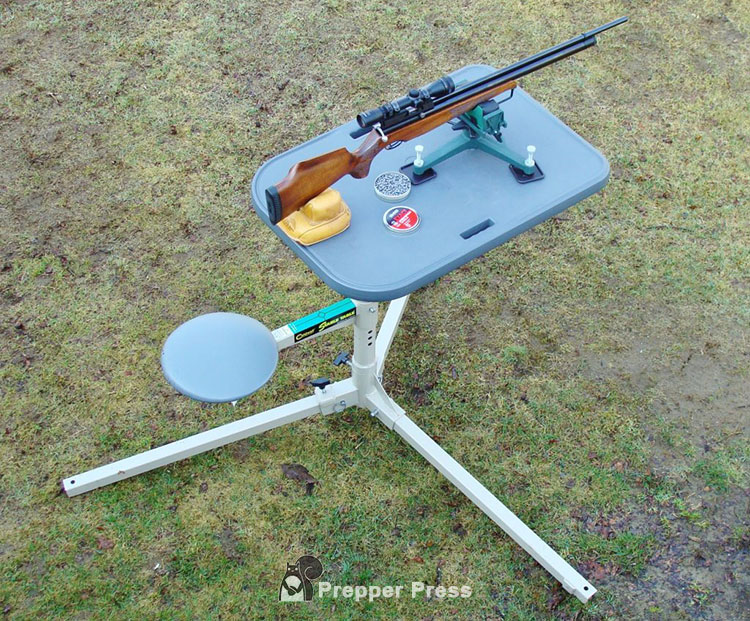
Target and Rest System for Pinpoint Accuracy
Your target setup makes or breaks your home zeroing success. Position a standard 25-yard zeroing target with 1-inch grid squares exactly 25 feet from your shooting position—this converts to 25 yards for zeroing purposes. Create a rock-solid shooting platform using sandbags, a bench rest, or even rolled-up towels secured with rubber bands to prevent movement.
Use a small bubble level on your rifle’s rail to ensure perfect horizontal alignment before making any adjustments. Hang your target on a sturdy backstop using two nails at the top corners to prevent shifting. The grid lines should appear perfectly square when viewed through your red dot—any distortion indicates your target isn’t hanging straight.
Adjustment Tools for Precise Clicks
Most red dots require either a flathead screwdriver, coin, or specialized tool for windage and elevation adjustments. Keep both metric and standard tools handy since some models use different size screws for each axis. A small notebook is essential for tracking your click counts—write down each adjustment so you can return to mechanical center if needed.
Pro tip: Apply a tiny drop of grease to adjustment screws before zeroing. This prevents “click” inconsistency caused by dry mechanisms, ensuring each adjustment produces the exact expected movement. Remember that most red dots adjust at 0.5 MOA per click, meaning each click moves your point of impact 0.5 inches at 100 yards.
Safety Setup That Prevents Accidents
Designated Safe Zone Checklist
Transform an interior room, garage, or basement into a safe zeroing environment with these critical steps: Clear all ammunition from the area and store it in a locked container elsewhere. Create a bullet trap using stacked phone books (minimum 18 inches thick), commercial sandbags, or a dedicated bullet trap—never rely on drywall or household furniture.
Your backstop must extend at least 12 inches beyond your target in all directions. Position yourself at least 10 feet from the backstop to allow safe deceleration of any potential ricochets. Install bright LED work lights to eliminate shadows that could cause misalignment errors during the zeroing process.
Firearm Safety Protocol You Must Follow
Begin every session with the three fundamental safety rules: Keep your finger off the trigger until ready to shoot, always point in a safe direction, and treat every firearm as if loaded. Triple-check your chamber and magazine well with both visual and physical inspection before installing the bore sighter.
Place your unloaded firearm on the rest with the muzzle pointed toward your backstop. Keep your non-shooting hand on the stock to prevent accidental movement. Never leave your setup unattended—even for a moment—with the bore sighter installed. This discipline prevents the most common home zeroing accidents.
Initial Laser Alignment Process
Bore Sighter Installation Done Right
Insert your laser bore sighter firmly but gently into the barrel or chamber. For magnetic models, test the attachment strength by lightly tugging—any movement ruins your alignment. Cartridge-style lasers should chamber smoothly without resistance; forcing them damages both the laser and your firearm.
Activate the laser and verify the dot appears centered on your target. If the dot appears off-center, rotate the laser slightly while watching the dot movement. Stop when the dot creates the smallest possible circle—this indicates perfect alignment with your bore axis. This precision step ensures your reference point is accurate.
Red Dot Coarse Adjustment Technique
Look through your red dot sight and note where the reticle appears relative to the laser dot. Using your adjustment tools, move the red dot until it sits directly on top of the laser dot. Make adjustments in 4-click increments, pausing to verify alignment after each change.
Remember the golden rule: “Your adjustments move the point of impact, not the reticle.” Turning the elevation screw clockwise typically moves your point of impact up. Most red dots require 8-12 clicks from mechanical center to achieve proper alignment at 25 feet. This coarse adjustment gets you “on paper” for final tuning.
Windage Adjustment Process That Sticks

Left-Right Verification Without Guesswork
With your elevation roughly set, focus on windage alignment. The laser dot shows true bore alignment—your red dot should sit directly above it. If it drifts left or right, use windage screws to center it precisely. Turn the windage screw in the direction you want the point of impact to move (right screw turns move impact right).
Make adjustments in quarter-turn increments while watching the reticle movement. Count each audible “click” as you adjust—most shooters underestimate how many clicks they’ve made. Document your settings: “12 clicks right from center” gives you a reliable reference for future adjustments.
Click Counting System for Consistency
Create a simple tracking system: Mark your adjustment screws with a paint pen at mechanical center, then count clicks outward. This visual reference prevents over-adjustment and helps you return to known positions. When fine-tuning, make 2-click adjustments followed by verification—this prevents chasing phantom errors.
After each adjustment, remove and reinstall the bore sighter to confirm consistency. If the laser dot returns to the same spot but your red dot alignment changed, you’ve found true movement. If the laser position shifts, your bore sighter isn’t seating consistently—a common issue that wastes hours of adjustment time.
Elevation Zeroing Steps for Perfect Impact
Bullet Drop Compensation Simplified
At 25 feet, set your red dot to impact 0.9 inches high. This creates the proper 25-yard zero where bullet trajectory crosses line of sight twice. The math is simple: At actual 25 yards, your bullet will hit exactly where the red dot appears, with minimal deviation out to 100 yards.
Start with elevation at mechanical center. Make 2-click adjustments upward while watching the reticle movement. Stop when the red dot sits precisely 0.9 inches above the laser dot on your grid target. Use the 1-inch squares to measure—0.9 inches is just under the full square width.
Vertical Adjustment Pattern for Reliability
Test your elevation setting by moving the laser dot to different target edges. The red dot should maintain consistent vertical relationship regardless of position. If the relationship changes, your mount may be loose or your adjustment mechanism faulty.
Confirm your setting by removing and reinstalling the bore sighter three times. Each time, verify the red dot returns to the same position relative to the laser dot. This repeatability check ensures your adjustments are tracking correctly before you head to the range.
Common Zeroing Mistakes That Waste Time
Over-Adjustment Errors Beginners Make
New shooters often crank adjustment screws too aggressively, throwing their zero completely off. One full turn might equal 16 clicks or 8 MOA—enough to move your point of impact 4 inches at 25 yards. Instead, make small 2-4 click adjustments, then reassess. Patience prevents starting over from scratch.
When in doubt, return to mechanical center and restart the process. Count total clicks from one extreme to the other, divide by two, and mark this position. This reliable starting point saves hours when you lose track of your adjustments.
Improper Distance That Ruins Accuracy
Using 10 feet instead of 25 feet creates significant errors in your zero. Your 25-foot distance equals 25 yards for zeroing purposes because you’re working within home space limitations. Measure precisely with a tape measure—don’t estimate.
Verify your distance by measuring from the muzzle to target three times. Even a 6-inch error at 25 feet translates to a 2-inch error at 25 yards. This precision ensures your home zero translates perfectly to the range.
Live Fire Verification Essentials
First Range Trip Preparation Checklist
Bring your bore sighter, adjustment tools, and notebook to the range. Set up at exactly 25 yards and fire three-shot groups using your normal shooting technique. Your home zero should put you within 2-3 inches of center—close enough for final tuning with minimal ammunition.
Fire your first group without making any adjustments—this verifies your home zero’s accuracy. Use a spotting scope to precisely measure group center relative to point of aim. Calculate required adjustments: at 25 yards, 1 MOA equals 0.25 inches, so each 0.5 MOA click moves impact 0.125 inches.
Adjustment Translation That Saves Ammo
Your 25-foot home adjustments translate directly to 25-yard range results. If you adjusted 8 clicks at home, those same 8 clicks will have identical effect at the range. This knowledge saves dozens of rounds by preventing unnecessary adjustment chasing.
Make final adjustments based on group center, not individual shots. Fire three-shot groups after each adjustment to confirm movement. Document your final zero settings by photographing your adjustment screw positions—this provides reference for future re-zeroing needs.
Maintenance and Re-Zeroing Protocol
Regular Checks That Prevent Failures
Check your zero monthly using the bore sighter method—it takes just 5 minutes and catches problems before they affect accuracy. Look for loose screws, damaged mounts, or shifts in your red dot position. A properly maintained zero should hold through hundreds of rounds.
Perform this quick check before every important shooting session. If your red dot appears significantly off during verification, investigate mounting issues before firing live rounds. This discipline prevents wasted ammunition and potential safety issues.
Storage Protocol for Long-Term Reliability
Store your firearm with optic attached in a climate-controlled environment between 60-75°F. Avoid drastic temperature changes that stress mount screws and internal optics. Before shooting sessions, always verify zero hasn’t shifted during storage using your bore sighter.
Place silica gel packets in your gun safe to prevent moisture damage to electronic components. Check battery contacts regularly—corrosion here causes intermittent operation that mimics zero shift. A well-maintained red dot sight should hold zero for years with proper care.
Your red dot is now precisely zeroed from the comfort of home. This method works with any firearm platform and saves significant time and ammunition costs. Remember to verify your zero at the range when possible, but your home adjustments provide an excellent starting point. Store this guide with your shooting gear as a reference for future zeroing sessions—mastering this skill means you’ll never waste range time hunting for your zero again.


