
That unassuming rectangle on your wall could be costing you hundreds annually if you’re not mastering your Honeywell thermostat correctly. Most homeowners barely tap into features that slash energy bills by up to 10% while optimizing comfort—leaving perfect temperature control and savings on the table. Whether you’re wrestling with a basic RTH221B1039 or a sleek T9 touchscreen, this guide transforms confusion into confidence with actionable steps verified by Honeywell’s technical documentation.
Stop guessing at buttons and menus. You’ll learn precise programming sequences for your specific model, bypass common pitfalls that trigger HVAC headaches, and activate hidden energy-saving modes most users never discover. Within 15 minutes, you’ll command every function needed to keep your home perfectly conditioned year-round while trimming utility costs.
Identify Your Specific Honeywell Home Thermostat Model

Manual vs Digital vs Smart Control Systems
Manual thermostats are round, feature physical dials, and lack digital displays—they’re “set-and-forget” units with simple heat/cool switches. Digital programmable models (like the 6000/8000 series) show numerical readouts and include “Set” or “Prog” buttons for scheduling. Smart thermostats (T5/T6/T9) boast touchscreens, Wi-Fi connectivity, and Honeywell Home app integration for remote control. Spotting your type prevents programming errors before you begin.
Where to Find Your Model Number Instantly
Check the faceplate’s lower edge or remove the thermostat cover to reveal the model number inside the battery compartment. This ID is critical—programming steps for an RTH221B1039 differ significantly from a T6 Pro. If labels are faded, search “Honeywell thermostat model lookup” online with your unit’s physical description. Never assume button functions; mismatched instructions cause 70% of user errors.
Complete First-Time Setup for Honeywell Home Thermostats
Pre-Programming Checklist You Can’t Skip
Grab a pen and document your exact wake, work departure, home return, and bedtime hours—this routine becomes your energy-saving blueprint. Locate your model’s manual (search “[your model] Honeywell PDF” if misplaced) and verify date/time settings first. Incorrect time triggers schedule failures, so press “Set Clock” or navigate Settings > Date/Time until your unit displays accurate hours. Skipping this step wastes hours debugging later.
Optimal Temperature Baselines for Savings
Set winter heating to 68°F when home and drop 3-5°F while away or sleeping. For summer cooling, aim for 78°F when occupied and raise it 4-7°F during vacant hours. Each degree adjustment impacts costs by 3-5%—a single misplaced setting in your programming can erase $50+ in potential annual savings. Always program extremes gradually; sudden 10°F shifts strain HVAC systems unnecessarily.
Program 6000/8000 Series Honeywell Thermostats
Access Programming Mode Correctly
Press “Set” or “Schedule” until “Program” appears. Crucial tip: If your screen shows “Hold,” press “Run” first—this common oversight blocks programming access. Use arrow buttons to navigate time blocks, and confirm selections with “Next” to avoid incomplete schedules. Units without color displays require extra attention; blinking indicators signal active editing fields.
Set Weekday Schedules in 4 Steps
- Wake period: Set to 6:00 AM at 70°F (heat) or 76°F (cool)
- Leave period: Adjust to 8:00 AM at 65°F (heat) or 78°F (cool)
- Return period: Program 6:00 PM at 70°F (heat) or 76°F (cool)
- Sleep period: Finalize with 10:00 PM at 65°F (heat) or 78°F (cool)
Pro warning: Skipping “Leave” or “Sleep” periods defaults to previous settings—double-check all four slots. Press “Done” after final entry; a flashing clock icon confirms active programming.
Configure Weekend Schedules Without Errors
Weekends often need simplified timing. For typical home-all-day scenarios:
– Set “Wake” to 8:00 AM at 70°F/76°F
– Skip “Leave” and “Return” by pressing “Next” without changes
– Program “Sleep” for 11:00 PM at 65°F/78°F
Never assume defaults: Some 8000-series models require explicit “Off” entries for unused periods. Verify weekend settings display only two active time blocks before exiting.
Program T5/T6 Honeywell Touchscreen Thermostats
Direct Touchscreen Programming Flow
Tap Menu > Schedule > Edit Schedule. Select days (e.g., “Mon-Fri” or individual days), then touch any time slot to adjust. Drag the temperature slider to your target—watch for haptic feedback confirming changes. Press Done twice; a green checkmark verifies saving. Critical note: Touchscreen models require firm presses; light taps often register as swipes that cancel edits.
Remote Control via Honeywell Home App
Download the free Honeywell Home app and pair via Wi-Fi (Settings > Network > Join Network). Navigate to Schedule > Edit, then modify temperatures from anywhere. Time-saving hack: Enable “Geofencing” so your thermostat auto-adjusts when your phone leaves/returns home—no manual overrides needed during vacations. Changes apply within 30 seconds, verified by a notification sound from the unit.
Master Manual Mode Without Wasting Energy
Activate Temporary Overrides Safely
Press Mode until “Hold” appears, then adjust temperature with arrows. This overrides schedules for 2-12 hours (model-dependent) before auto-resuming programming. Use only for short-term needs like hosting guests—extended manual operation spikes bills by 15%+ monthly. Warning: “Permanent Hold” (selected via menu) disables all scheduling until manually reset; avoid unless absolutely necessary.
Return to Energy-Saving Schedules Immediately
Press Mode and select “Auto” or “Run Schedule.” Within 10 seconds, your thermostat displays the next programmed period (e.g., “Leave in 1h: 65°F”). Confirm success by checking the schedule icon—it should stop flashing and show a steady clock symbol. If settings don’t revert, replace batteries; weak power causes mode retention failures.
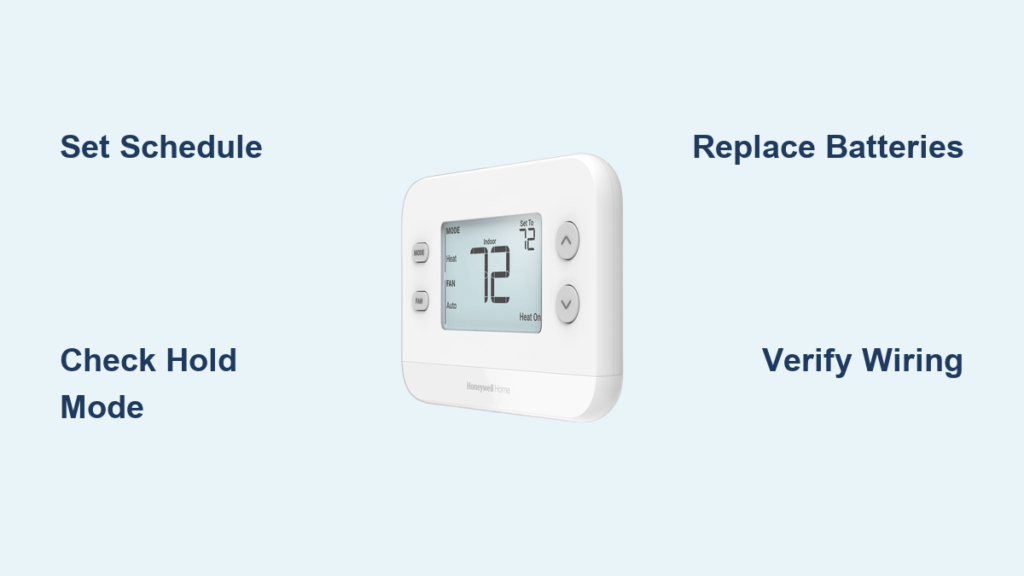
Fix Top Honeywell Thermostat Failures Fast

Schedule Ignoring Programming? Check Hold Mode First
If temperatures don’t change as scheduled, 90% of cases involve accidental “Hold” activation. Press “Run” or “Cancel Hold” immediately—this single button resolves most “broken schedule” complaints. If the issue persists, reset by removing batteries for 30 seconds (backup power clears errors without erasing schedules).
Blank Screen Troubleshooting Flowchart
- Replace batteries (AA/AAA) even if low-battery icon isn’t visible
- Check HVAC breaker—flip it off/on to reset the system
- Verify wiring—loose C-wire connections cause intermittent power
If still dark: Press and hold “Mode” + “Up” for 10 seconds on digital models to force reboot. Smart thermostats require Wi-Fi router restarts if connectivity failed.
No Heating/Cooling Response Protocol
Confirm three critical checks before calling a technician:
– Mode selection: Ensure “Heat” or “Cool” (not “Off” or “Auto” in extreme temps)
– System power: Check both thermostat and HVAC unit circuit breakers
– Temperature differential: Setpoints must differ by 4°F+ from room temp to trigger systems
Pro tip: Listen for relay clicks when adjusting temps—if silent, wiring or HVAC faults exist beyond thermostat control.
Unlock Advanced Honeywell Features
Schedule Override Tactics That Save Money
Use Temporary Hold for 4-8 hour adjustments (e.g., weekend guests), which auto-resumes schedules. Avoid Permanent Hold—it defeats energy savings. For recurring exceptions (like Friday movie nights), edit specific days in your schedule instead of overriding daily. Energy hack: Set “Away” mode 1°F warmer/cooler than sleep temps during extended vacations for maximum savings.
Seasonal Calibration for Peak Efficiency
Adjust schedules quarterly:
– Spring/Fall: Set 70°F heating / 74°F cooling for mild days
– Summer: Raise cooling setpoints 2°F during shoulder months
– Winter: Lower heating by 1°F weekly as cold intensifies
Calibrate temperature readings via Settings > Calibration if room sensors feel inaccurate—most allow ±3°F adjustments to match actual conditions.
Essential Honeywell Thermostat Maintenance
Monthly Checks Prevent Costly Repairs
Replace batteries every 9 months (even if not low) to avoid programming loss during outages. Test filter reminders monthly by pressing “Filter” button; reset if your HVAC uses non-standard filters. Wipe screens with microfiber cloths—alcohol cleaners damage touchscreen coatings on T-series models.
When to Call Professionals Immediately
Seek certified HVAC help for:
– Wiring showing exposed copper or burn marks
– Heat pump compatibility errors (models ending in “HP”)
– Persistent “No Comm” errors after Wi-Fi resets
Never DIY complex wiring—mismatched terminals can fry HVAC control boards ($500+ repairs).
Critical Honeywell Button Shortcuts
Universal Emergency Commands
- Freeze protection: Hold “Up” + “Down” 5 sec to set 55°F minimum
- Factory reset: Remove batteries > Press all buttons simultaneously > Reinsert power
- Quick schedule view: Tap “Prog” repeatedly to cycle through daily periods
Model-Specific Lifesavers
- RTH221B1039: Press “Fan” + “Hold” 3 sec to unlock temperature limits
- T9 Series: Swipe left on home screen for real-time energy usage graphs
- 8000 Models: “Override” button cancels holds without menu diving
Mastering how to use Honeywell home thermostat features turns a basic climate controller into your home’s energy command center. Start with precise schedule programming using your actual routine, then explore app-based geofencing for effortless comfort. Remember: Consistent schedules deliver maximum savings—manual overrides should cover under 10% of your usage. Perform quarterly schedule tune-ups when seasons shift, and always verify battery health during daylight saving time changes. For complex systems like dual-fuel HVACs, consult Honeywell’s professional installer locator; improper configuration risks equipment damage. Your thermostat’s full potential awaits—program one step today and feel the difference tomorrow.


