

Your home’s exterior deserves durable, weather-resistant protection that enhances curb appeal for decades. Learning how to stucco a home transforms ordinary walls into stunning Mediterranean-style facades while providing 50-100 years of reliable performance. Whether you’re refreshing an aging surface or finishing new construction, this guide delivers professional techniques for DIY success. You’ll discover critical preparation steps, mixing ratios, and application methods that prevent common failures—saving you costly repairs down the road.
Choosing Your Stucco System for Home Application
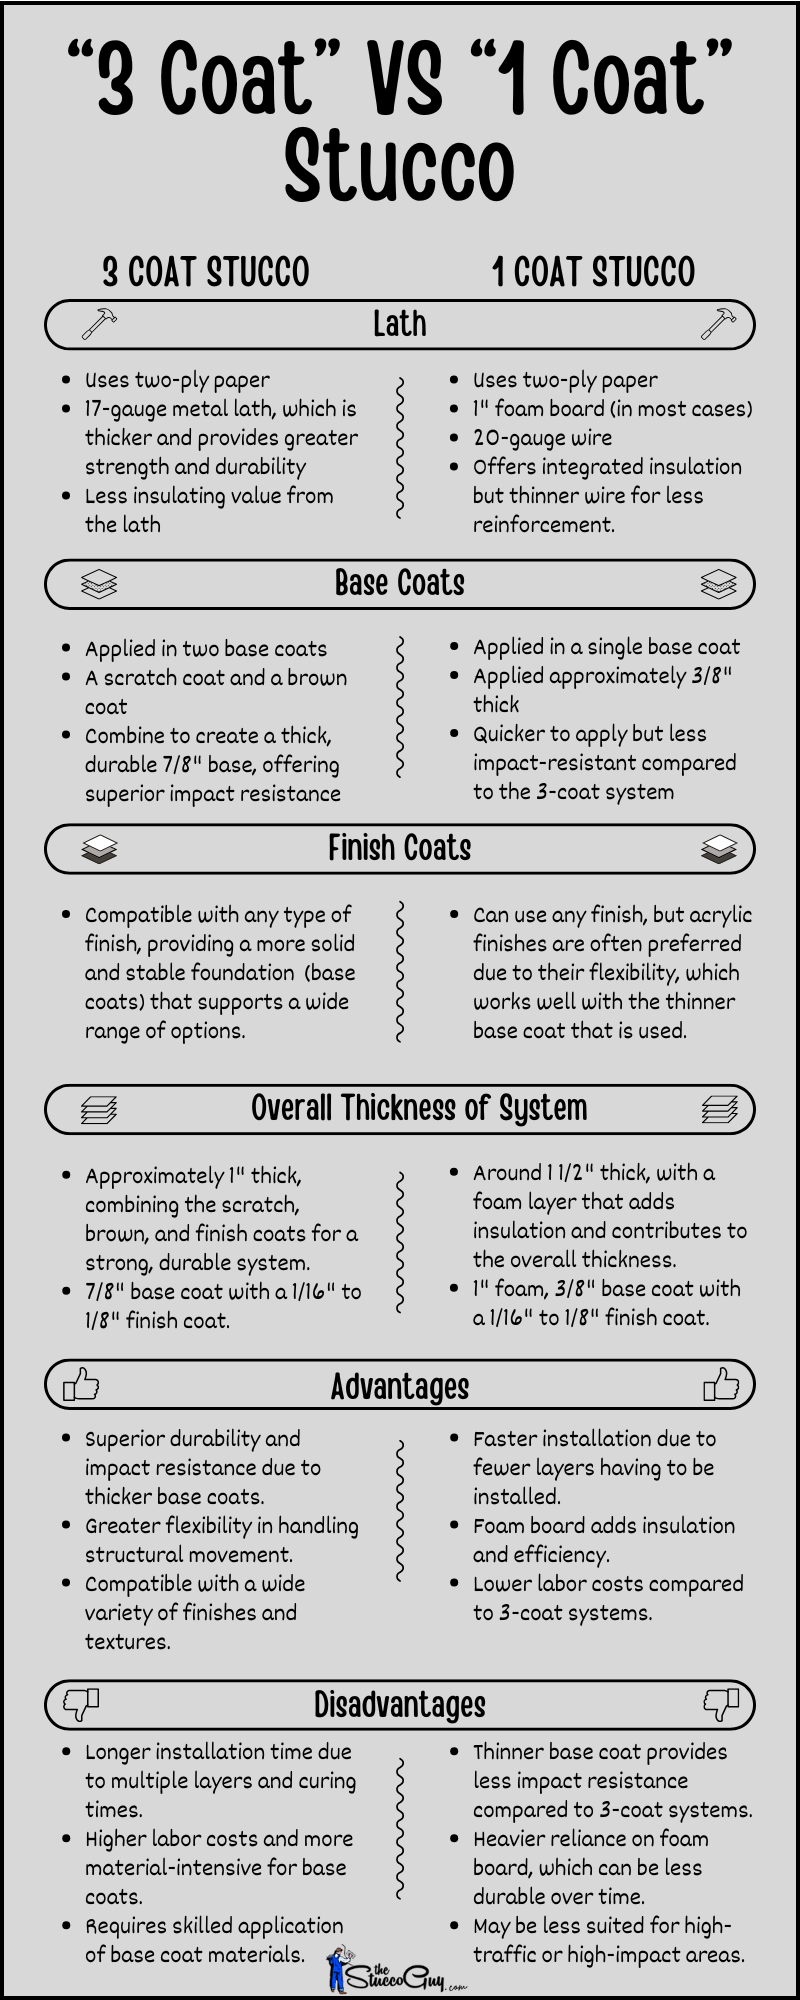
Traditional Three-Coat Method for Maximum Durability
When learning how to stucco a home, the three-coat system remains the gold standard for longevity. Start with a scratch coat (3/8″ to 1/2″ thick) that bonds to your lath, followed by a brown coat (3/8″ thick) for leveling, and finish with your decorative texture coat (1/8″ to 1/4″ thick). This system delivers the full 7/8″ total thickness required by building codes for wood-frame homes. The extra time investment pays off with superior crack resistance and weather protection compared to quicker alternatives.
One-Coat Systems for Faster Home Stucco Projects
If you’re pressed for time but still want to stucco your home correctly, modern polymer-modified one-coat systems cut application time by 60%. These products require specialized substrates like cement board or approved weather barriers—never apply directly over wood sheathing. Expect 3/8″ to 1/2″ total thickness versus traditional systems. While faster, one-coat systems offer less flexibility for texture options and require precise temperature control during application.
EIFS for Energy-Efficient Home Stucco
Exterior Insulation and Finish Systems combine stucco aesthetics with serious energy savings. These systems attach 1-2″ EPS foam boards directly to your walls before applying a reinforced base coat and finish texture. The continuous insulation dramatically improves your home’s R-value while maintaining authentic stucco appearance. For cold climates, this approach pays dividends through reduced heating costs—just ensure proper drainage installation to prevent moisture issues.
Essential Tools for DIY Home Stucco Success

Must-Have Application Equipment
Mastering how to stucco a home requires the right tools: Start with a hawk and trowel set as your primary application tools—these become extensions of your hands during work. Add a magnesium float for smoothing, a 4-foot darby for leveling large areas, and corner tools for crisp edges. Rent a heavy-duty mortar mixer rather than struggling with a drill and paddle for larger projects. Professional results depend on having the proper tools rather than just strong technique.
Critical Safety Gear for Home Stucco Projects
Stucco work demands serious protection—cement burns can damage skin within minutes. Always wear safety glasses, respirators for dust protection, long sleeves, and gloves during mixing and application. For multi-story homes, invest in proper scaffolding rather than risking ladder work. Keep vinegar on hand to neutralize any cement splashes on skin immediately. Skipping safety equipment risks painful injuries that could sideline your entire project.
Preparing Your Home Walls for Stucco
Surface Assessment Before Application
Before you stucco your home, pressure wash all surfaces at 2,500 PSI to remove contaminants. Inspect for loose paint, rotted wood, or structural cracks—these require complete remediation first. Test absorption by sprinkling water; proper substrates darken within 60 seconds. Any areas that repel water need additional preparation to ensure stucco adhesion. Rushing this step causes costly delamination later.
Weather Barrier and Lath Installation
Install house wrap shingle-style from bottom to top with 6-inch overlaps, sealing all penetrations with compatible flashing. Create a 1/4″ drainage plane using furring strips—this prevents moisture entrapment behind stucco. For lath, choose 2.5 lb galvanized metal fastened every 6″ horizontally and 16″ vertically. Maintain 2″ overlaps at seams and fold corners tightly without gaps. Proper moisture management separates professional results from DIY disasters.
Mixing Perfect Stucco Batches for Home Use
Traditional Mix Ratios for DIYers
Create your scratch coat using 1 part Portland cement, 1/4 part Type S lime, and 2.5 parts sand. Brown coat increases sand to 3.5 parts for easier floating. Finish coat uses 1:1:2 ratios for smooth troweling. Add water gradually until mix holds ridges without slumping—too much water causes shrinkage cracks. Pre-mix large batches for color consistency, especially on visible home exteriors.
Mixing Sequence for Optimal Results
Dry-blend ingredients for 2 minutes before adding water. Mix for 3 minutes after water incorporation, then rest 15 minutes. Remix briefly before use—this rest period allows chemical activation and dramatically improves workability. Never add extra water to stiffened mix; instead, prepare smaller batches more frequently. Proper mixing technique prevents premature drying and ensures strong adhesion to your home’s walls.
Applying Stucco Coats to Your Home
Scratch Coat Techniques for Beginners
Load your hawk with mixed material, transferring to wall using horizontal strokes from bottom upward. Maintain consistent 3/8″ to 1/2″ thickness throughout. Work in 3-foot sections to maintain control before material sets. Immediately create horizontal grooves 1/8″ deep using a scarifier—these provide mechanical keys for brown coat adhesion. Mist newly applied scratch coat every 2 hours for 48-72 hours to prevent cracking.
Brown Coat Leveling Process
Apply brown coat at 3/8″ thickness, bringing total system to 3/4″. Use a darby or straightedge to level surfaces immediately, filling low spots with additional material. Check flatness frequently with a 6-foot straightedge—deviations over 1/4″ require correction. After initial set, float surfaces using magnesium floats in circular motions to compact the coat. Allow 7 days minimum cure with daily misting before proceeding.
Finish Coat Texture Selection
Choose from four primary textures: smooth (steel troweled), sand (floated), dash (sprayed aggregate), or lace (knock-down). Each requires specific techniques and timing considerations. Practice textures on test panels before tackling visible areas of your home. Maintain identical water ratios throughout application for consistent color development—variations cause noticeable patches on your finished exterior.
Critical Curing and Protection Steps
Proper Moisture Management Strategy
Critical curing begins immediately after finish coat application. Mist surfaces lightly every 2-3 hours for 48 hours, avoiding over-saturation that causes erosion. Continue light misting for 7 days minimum—this develops full strength and prevents cracking. Install windbreaks using tarps to prevent rapid drying in breezy conditions. Create shade structures during hot weather to prevent uneven curing that creates visible patches.
Timeline Requirements for Home Projects
Allow 7 days minimum before painting or sealing stucco surfaces. Full strength develops over 28 days—avoid pressure washing or aggressive cleaning during this period. Schedule final inspections after complete curing to ensure system performance. Rushing the curing process compromises durability and leads to premature failure of your stucco application.
Troubleshooting Home Stucco Problems
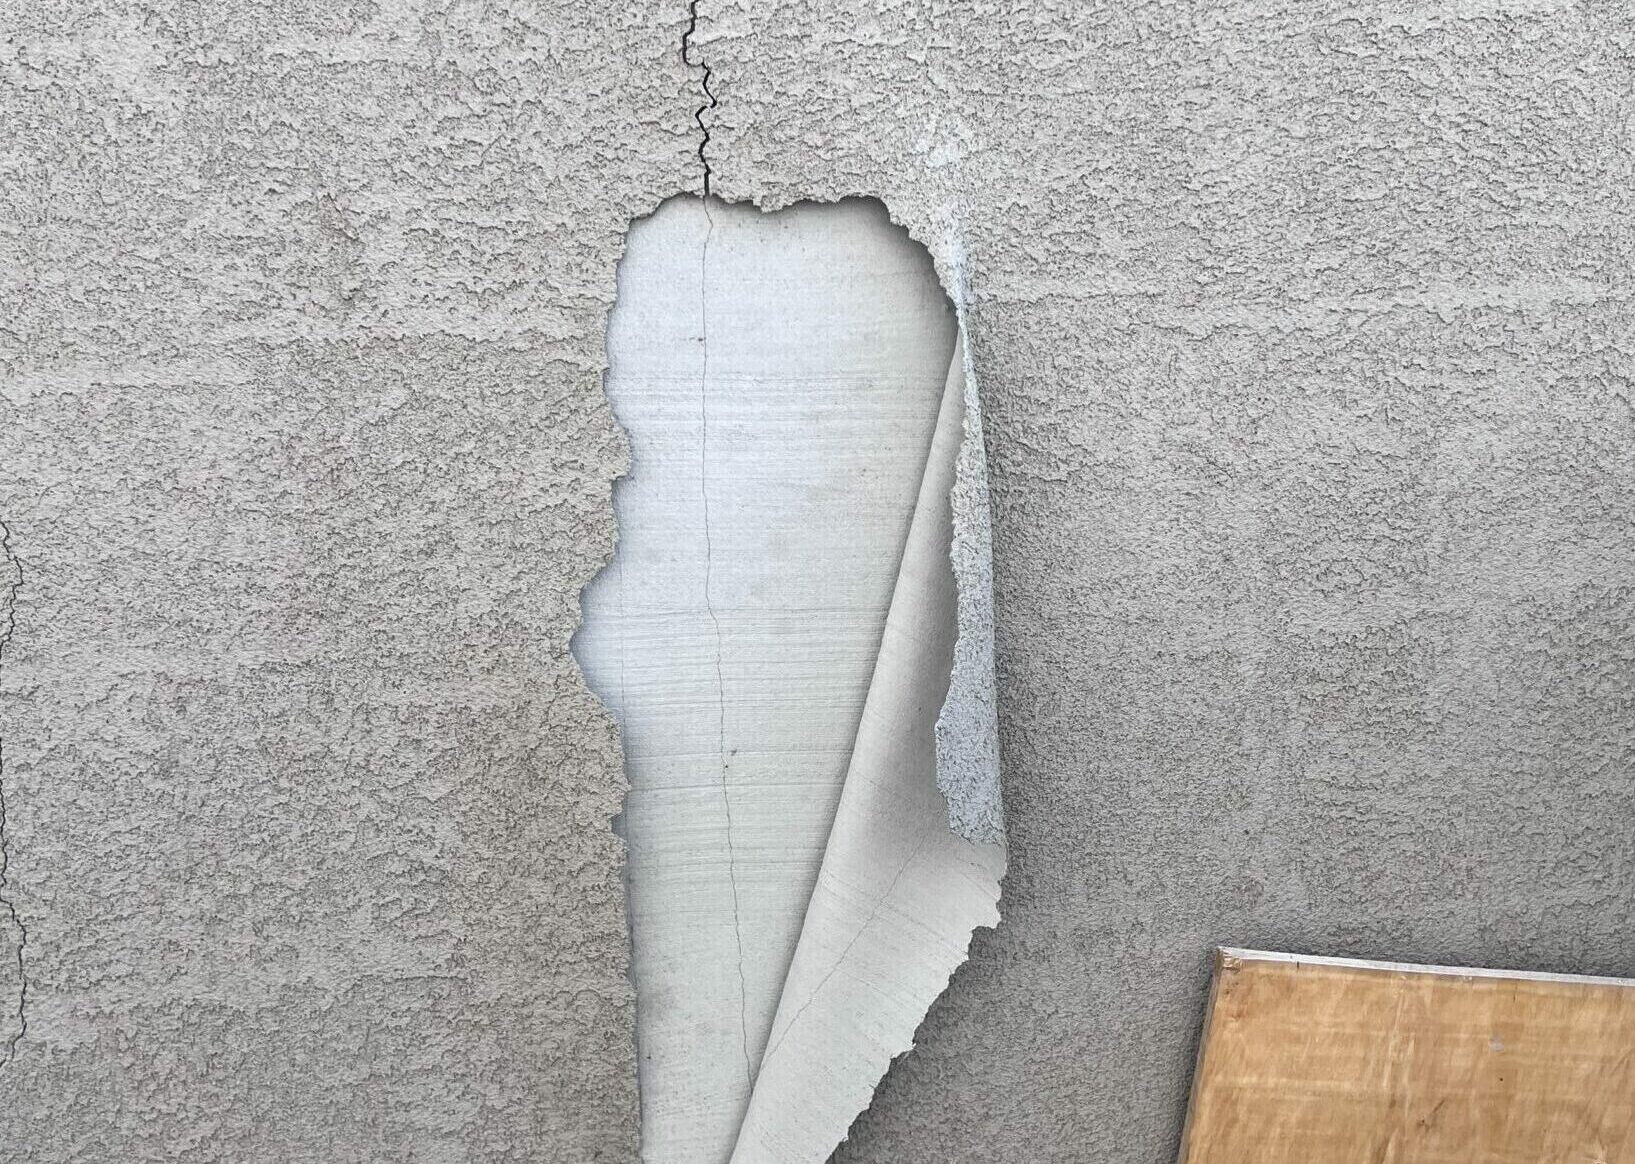
Crack Prevention and Repair Solutions
Hairline cracks indicate rapid drying—increase misting frequency immediately. Structural cracks signal substrate movement requiring professional assessment. Repair minor cracks using elastomeric caulk that matches texture and color. Prevent future cracking by maintaining proper curing conditions and using fiber-reinforced mixes. Ignoring small cracks leads to major water intrusion problems.
Adhesion Failure Fixes for DIYers
Delamination results from contamination or poor surface prep—complete removal and reapplication becomes necessary. Verify lath attachment and substrate compatibility before proceeding. Ensure weather barriers drain properly to prevent moisture-related failures. When in doubt, consult a professional before attempting major repairs on visible home exteriors.
Long-Term Home Stucco Maintenance
Annual Inspection and Cleaning Routine
Examine stucco surfaces each spring for cracks, damage, or water infiltration points. Check caulking around windows, doors, and penetrations—replace every 5-7 years. Use low-pressure washing (under 600 PSI) with mild detergents for routine cleaning. Avoid harsh chemicals that damage surface finishes. Document changes with photographs for long-term monitoring.
Protection Strategies for Lasting Results
Apply breathable masonry sealers every 5-10 years for enhanced weather resistance. Use 100% acrylic latex paint formulated specifically for stucco when repainting becomes necessary. Consider elastomeric coatings for superior crack-bridging capabilities on aging home exteriors. Proper maintenance extends your stucco’s lifespan well beyond 50 years with minimal upkeep.
Mastering how to stucco a home requires careful preparation and patient execution, but the results deliver decades of beauty and protection. Start with small practice areas to develop technique before tackling your entire exterior. The investment in proper materials and methods pays dividends through maintenance-free performance that increases your home’s value and curb appeal for generations.


