
Your tooth started wiggling during breakfast, and now you can’t stop touching it with your tongue. Whether it’s from biting into a crusty baguette or an old sports injury flaring up, a loose adult tooth demands immediate attention. While professional dental care is essential, these proven home techniques can stabilize your tooth and prevent further damage until your dentist appointment. Ignoring a loose tooth risks permanent damage, but quick action with the right stabilization methods gives you the best chance of saving your natural tooth.
Stop Tooth Movement Before It Worsens
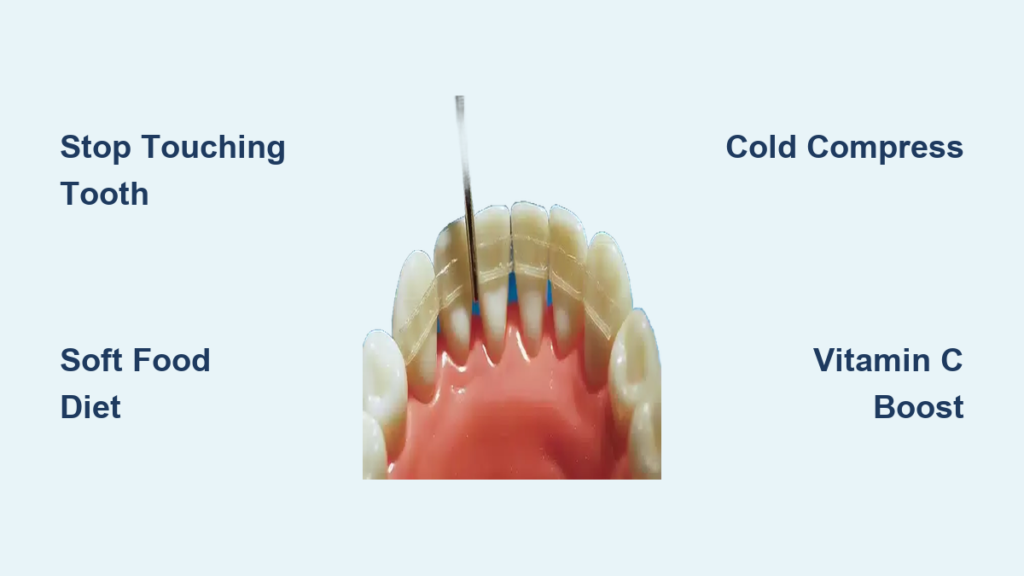
Cease All Tooth Manipulation Immediately
Don’t touch, wiggle, or test the loose tooth—every movement risks additional damage to the periodontal ligaments holding it in place. Your tongue naturally gravitates toward new sensations, so consciously keep it occupied elsewhere. Switch to chewing exclusively on the opposite side of your mouth and avoid biting down completely on the affected side. This immediate behavioral change prevents 90% of additional loosening within the first critical 24 hours. If you catch yourself touching the tooth, gently redirect your tongue and practice breathing exercises to reduce the compulsion.
Implement a Strict Soft Food Diet
Transform your eating habits instantly to protect your vulnerable tooth. Replace crunchy snacks with nutrient-dense soft foods like Greek yogurt, protein smoothies, and scrambled eggs. Eliminate apples, carrots, nuts, and hard candies from your diet completely—even seemingly harmless foods become enemies to a loose tooth. Temperature matters too; avoid ice cream or hot soup that triggers sensitivity. Stick to lukewarm, soft textures that maintain nutrition without risking further displacement. Carry emergency soft food options like protein shakes when you’re on the go to avoid accidental hard food consumption.
Adjust Oral Hygiene Without Causing Harm
Trade your regular toothbrush for an extra-soft bristled brush immediately—this simple switch makes a dramatic difference in stabilization efforts. Use gentle, circular motions focusing on gum massage rather than aggressive scrubbing. Skip electric toothbrush modes that might apply too much pressure, and consider using a manual brush for the next few days. Floss carefully around the loose tooth; if the tooth moves when you floss, pause and switch to a water flosser on its lowest setting instead. After brushing, rinse with warm salt water (½ teaspoon salt in 8 ounces warm water) to reduce inflammation without irritating delicate tissues.
Apply Targeted Anti-Inflammatory Treatments

Create an Effective Turmeric Healing Paste
Make a powerful anti-inflammatory paste by mixing ¼ teaspoon turmeric powder with two drops of water to form a thick consistency. Using a clean cotton swab, apply this golden mixture gently around the gum line of your loose tooth—avoid direct contact with the tooth itself. Leave it in place for 5-10 minutes before rinsing with warm water. Turmeric’s natural curcumin reduces gum swelling that often accompanies tooth mobility by targeting inflammatory pathways. Use this treatment once daily, preferably before bed, for maximum overnight healing benefits. Store leftover paste in a small airtight container in the refrigerator for up to three days.
Master the Cold Compress Technique
Wrap an ice pack in a thin cloth and apply it to your cheek over the affected area for 10-15 minutes at a time. Repeat this every 3-4 hours during the first 48 hours to significantly reduce inflammation that can loosen teeth further. The cold constricts blood vessels, minimizing swelling and providing pain relief. Never apply ice directly to the tooth or gums—this can cause extreme sensitivity and potential tissue damage. For precise application, mold the ice pack to your cheek contour and keep it in place with a soft bandage to free up your hands during treatment.
Apply Clove Oil for Natural Pain Relief
Dilute 2-3 drops of medicinal-grade clove oil with ½ teaspoon coconut oil to create a safe, effective treatment. Using a cotton swab, apply this mixture to the surrounding gum area—not directly on the tooth—for antibacterial protection and mild numbing relief. Eugenol, the active compound in clove oil, acts as a natural anesthetic while fighting potential bacterial invasion. Limit applications to 2-3 times daily—overuse can irritate sensitive tissues and delay healing. For best results, apply after meals when your mouth is clean but before eating to allow maximum absorption time.
Strengthen Tooth Support Structures

Boost Vitamin C Intake for Gum Repair
Your gums need vitamin C to produce collagen for tissue repair—this is non-negotiable for tooth stabilization. Load up on vitamin C-rich foods like strawberries, kiwi, and bell peppers throughout the day. Consider a 500mg vitamin C supplement, but consult your doctor first if you take blood thinners or have kidney issues. Vitamin C deficiency, often overlooked, is a hidden cause of gum recession leading to loose teeth. For maximum absorption, pair vitamin C sources with iron-rich foods like spinach or lentils. Track your daily intake to ensure you’re getting at least 200mg—double the standard recommendation—during the stabilization period.
Optimize Calcium and Vitamin D Absorption
Strong teeth need strong bones beneath them, so enhance your calcium and vitamin D intake strategically. Increase dairy products, leafy greens, and almonds in your diet, but don’t stop there—pair calcium sources with vitamin D for optimal absorption. Get 10-15 minutes of daily sunlight for natural vitamin D production, ideally between 10am and 2pm when UVB rays are strongest. If supplementing, choose 1000mg calcium citrate (better absorbed than carbonate) with 600-800 IU vitamin D3 for maximum bone density support. Take calcium supplements in 500mg doses twice daily rather than one large dose for better absorption.
Implement CoQ10 for Accelerated Gum Healing
This powerful antioxidant supports gum tissue repair at the cellular level. Take 60-100mg of ubiquinol (the active form of CoQ10) daily for best results, preferably with a meal containing healthy fats for improved absorption. Increase intake through fatty fish like salmon, organ meats, and whole grains. CoQ10 levels drop significantly with age and certain medications like statins, making supplementation particularly beneficial for adults over 40. Noticeable improvements in gum firmness typically appear within 2-3 weeks of consistent use, providing crucial support for your loose tooth’s recovery.
Prevent Further Damage During Recovery
Create an Emergency Night Guard Solution
If you wake with jaw pain or headaches, you’re likely grinding your teeth at night—a habit that rapidly loosens teeth. Get an over-the-counter boil-and-bite guard as a temporary solution within 24 hours. When fitting it, ensure it doesn’t put additional pressure on your loose tooth by testing the bite before it fully cools. Wear it every night until your dentist can provide a custom fit. Even slight grinding can undo days of careful home care, so this step is non-negotiable. Check your guard daily for wear patterns that might indicate uneven pressure on your loose tooth.
Apply Temporary Splinting Techniques Correctly
For immediate stabilization, sugar-free chewing gum can provide crucial daytime support. Cut a small ¼-inch piece and place it gently between the loose tooth and its neighbor—this creates a natural splint. Crucially, remove it before eating or sleeping—this is purely an emergency measure for daytime comfort. Orthodontic wax offers another temporary splinting option for visible gaps; warm a small piece between your fingers and press it carefully into position. Never use super glue or other adhesives—these can cause severe damage and complicate professional treatment.
Track Healing Progress Effectively
Monitor Mobility Changes Daily
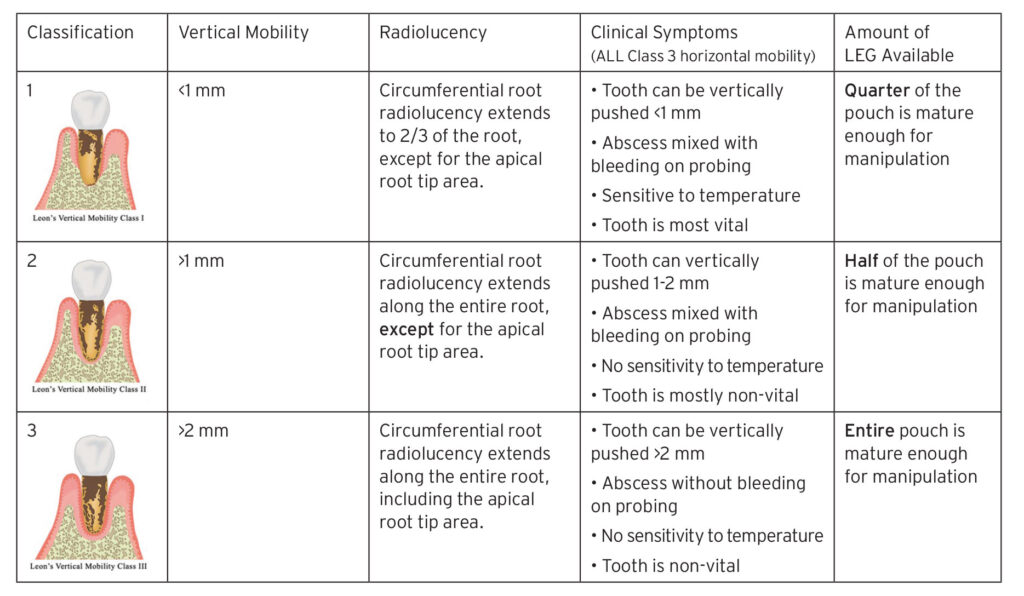
Assess your tooth daily using a standardized approach: gently press the tooth horizontally with a clean cotton swab and note the movement. Grade 1 mobility (slight horizontal movement under 1mm) might improve with home care, while Grade 2-3 mobility requires immediate professional attention. Keep a simple journal noting morning sensitivity level (1-10 scale), amount of movement detected, any new pain or swelling, and foods you can comfortably eat. Take weekly photos with your smartphone to visually track improvements you might not notice day-to-day.
Identify Critical Warning Signs
Stop all home treatments and call your dentist immediately if you notice increased mobility or displacement, severe throbbing pain that worsens at night, pus or foul taste indicating infection, facial swelling or fever, or difficulty closing your mouth properly. These signs indicate serious complications that home care cannot address. Don’t wait until your scheduled appointment—call for an emergency slot if you observe any of these symptoms. Early professional intervention makes the difference between saving your tooth and facing extraction.
Optimize Your Healing Environment
Eliminate Smoking Completely
Smoking delays healing by 50% and increases infection risk by compromising your immune response. Quit immediately—this is non-negotiable for tooth stabilization. Nicotine patches are acceptable alternatives during recovery, but avoid vaping as the heat and chemicals still impair healing. Every cigarette you skip gives your tooth a better chance to stabilize. Even secondhand smoke exposure can impair healing, so avoid smoky environments completely during your recovery period. Track your smoke-free days to stay motivated—most dental professionals report significantly better outcomes in non-smokers.
Address Stress-Related Grinding Proactively
Stress often manifests as teeth grinding, which undoes stabilization efforts overnight. Download a meditation app or practice deep breathing exercises for 10 minutes three times daily. Set phone reminders throughout the day to check if you’re clenching—your jaw should naturally separate when relaxed; if your teeth touch, you’re clenching. Keep a stress journal to identify triggers and develop alternative coping mechanisms. Consider wearing your temporary night guard during high-stress work periods if grinding occurs during the day.
Optimize Sleep Position for Healing
Elevate your head slightly with an extra pillow to reduce blood flow to inflamed tissues—this simple change can reduce morning swelling by 30-40%. Avoid sleeping on the side of your loose tooth; instead, sleep on your back with head elevated. For precise positioning, use a wedge pillow designed for acid reflux—it maintains elevation without neck strain. This adjustment works synergistically with nighttime anti-inflammatory treatments to maximize healing while you sleep.
Final Note
Remember: These home techniques stabilize and protect your loose tooth, but they cannot reattach significant bone loss or treat periodontal disease. Schedule your dental appointment within 1-2 weeks maximum. Delaying professional care can transform a saveable tooth into one requiring extraction. Your dentist will determine if additional treatments like professional splinting, deep cleaning, or bone grafting are necessary for permanent stability. The window for saving a loose tooth is narrow—combine these home stabilization methods with prompt professional care for the best outcome.


