
Your favorite cowboy hat has lost its crisp creases, or maybe you scored a vintage find that needs new life. Before you drop $75 at a hat shop, know this: you can reshape that felt, straw, or leather hat right in your kitchen with tools you probably already own. The secret lies in understanding your hat’s material and using controlled moisture—not drowning it—to make it pliable enough to mold. This guide walks you through exactly how to restore that perfect cattleman crease or craft a custom gus shape without ruining your investment.
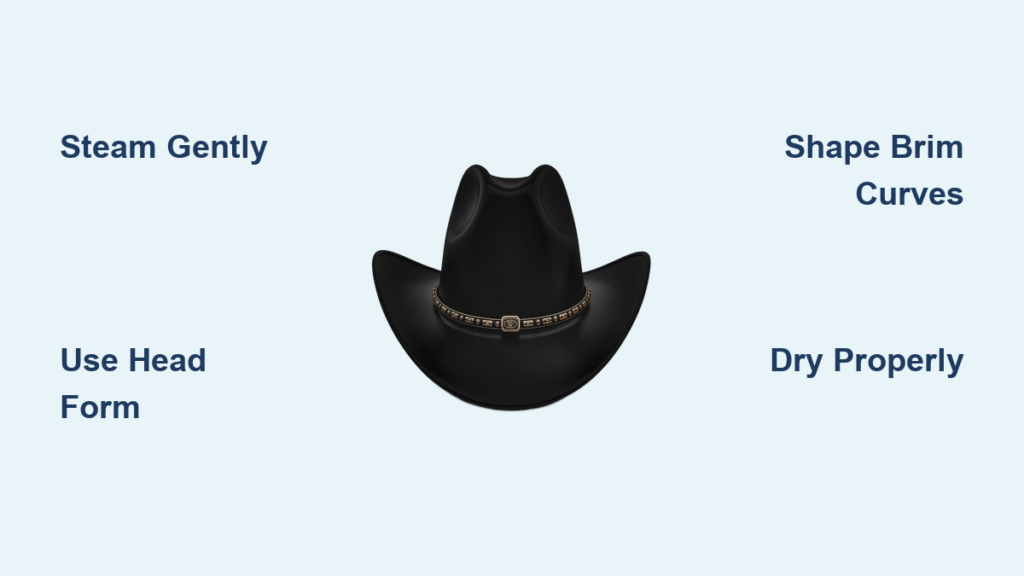
Essential Tools for Hat Shaping at Home
Basic Steam Kit You Already Own
Skip the expensive professional gear—your kitchen holds everything needed for most reshaping jobs. Grab your tea kettle or garment steamer for heat, a clean spray bottle filled with distilled water for precise moisture control, and a soft-bristled hat brush to maintain the hat’s texture during the process. An adjustable hat jack or even a clean towel-wrapped bowl works as a head form to maintain shape while drying. Cotton cloths protect your hands from steam burns and absorb excess moisture that could damage delicate fibers.
Precision Accessories for Professional Results
Once you’ve mastered the basics, add these game-changing tools: A hat jack expands the crown for size adjustments without stretching weak spots, while brim flanges create consistent curves that look store-bought. Clothespins become your secret weapon for holding dramatic brim curves during drying, and professional shaping spray adds permanent hold to stubborn areas that resist standard techniques.
Pro tip: Wait until you’ve reshaped three hats successfully before investing in specialty tools. Most home reshaping needs can be met with that $20 tea kettle and a thrift store hat for practice.
Prepare Your Hat Before Reshaping
Clean First or Ruin Your Hat Forever
Never attempt reshaping on a dirty hat—ground-in dust becomes permanent when heated. Start by brushing the entire surface with your appropriate hat brush, working from crown to brim in smooth strokes. For stubborn spots on felt, use a barely damp cloth with mild soap, but never soak the material. Straw hats need extra gentle treatment; just a light brushing usually suffices since water damages their delicate fibers.
Identify Your Hat Material or Risk Disaster
Run your fingers along the hat’s surface to determine your approach. Felt feels dense and slightly fuzzy, straw shows visible woven patterns, and leather feels smooth or suede-like. This critical step dictates your entire technique—what works for felt can destroy straw, and leather requires special conditioning.
Warning signs to stop immediately: Cracks in straw, thinning spots in felt, or flaking leather indicate previous damage that steam will worsen beyond repair.
Steam Reshaping Felt Cowboy Hats Properly
Perfect Steam Technique for Felt
Bring water to a gentle boil in your kettle, then hold the hat 6-8 inches above the steam—close enough to feel the heat, far enough to avoid water droplets. Rotate slowly for 15-20 seconds until the felt becomes pliable but not soggy. Test flexibility by gently pressing the crown; it should yield without feeling mushy. Over-steaming makes felt limp and lifeless, requiring a 10-minute drying break before reshaping.
Create a Crisp Cattleman Crease in 5 Steps
- Steam the crown thoroughly until warm and flexible
- Insert head form to maintain your head size while working
- Create center crease using your thumbs—press firmly from front to back
- Shape side dents by pinching 2-3 inches from each side
- Hold for 30 seconds until the felt cools and sets in position
Common mistake: Rushing the cooling process by handling the hat too soon. Let the felt harden in shape before removing your hands.
Gentle Straw Hat Reshaping Without Cracking

Water-Only Method for Straw Hats
Unlike felt, straw requires no steam—just controlled moisture. Lightly mist your straw hat with distilled water, focusing on problem areas, and wait 2-3 minutes for penetration. The straw should feel slightly flexible but not damp to the touch. Work slowly in small sections, as straw fibers crack under sudden pressure or excessive moisture.
Shape Brim Curves Without Weak Spots
Support the underside with a rolled towel while creating gradual curves—never sharp bends. For upturned sides, roll the edge between your fingers in tiny increments. Use clothespins every 3 inches to hold the new shape during drying. Straw needs 48 hours to fully set, so resist the urge to adjust it prematurely.
Critical warning: Direct steam on straw causes immediate fiber damage. If you accidentally over-moisten, stuff the crown with paper towels immediately to absorb excess water.
Leather Hat Special Reshaping Process
Steam and Condition Simultaneously
Leather needs heat for pliability but loses natural oils during the process. Steam the hat briefly—just enough to make it flexible—then immediately apply leather conditioner with a soft cloth. This two-step process prevents cracking while allowing gentle reshaping. Work slowly, as leather stretches more than felt but doesn’t bounce back when over-manipulated.
Set Leather Shape Without Stiffening
After achieving your desired shape, treat the entire hat with conditioner and let it dry on a head form for 24-48 hours. Apply a second light coat once the first has absorbed. This maintains flexibility while setting the new shape—skipping this step leaves leather stiff and prone to cracking during wear.
Fix Common Hat Shaping Mistakes Immediately
Rescue Over-Steamed Felt
If your felt becomes too soft and loses structure, don’t panic. Let it air dry for 30 minutes until slightly firm, then re-steam lightly and reshape. The key is working with the material’s natural recovery cycle—felt regains memory when handled correctly after oversaturation.
Correct Uneven Brim Curls
Notice one side curling higher than the other? Re-steam just the problem area and use clothespins to match the opposite side. Take photos from multiple angles—the camera reveals asymmetry your eyes miss during the shaping process.
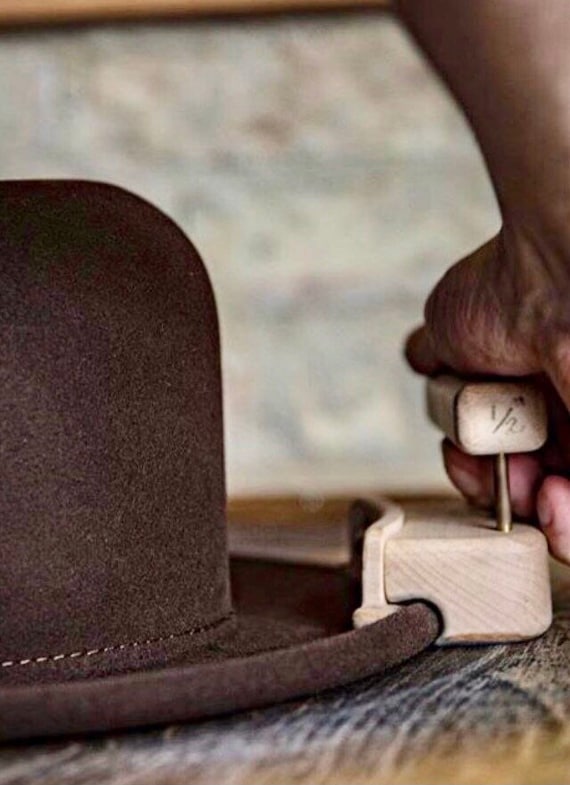
Expand Too-Tight Crowns Safely
Steam the entire crown, then insert a hat stretcher or head form one size larger. Expand gradually in 1/8 inch increments with 15-minute cooling periods between stretches. Rushing this process creates weak spots that collapse during wear.
Set and Maintain Your New Hat Shape
Professional Drying Technique at Home
Place your shaped hat on a head form or clean, towel-covered surface with 360-degree air circulation—never set it on a flat surface where the brim touches. Direct a fan on low speed to speed drying without creating hot spots that cause uneven shrinkage. Felt needs 24 hours, straw requires 48, and leather benefits from an extra conditioning after initial drying.
Daily Maintenance for Long-Lasting Shape
- Store upright on a hat rack—never flat or upside down
- Handle by the brim, not the crown to prevent dents
- Light steam touch-ups fix minor dents between major reshaping
- Brush weekly with appropriate brush to maintain texture
Long-term care: Re-steam and reshape every 6-12 months, especially after extended storage. High-quality felt hats actually improve with proper reshaping over time.
Safety First: Avoid Costly Hat Damage
Heat Safety Protocol You Must Follow
Test steam temperature on your hand before applying to the hat. Use heat-resistant gloves for extended shaping sessions, especially when working with leather that requires more manipulation. Work near a window—proper ventilation prevents steam burns and helps you see the hat’s true color during shaping, avoiding accidental scorching.
Material-Specific Warning Signs
- Felt: Shiny spots indicate scorching—immediately reduce heat
- Straw: Any cracking sound means you’ve gone too far—stop steaming
- Leather: White discoloration signals heat damage—apply conditioner immediately
Your cowboy hat tells a story—make sure it’s your story. With these techniques, you can refresh that old work hat into a sharp cattleman crease or transform a thrift store find into a custom gus shape. Start with simple brim adjustments on an inexpensive hat, then work up to full crown reshaping. The satisfaction of tipping a perfectly shaped hat you crafted yourself? Priceless. Remember that most professionals started with the same $20 tea kettle you’re using—every expert was once a beginner who refused to pay for something they could learn to do themselves.


