
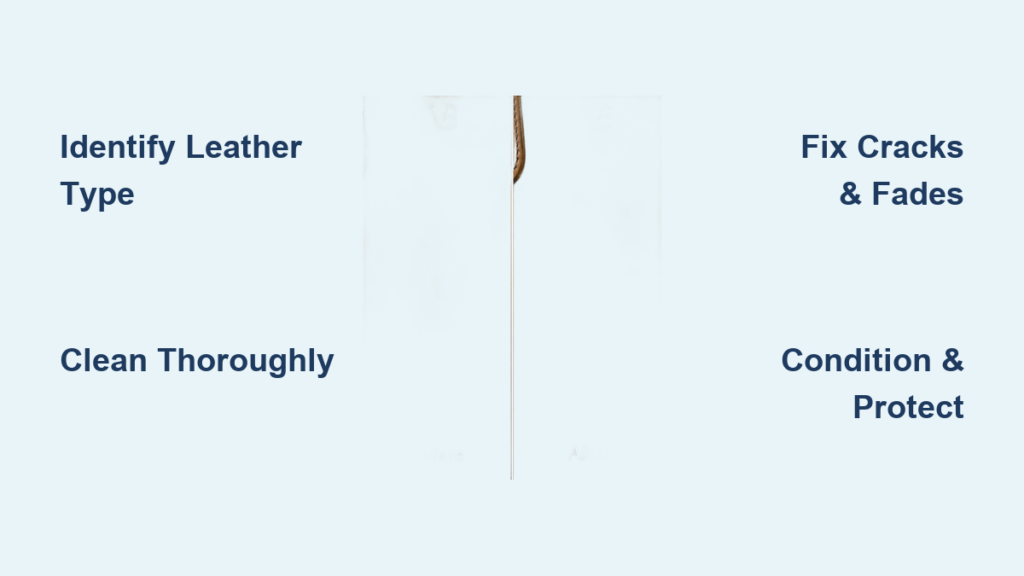
That cherished leather armchair in your living room has seen better days. The rich brown has faded to a dull tan, cracks spider across the armrests, and mysterious stains mar the seat cushion. Before you consider replacing it, know this: professional leather restoration costs $300-800 per piece, but you can achieve stunning results at home for under $50 in materials with the right approach to how to restore leather at home.
This complete guide walks you through every step of leather restoration, from identifying your leather type to applying the final protective coat. Whether you’re reviving a thrift store find or breathing new life into family heirlooms, these proven techniques work on furniture, car interiors, jackets, and accessories. You’ll learn exactly how to restore leather at home without expensive professional services.
Identify Your Leather Type Before Starting Restoration
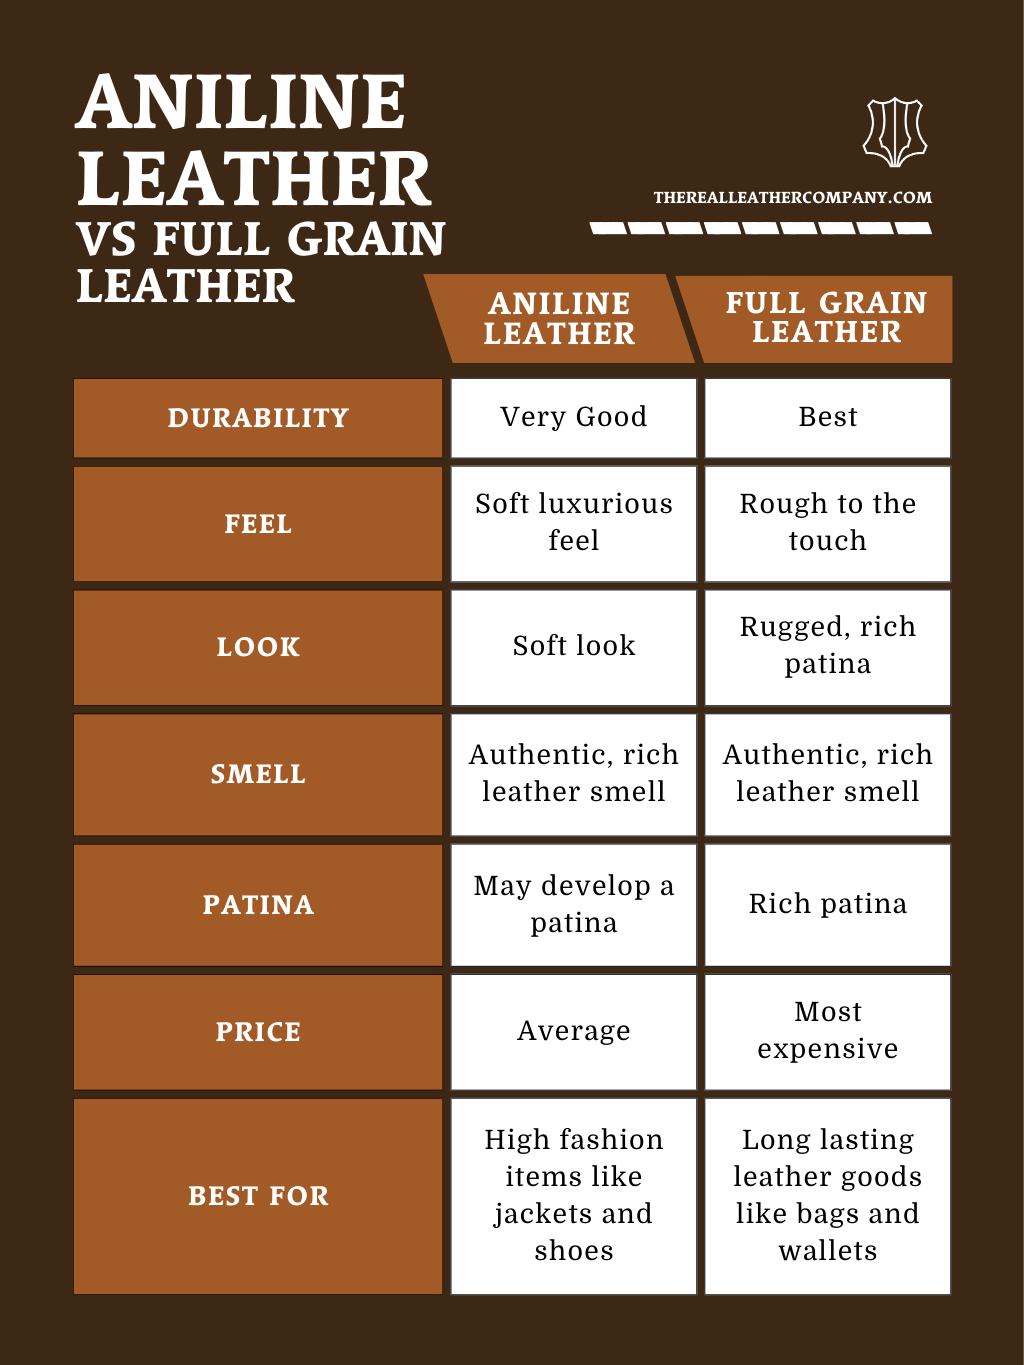
Aniline vs Protected Leather Water Test
Before touching a single product, determine what leather you’re working with—this is the most critical step in how to restore leather at home successfully. Place a small water drop on a hidden area. If it darkens immediately and absorbs within seconds, you have porous aniline leather. If the water beads up or sits on top, you’re dealing with protected/pigmented leather—much more forgiving for beginners.
Quick identification guide:
– Aniline: Natural markings visible, scratches easily, no protective coating
– Semi-aniline: Light surface coating, some protection while maintaining natural look
– Protected: Plastic-like feel, uniform color, most durable option
– Nubuck/Suede: Soft, velvety texture—never use regular leather products
Condition Assessment Checklist
Visual damage to document:
– Color fading patterns (especially on sun-exposed areas)
– Crack types: hairline surface cracks vs. deep fissures
– Peeling or flaking finish
– Water stains or dye transfer from clothing
– Mold spots (fuzzy green/white patches)
Physical tests to perform:
– Flexibility check: Gently bend leather—stiffness indicates dehydration
– Surface scratch test: Light fingernail scratch reveals if finish is intact
– Absorption rate: Determines conditioning needs and product selection
Build Your Leather Restoration Toolkit Under $50
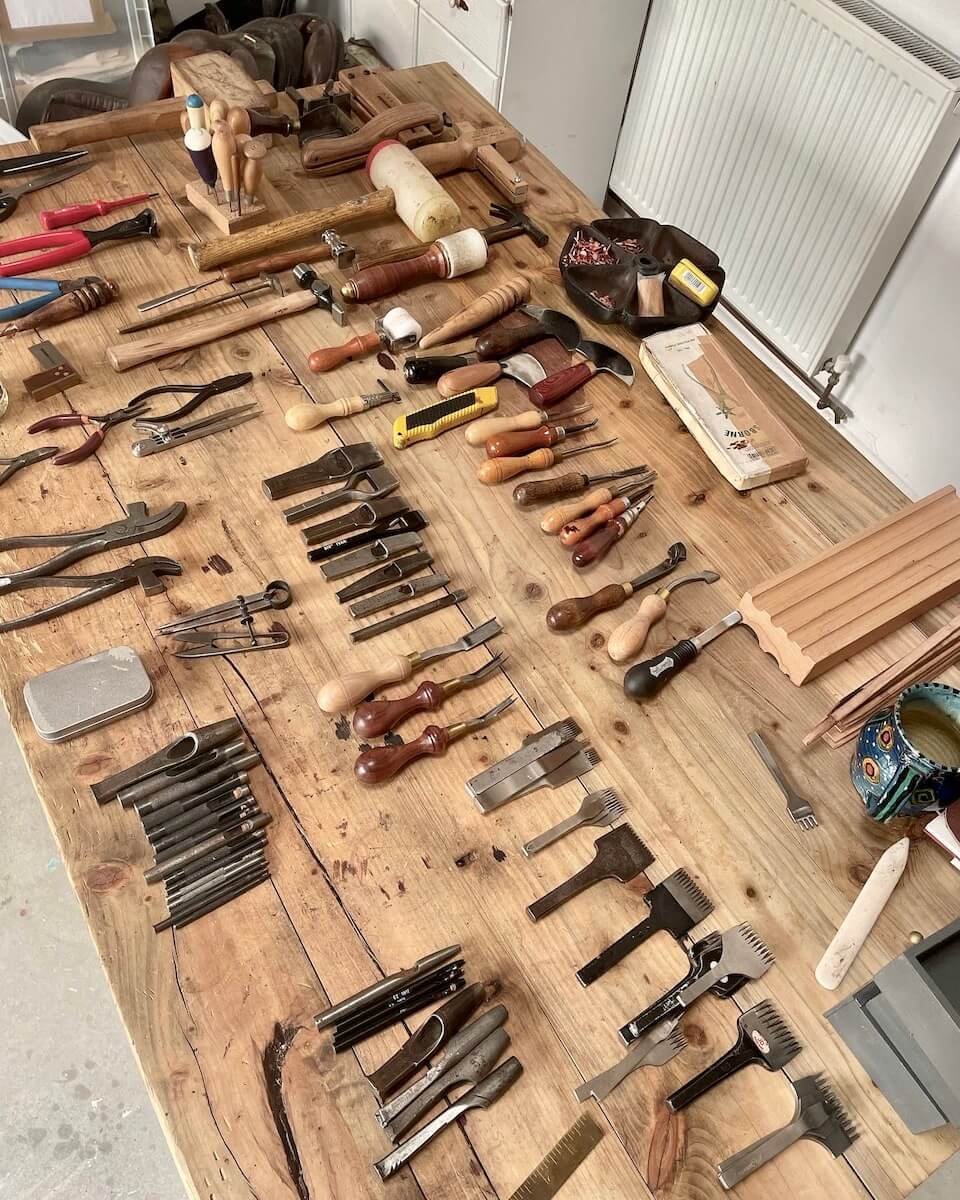
Essential Supplies for Home Restoration
Cleaning arsenal:
– pH-balanced leather cleaner (chemical guys or similar)
– Distilled water (prevents mineral deposits)
– 70% isopropyl alcohol (ink stain removal)
– White vinegar (mold treatment)
– Horsehair brushes (soft bristles prevent scratching)
– Lint-free microfiber cloths (buy a 20-pack)
Repair materials:
– Leather filler compound (for cracks and holes)
– Matching leather dye or pigment
– Quality leather conditioner (Bick 4 or Leather Honey)
– 400-800 grit sandpaper for smoothing
– Palette knife for filler application
Pro tip: Skip the $200 “complete kits.” Buy individual products based on your specific damage type when learning how to restore leather at home.
Product Selection Matrix for Different Leather Types
For protected leather: Water-based products work perfectly
For aniline leather: Oil-based conditioners only—avoid pigments
For nubuck/suede: Specialized products only (never regular leather conditioner)
Color matching strategy: Test dyes on the underside first. Mix small amounts until you match the original shade exactly. Document your ratios—future touch-ups become effortless when you know how to restore leather at home properly.
Prep Your Workspace for Successful Leather Restoration
Environmental Setup for Optimal Results
Ideal conditions:
– Temperature: 65-75°F (avoid garages in winter/summer)
– Humidity: 45-55% (use a humidifier or dehumidifier as needed)
– Lighting: Bright LED shop lights or natural daylight
– Ventilation: Open windows plus a fan for air circulation
Surface protection: Cover floors with plastic drop cloths. Leather dyes stain permanently—a crucial consideration when you learn how to restore leather at home.
Pre-Cleaning Sequence for Maximum Adhesion
Step 1: Vacuum thoroughly using brush attachment. Remove all crumbs, pet hair, and debris from crevices.
Step 2: Mix leather cleaner per instructions. Apply with microfiber cloth using circular motions. Work in 2-foot sections.
Step 3: Treat individual stains before general cleaning:
– Ink stains: 70% alcohol on cotton swab, blot gently
– Grease marks: Cornstarch overnight, brush away residue
– Water spots: Lightly dampen entire area to blend
Step 4: Allow 24-48 hours complete drying. Rushing this step ruins adhesion—a common mistake when people attempt how to restore leather at home.
Fix Color Fading and Dye Damage Like a Pro
Professional Color Restoration Process
Testing protocol: Always test dye on an inconspicuous area first. Apply, let cure 24 hours, then evaluate color match and adhesion—this prevents costly mistakes when you’re learning how to restore leather at home.
Application technique:
1. Lightly sand glossy areas with 600-grit sandpaper
2. Apply dye in thin, even coats using foam applicator
3. Work in circular motions following leather grain
4. Allow 30 minutes between coats
5. Build color gradually (3-5 light coats vs. 1 heavy coat)
Advanced color matching: Use color wheel theory. Add complementary colors to neutralize unwanted tones. For example, add green tint to cancel red undertones—this professional trick elevates your how to restore leather at home skills.
Common Dye Mistakes to Avoid
Avoid these errors:
– Heavy application leads to cracking and peeling
– Skipping surface prep causes poor adhesion
– Wrong dye type for leather type
– Insufficient cure time before use
Repair Cracks and Tears Without Professional Help
Hairline Crack Fix for DIY Restoration
Step-by-step repair:
1. Use needle to slightly widen cracks for filler adhesion
2. Apply leather filler with palette knife, overfilling slightly
3. Level with plastic card while still tacky
4. Create texture using crumpled plastic wrap
5. Dry 6-8 hours completely
6. Sand lightly with 600-grit to blend
7. Apply matching dye to repaired area
Pro tip: Use a hair dryer on low setting to speed drying between filler layers, but never rush the final cure—patience is key when you learn how to restore leather at home.
Deep Tear Restoration for Serious Damage
For splits or holes:
1. Insert fabric backing behind tear using leather cement
2. Build filler in multiple thin layers
3. Match original texture using leather grain paper
4. Test flexibility—repair should bend naturally with leather
5. Color match carefully—repairs often absorb dye differently
Condition and Protect Your Restored Leather Properly
Conditioning Protocol for Long-Lasting Results
Product selection:
– Light conditioning: For newly restored pieces
– Heavy conditioning: For dried, cracked leather
– Specialized: Mink oil for waterproofing, lanolin for softness
Application method:
1. Warm conditioner slightly (place bottle in warm water)
2. Apply in circular motions following grain
3. Allow 2-4 hours absorption
4. Buff with clean microfiber cloth
5. Wait 24 hours before use
Frequency guide: High-use areas monthly, complete piece quarterly—this maintenance ensures your how to restore leather at home efforts last for years.
Protective Coating Options for Everyday Wear
Water-based protectors: Acrylic-based for general protection, fluoropolymer for stain resistance.
Application technique: Use HVLP spray gun or aerosol for even coverage. Apply 2-3 thin coats in crosshatch pattern. Cure 72 hours for maximum protection—this final step completes your how to restore leather at home process.
Maintain Your Restored Leather for Years of Use
Routine Care Schedule After Restoration
Weekly: Dust with soft cloth, address spills immediately, rotate cushions
Monthly: Condition high-wear areas, inspect for new damage
Quarterly: Deep clean and condition entire piece, touch-up color as needed
Annual: Complete assessment, professional evaluation for complex issues
Troubleshooting Common Issues After Restoration
Sticky leather: Over-conditioning culprit. Wipe with damp cloth, allow to dry, reapply sparingly.
Color rub-off: Insufficient dye bonding. Strip and re-dye with proper preparation.
New cracks: Environmental—check humidity levels, increase conditioning frequency.
Uneven absorption: Inconsistent prep work. Strip and restart with uniform surface preparation.
Safety and Best Practices for Home Leather Restoration
Chemical Safety Essentials for DIY Projects
Required PPE: Nitrile gloves, safety glasses, respirator for spray work. Never skip protection—chemical sensitivities develop over time.
Ventilation rules: Minimum 4 air changes per hour. Use exhaust fans for spray applications. Avoid basements or confined spaces.
Storage protocol: Keep chemicals in original containers, 60-80°F storage temperature, away from ignition sources.
Final results: With patience and proper technique, your restored leather will look factory-fresh for years. Document your color formulas and techniques—you’ll use them again. Most importantly, establish a maintenance routine. Restoration is a one-time investment, but ongoing care preserves your work indefinitely when you know how to restore leather at home. The satisfaction of reviving a cherished piece yourself makes mastering how to restore leather at home well worth the effort.


