
Your HVAC system is working overtime right now because of one overlooked task. When dust bunnies dance in sunbeams and allergy symptoms flare without warning, a clogged air filter is usually the silent culprit. Dirty filters force your system to consume 15% more energy while circulating pet dander, pollen, and mold spores through every room. The good news? How to replace air filter in home is a 10-minute fix that restores airflow, slashes utility bills, and protects your family’s health.
Most homeowners wait until vents wheeze or bills spike, but proactive filter changes prevent these headaches. This guide reveals exactly where to find hidden filters, how to choose the perfect replacement, and critical installation mistakes that sabotage performance. You’ll learn why “every 90 days” is often wrong for your home and spot the 5 urgent warning signs demanding immediate action. No HVAC expertise required—just follow these field-tested steps.
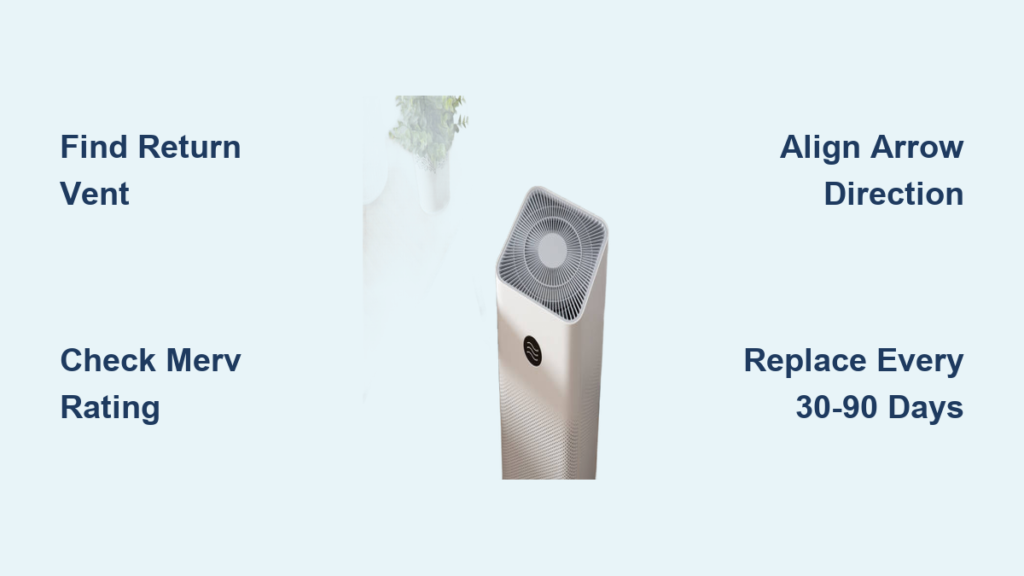
Find Your Air Filter in Under 2 Minutes
Wall and Ceiling Return Vent Locations
Your filter hides inside large rectangular vents pulling air back to your HVAC system. Check hallways and living areas for wall returns—these are 2-3 times larger than standard supply vents. In two-story homes, you’ll likely find separate filters for each floor’s return system. For ceiling returns, inspect central hallways where air circulates most.
Spot them instantly with these clues:
– Size giveaway: Return vents measure 12″x24″ or larger (supply vents are typically 4″x10″)
– Airflow test: Hold tissue near vents—the strongest suction indicates return locations
– Panel clues: Look for metal clips along the top edge for easy access
Furnace and HVAC Unit Spots
If you don’t see large wall vents, head to your furnace room, basement, or utility closet. 80% of filters nestle between the furnace blower and main ductwork inside a sliding metal compartment. In attic or crawl space systems, check the air handler cabinet near the blower motor. Renters: Confirm responsibility with your lease—some landlords handle replacements.
Critical discovery tip: Shine a flashlight along duct seams near your furnace. The filter slot always appears as a rectangular opening with visible airflow arrows etched into the frame.
Choose the Exact Replacement Filter You Need
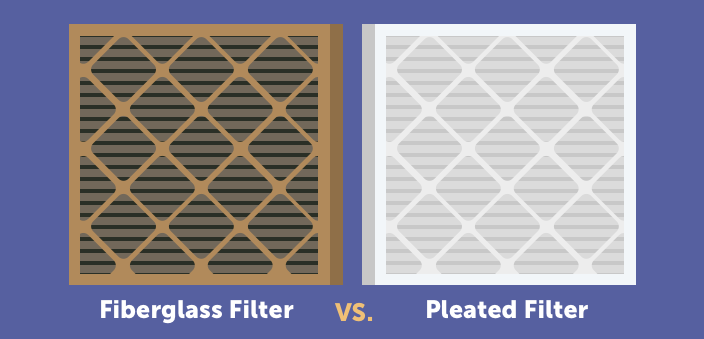
Pleated vs. Flat Filter Differences
Pleated filters (the accordion-style versions) trap 3x more particles than flat filters and last 3x longer—up to 90 days under normal conditions. Their folded design creates massive surface area without restricting airflow. Flat fiberglass filters cost less upfront but become clogged in 30 days, forcing your system to work harder. Avoid bargain-bin filters with MERV ratings below 5—they only catch large debris like dust bunnies.
Never install hospital-grade MERV 16+ filters unless your manual specifies compatibility. These ultra-dense filters strangle residential HVAC systems, causing ice buildup on coils and premature blower motor failure.
Decode MERV Ratings for Your Home
Your ideal filter lives between MERV 5-11 for standard homes. Families with pets or allergy sufferers need MERV 9-11 to capture microscopic dander and pollen. Before upgrading, check your furnace manual’s “Maximum Filter Rating” warning—exceeding it risks $500+ repairs.
Quick reference chart:
| Household Type | Ideal MERV | Replacement Frequency |
|—————-|————|————————|
| Basic home, no pets | 5-8 | Every 90 days |
| Pets or seasonal allergies | 9-11 | Every 60 days |
| Asthma sufferers | 13 (verify compatibility) | Every 45 days |
Recognize When to Change Filters Immediately
Standard Schedule vs. Real-World Needs
While manufacturers suggest 90-day changes, real homes need more frequent swaps. Replace pleated filters every 45 days if you have shedding pets, smokers, or live near construction zones. During allergy season or home renovations, change filters weekly—the dust clouds overwhelm standard filters in days.
Change flat filters monthly without exception—their thin material clogs fast, turning your HVAC into a dust distributor.
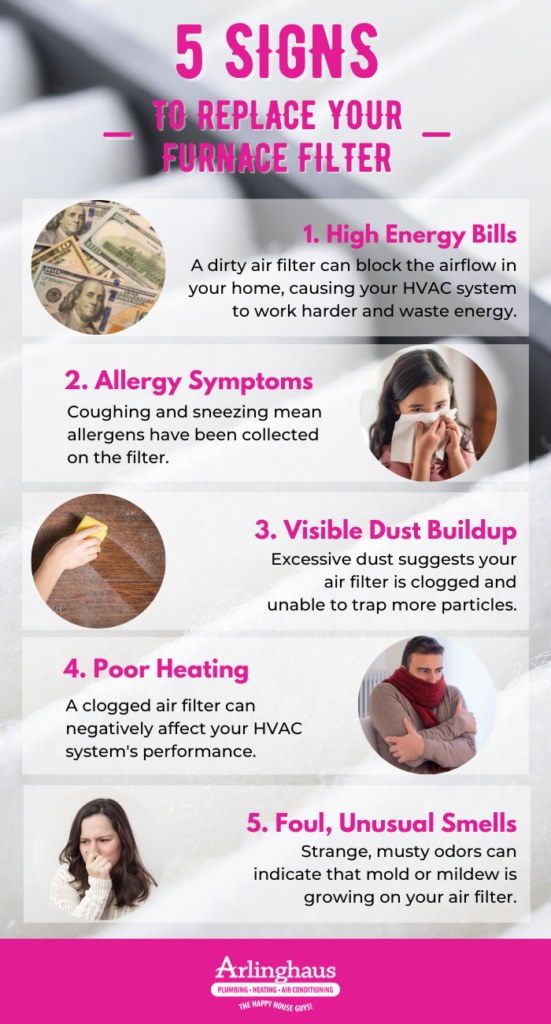
5 Emergency Warning Signs
Don’t wait for your calendar—act when you see:
1. Gray/black discoloration across 50%+ of the filter surface
2. Weak airflow from vents (hold your hand 6 inches away—it should feel strong)
3. Musty smells when the system kicks on (sign of mold growth)
4. Ice on refrigerant lines (caused by restricted airflow)
5. HVAC running 20+ minutes to reach temperature
Pro tip: Set phone reminders for the 1st of each month to inspect filters. Write the installation date directly on the frame with a Sharpie.
How to Replace Air Filter in Home: Foolproof Installation
Safety First: Power Down Procedures
Turn off your thermostat completely—set heating, cooling, AND fan modes to “Off.” For electronic filters, flip the disconnect switch near your furnace (a red light will go dark). Skipping this risks electrical shock when accessing internal components.
Remove the Old Filter Without Mess
For return vent systems:
1. Slide metal levers upward to release the panel
2. Pull the filter straight out—never tilt it (this dumps dust into ducts)
3. Slide the dirty filter into its plastic bag for disposal
For furnace-mounted filters:
1. Open the metal access door near the blower compartment
2. Note the airflow arrows pointing toward the furnace
3. Lift the filter straight up without touching duct interiors
Critical mistake to avoid: Never let the old filter touch ductwork—this releases trapped contaminants back into your air supply.
Install the New Filter Correctly
Size verification is non-negotiable: Match the exact dimensions (like 16″x25″x1″) printed on the old frame. If numbers are worn off, measure the slot—not the filter—to avoid gaps. A 1/4″ gap around the frame reduces efficiency by 40%.
Arrow direction is critical: The “Airflow” arrow must point TOWARD your furnace/blower motor. Install it backward, and you’ll push captured dust into your system. Slide the filter in smoothly—forcing it bends the frame, creating air leaks.
Electronic and Window AC Filter Special Cases
Electronic Air Cleaner Replacement Steps

Unplug the unit FIRST—these require complete power disconnection. Press the red release tabs to open the housing like a book. Never touch the metal plates inside; oils from your skin reduce efficiency. After inserting the new filter, ensure the housing clicks shut on all sides—air leaks here cause ozone smells.
Window Unit Filter Maintenance
These reusable filters need monthly washing, not replacement. Remove the front grille, then slide out the filter. Vacuum loose dust, wash in lukewarm soapy water, and air-dry COMPLETELY for 24 hours before reinstalling. Replace only if the mesh is torn or brittle—forced replacement damages the unit’s housing.
Call an HVAC Pro: 6 Danger Signs You Can’t Ignore
Stop DIY efforts immediately if you notice:
– Grinding noises from the blower motor (indicates bearing failure)
– Water pooling around the furnace (condensate drain clog)
– Filter clogging within 2 weeks despite correct MERV rating
– Musty odors persisting after 3 consecutive filter changes
– HVAC shutting off before reaching temperature
– Visible mold inside ducts near the filter slot
Schedule annual professional maintenance to clean evaporator coils and check refrigerant levels—this prevents 80% of major breakdowns. Technicians also verify duct integrity, which DIYers can’t assess.
Long-Term Filter Maintenance Hacks
Keep 3 months of filters on hand—buying in bulk cuts costs by 30%. Store extras in sealed bins to prevent dust accumulation. For allergy sufferers, set recurring calendar alerts at 30-day intervals (even with pleated filters). Track energy savings by comparing utility bills before and after consistent changes—you’ll typically see 5-15% reductions.
Don’t forget hidden filters: Whole-home humidifiers need annual filter swaps, and garage HVAC units get overlooked during seasonal changes. After renovations, replace ALL filters—even those in unused rooms—as drywall dust penetrates every duct.
Final verification: After installation, turn on your system and hold your palm 6 inches from a vent. You should feel strong, steady airflow within 30 seconds. Weak or uneven flow means the filter is misaligned—remove and reseat it immediately. A correctly installed filter runs quieter, cools faster, and keeps your home’s air truly clean.
Remember: Mastering how to replace air filter in home isn’t just maintenance—it’s your frontline defense against costly repairs and unhealthy indoor air. Set that phone reminder now, and breathe easier tonight.


