
Mobile home walls present unique repair challenges that standard drywall tutorials rarely address. Unlike conventional homes, manufactured housing uses specialized materials like vinyl-covered gypsum panels and thin wood veneers that demand different repair approaches. When your mobile home wall develops water damage from roof leaks or holes from previous fixture installations, generic repair methods often fail, leading to recurring problems and wasted effort.
This practical guide shows you exactly how to identify your wall type, assess damage severity, and execute professional repairs using mobile-home-specific techniques. You’ll discover which tools actually work on these specialized surfaces, how to match existing textures perfectly, and when a problem requires professional intervention rather than DIY fixes.
Identify Your Mobile Home Wall Construction Type

Your repair approach depends entirely on recognizing which of three common wall systems your mobile home uses. Applying drywall techniques to vinyl-covered panels or wood veneer methods to manufactured drywall alternatives leads to failed repairs and additional damage.
Vinyl-Covered Gypsum Panels: The Most Common Mobile Home Wall
Look for seams at precise 4-foot intervals and a slightly glossy finish that feels smooth to the touch—these indicate vinyl-faced gypsum board. Most manufactured homes built after 1980 use this material, which creates a washable surface but complicates repairs. The vinyl coating prevents standard joint compounds from bonding properly, causing patches to peel away within weeks if you use conventional drywall repair methods.
Wood Paneling Systems: Identifying Particleboard Veneer Walls
Check for horizontal seams and wood grain patterns that repeat every few feet—these telltale signs indicate thin wood veneer panels between 1/8 and 1/4 inch thick. Older mobile homes frequently feature these panels with printed grain patterns over particleboard backing. Unlike real wood, these surfaces can’t be sanded extensively without exposing the underlying particleboard, requiring specialized repair compounds that match the printed finish.
Manufactured Drywall Alternatives: Recognizing Modified Drywall
Tap your wall surface—solid sounds suggest 1/2-inch drywall with possible fiberglass reinforcement, while hollow sounds indicate panel construction. Some newer mobile home models incorporate traditional drywall with textured finishes, but they often contain additives that affect how paint and repair compounds adhere. These walls require modified techniques that account for thinner framing and different expansion characteristics compared to site-built homes.
Assess Your Wall Damage Severity Before Starting Repairs

Accurate damage assessment determines whether you need simple patching or complete panel replacement. Mobile home walls show damage differently than conventional construction due to their thinner materials and unique installation methods.
Water Damage: Identifying Soft Spots and Bubbling Vinyl
Press gently on suspicious areas—spongy spots indicate saturated gypsum that requires complete replacement rather than surface repair. Look for brown stains spreading from ceiling or floor edges and check hidden areas like inside cabinets where moisture damage often starts. Water damage in mobile homes spreads faster than in traditional homes due to thinner wall cavities and different insulation materials.
Structural vs. Cosmetic Damage: When Holes Require More Than Patching
Small holes under 2 inches typically need only surface repair, but multiple holes or larger damage often indicates underlying structural problems. Cracks extending from corners frequently signal settling issues that must be addressed before wall repairs will last. Mobile home walls transfer structural stress differently than conventional homes, so what looks like cosmetic damage might actually indicate framing problems.
Delamination Detection: Finding Vinyl Separation from Gypsum
Press vinyl surfaces across your wall—areas that flex abnormally or make crinkling sounds indicate vinyl separation from the gypsum core. This delamination worsens rapidly in humid conditions and requires immediate attention. Unlike standard drywall, mobile home vinyl panels cannot be repaired once significant delamination occurs; the entire panel usually needs replacement to prevent further deterioration.
Gather Mobile-Home-Specific Repair Tools Before Starting
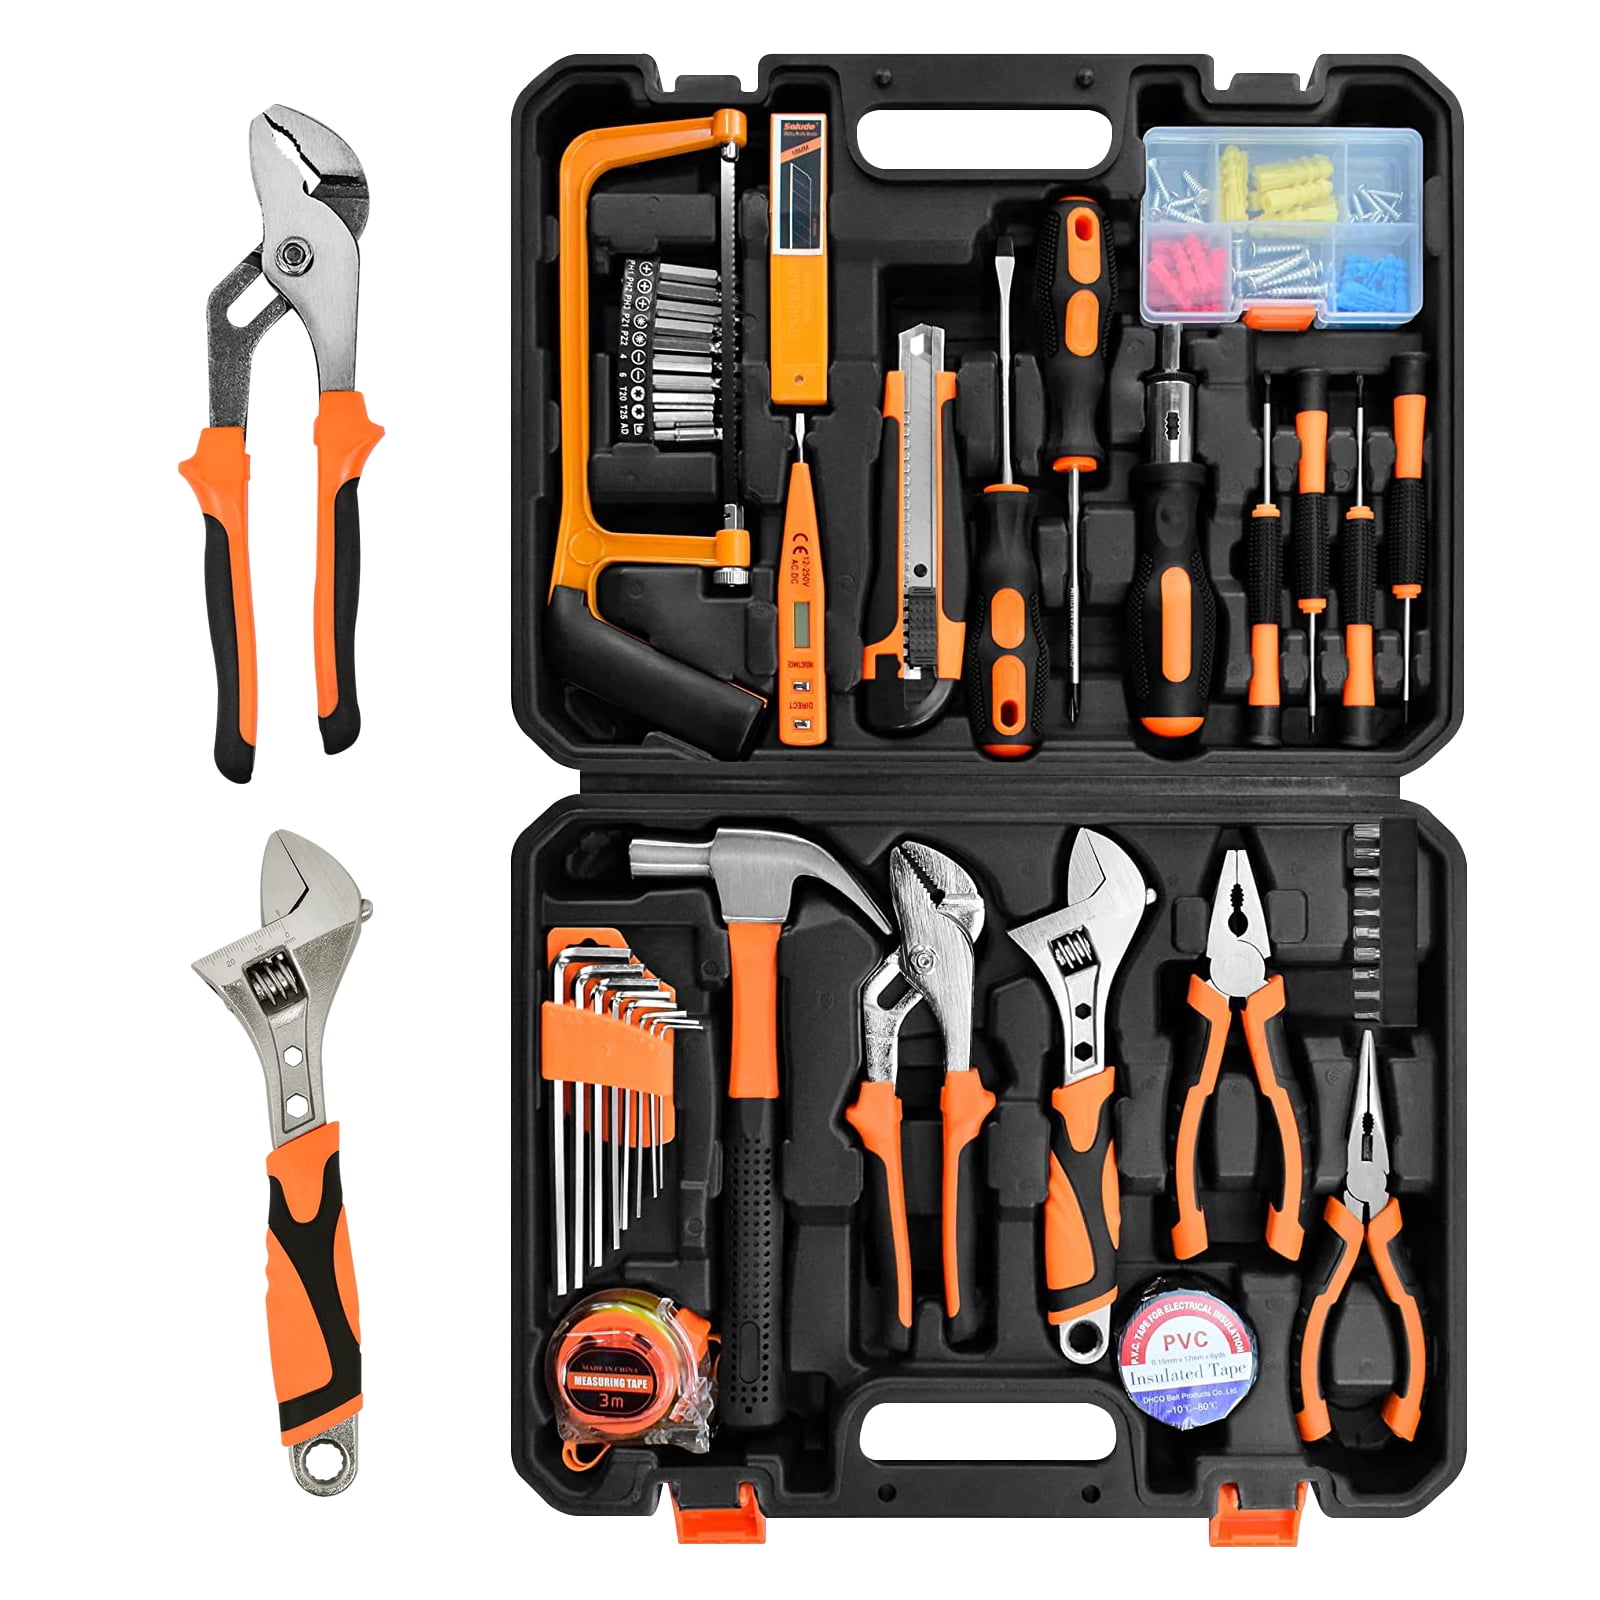
Standard drywall tools often damage mobile home walls due to their thinner construction. These specialized tools accommodate the unique materials and fastening systems used in manufactured housing.
Cutting and Measuring Tools for Precision Repairs
- Utility knife with extra blades: Makes clean cuts through vinyl without tearing
- Keyhole saw: Navigates tight spaces around electrical boxes without damaging surrounding panels
- Straight edge: Ensures square cuts in 4×8 panels to match existing seams
- Measuring tape marked for 4-foot panels: Reduces calculation errors when replacing sections
Adhesive and Fastening Systems That Won’t Damage Thin Walls
- Panel adhesive formulated for vinyl: Prevents chemical reactions that cause bubbling
- Fine-thread drywall screws: Grip thin materials without cracking surrounding areas
- Construction adhesive in caulk tubes: Secures large panels without visible fasteners
- Vinyl repair tape: Creates temporary fixes for small tears until permanent repair
Finishing Equipment for Seamless Results
- Flexible putty knives: Conform to textured surfaces without damaging vinyl
- Vinyl seam roller: Professionally reattaches lifted edges
- Texture spray cans: Match existing orange peel or knockdown patterns
- Fine-grit sanding sponges: Smooth repairs without cutting through vinyl coating
Fix Small Holes and Cracks Without Causing Further Damage
Minor damage under 2 inches requires specific techniques that account for mobile home wall construction differences. Standard drywall patching methods often fail on these specialized surfaces.
Vinyl Surface Repairs: Preventing Peeling and Bubbling
Clean damaged areas with rubbing alcohol first to remove oils that prevent adhesion. Apply vinyl repair compound using a flexible putty knife, feathering edges beyond the damage area. Allow 24 hours for complete curing before light sanding with 220-grit paper. Crucially, prime vinyl surfaces with bonding primer before painting to prevent peeling—a step most conventional guides omit but is essential for mobile home walls.
Gypsum Panel Patching: Avoiding Crumbling Edges
For holes through gypsum with intact vinyl backing, use mesh tape and lightweight joint compound specifically formulated for vinyl surfaces. Apply compound in thin layers, allowing complete drying between coats. Work gently with minimal pressure—mobile home gypsum crumbles easily when standard repair techniques are applied too aggressively, often enlarging the problem area.
Preventing Future Cracks: Reinforcing High-Stress Areas
Reinforce vulnerable spots like door corners with fiberglass mesh tape before applying repair compound. This prevents cracks from reopening as your mobile home naturally settles. Apply flexible acrylic caulk along ceiling joints where expansion frequently occurs—standard caulks become brittle and fail in mobile home environments with greater temperature fluctuations.
Replace Entire Wall Panels When Damage Is Too Extensive
When water damage or multiple holes compromise structural integrity, full panel replacement becomes necessary. This process differs significantly from conventional drywall installation due to mobile home construction methods.
Panel Removal Techniques: Minimizing Collateral Damage
Score along existing seams with a utility knife before prying to minimize damage to surrounding areas. Remove trim carefully—mobile home trim often conceals electrical wiring that standard homes route differently. Panels typically attach with adhesive and screws every 16 inches along studs, but these fasteners may be hidden beneath vinyl edges rather than exposed like conventional drywall.
New Panel Installation: Accounting for Mobile Home Expansion
Cut replacement panels 1/8 inch shorter than the opening height to allow for expansion—mobile homes experience greater thermal movement than site-built homes. Use vinyl-faced gypsum specifically manufactured for mobile homes; standard drywall won’t accept vinyl coatings properly and creates adhesion problems. Apply adhesive in serpentine patterns on studs rather than solid beads to accommodate movement.
Seam Concealment: Creating Invisible Repairs
Mobile home seams require special treatment that standard drywall guides don’t address. Use vinyl seam tape and heat-activated adhesive strips designed for manufactured housing. Overlap seams by 2 inches, then roll firmly with a seam roller to create a professional finish. Prime the entire wall before painting to ensure uniform color absorption across repaired and original surfaces.
Match Existing Wall Textures Perfectly for Seamless Repairs
Achieving invisible texture matches requires understanding mobile home finishing techniques that differ from conventional construction.
Vinyl Texture Replication: Mastering Spray Techniques
Create texture using spray cans formulated specifically for vinyl surfaces. Practice on cardboard first—mobile home textures differ from standard orange peel finishes. Hold the can 12-18 inches away, applying in overlapping horizontal passes rather than circular motions. The thinner vinyl coating requires lighter application than standard drywall to avoid sagging.
Wood Grain Matching: Repairing Veneer Panels
For wood panel repairs, use gel stains applied with specialized wood grain tools. Match existing stain color under different lighting conditions—mobile home lighting changes color perception dramatically. Apply thin coats, building color gradually rather than attempting full coverage in one application, which creates blotchy results on thin veneers.
Solving Paint Adhesion Issues on Vinyl Surfaces
Prime vinyl surfaces with bonding primer specifically designed for plastic finishes—standard primers peel within weeks. Use 100% acrylic latex paint formulated for vinyl siding, as this adheres properly to mobile home wall materials. Oil-based paints may initially adhere but eventually cause vinyl to deteriorate due to chemical incompatibility.
Mobile home wall repairs demand patience and attention to material-specific techniques that differ significantly from conventional drywall methods. Success depends on using products designed for manufactured housing rather than standard construction materials. Start with small repairs to build confidence with these specialized techniques before tackling larger projects.
When faced with extensive water damage or structural issues that affect wall integrity, consult mobile home repair specialists who understand the unique challenges of manufactured construction. These professionals have experience with mobile home-specific building codes and materials that standard contractors often overlook, ensuring your repairs meet safety standards and last for years rather than months.


