
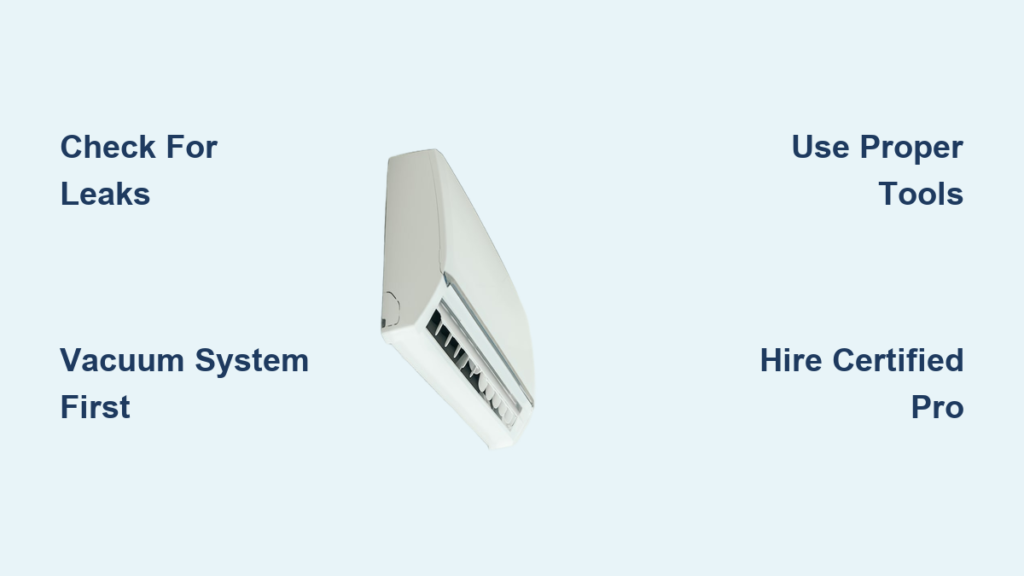
Your AC unit runs constantly but fails to cool your home, leaving you sweating through another sweltering afternoon. Before you grab a refrigerant can at the hardware store, understand that how to recharge home ac involves far more than adding coolant—it requires leak diagnosis, EPA compliance, and precision measurements. Most homeowners unknowingly violate federal regulations when attempting DIY recharges, risking $37,500 fines per violation. This guide reveals why professional intervention is usually essential and what you must know before touching your system.
Why Your AC Blows Warm Air: 5 Telltale Refrigerant Leak Signs
Warm airflow from vents signals serious system issues—not just low refrigerant. When refrigerant leaks occur, your compressor works harder while delivering weaker cooling. You’ll notice ice forming on copper lines near the outdoor unit, accompanied by hissing sounds from escaping gas. Electrical bills spike 20-30% as the system runs continuously trying to reach set temperatures. Short cycling—where the AC turns on/off every 5-10 minutes—damages components faster than normal operation. Most critically, oil stains around fittings reveal leak locations, appearing as greasy spots on refrigerant lines.
Visual Clues That Demand Immediate Action
- Rainbow-colored oil residue coating copper lines (refrigerant leakage indicator)
- Thick ice accumulation on suction line entering outdoor unit
- Water puddles beneath indoor air handler from melted ice
- Frost-covered evaporator coil visible through access panel
3-Minute Diagnostic Checklist Before Blaming Refrigerant
Stop! These issues mimic low refrigerant symptoms:
1. Replace clogged air filter (restricted airflow causes coil freezing)
2. Clear 2-foot radius around outdoor condenser unit (blocked airflow reduces efficiency)
3. Verify thermostat settings (accidental “fan only” mode wastes energy)
4. Check circuit breakers (tripped compressor breaker halts cooling)
5. Inspect duct leaks (up to 30% air loss in unsealed ducts)
EPA Compliance: 4 Legal Barriers to DIY AC Recharging
Venting refrigerant carries $37,500 fines under Clean Air Act Section 608. The EPA strictly prohibits unlicensed individuals from purchasing R-22 (Freon) or R-410A—the refrigerants in 95% of home systems. You’ll need EPA Section 608 Type II certification to legally buy refrigerant for systems under 50 pounds charge, which includes virtually all residential units. Even certified technicians must document every ounce recovered or added. Attempting DIY recharging without certification risks massive fines and environmental damage.
Non-Negotiable Safety Gear Checklist
- ANSI Z87.1 safety goggles (refrigerant contact causes instant frostbite)
- Nitrile gloves rated for -40°F (standard gloves offer zero protection)
- Long-sleeved cotton shirt (synthetics melt on contact with refrigerant)
- Electrical fire extinguisher (Class C) within arm’s reach
- UV safety glasses if using dye leak detection
3 Critical Legal Restrictions You Can’t Ignore
- Refrigerant purchase ban for uncertified individuals (verified via ID checks)
- Mandatory recovery equipment when removing refrigerant (hand pumps are illegal)
- Leak repair requirement before recharging (EPA prohibits topping off leaking systems)
Essential Tools for Professional-Grade AC Recharging
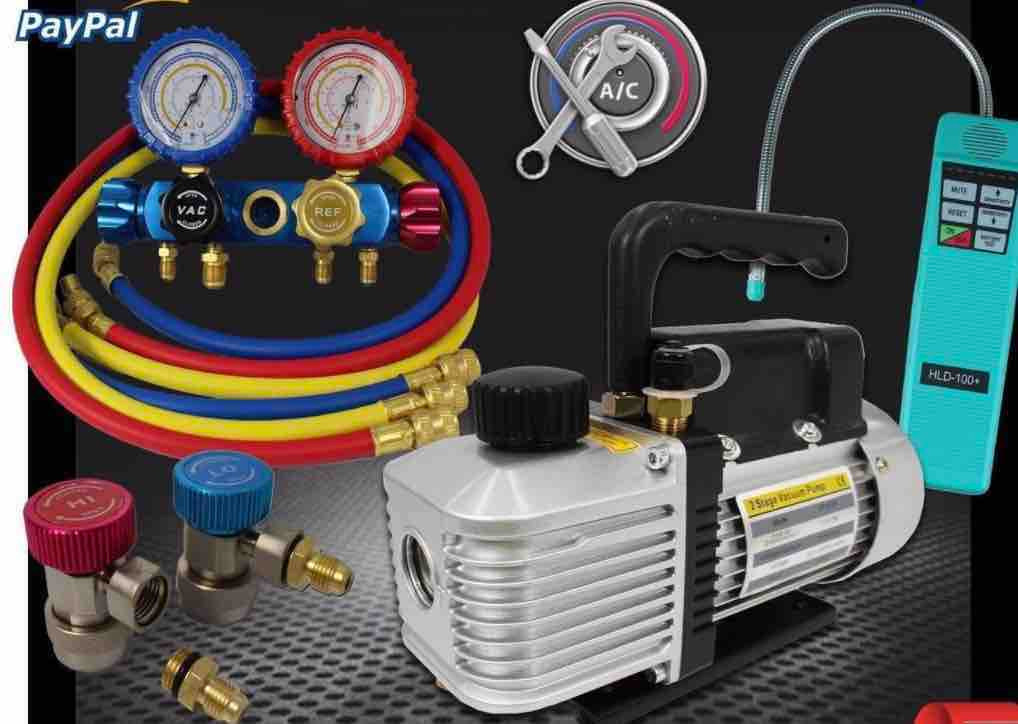
Skipping proper tools causes 70% of recharge failures. A $35 DIY recharge kit lacks the precision needed for modern systems. You’ll need a manifold gauge set with 0-80 PSI low-side and 0-500 PSI high-side gauges calibrated annually. A 4 CFM vacuum pump removes moisture that turns acidic when mixed with refrigerant. Digital refrigerant scales measure to 0.1 oz accuracy—critical since overcharging by just 4 oz reduces efficiency 5%. Electronic leak detectors pinpoint leaks as small as 0.25 oz/year.
Must-Have Equipment Breakdown
- Manifold gauge set ($120-$250) with color-coded hoses (blue=low, red=high)
- Vacuum pump (4+ CFM) achieving 500 microns or lower vacuum
- Digital refrigerant scale ($80-$150) with tare function
- Electronic leak detector (non-heated diode type) costing $200+
- Thermometer probes measuring superheat/subcooling within 1°F
Leak Detection: Why Skipping This Step Wastes $300+
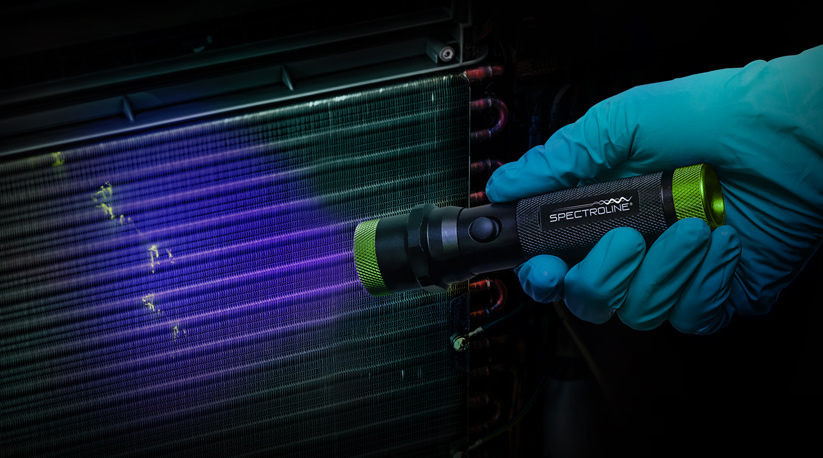
Adding refrigerant without fixing leaks violates EPA regulations and destroys compressors. Start with visual inspection using a bright flashlight to spot oil stains—the #1 leak indicator. For hidden leaks, inject UV dye through the low-side service port and scan with a blacklight after 15 minutes of operation. Electronic detectors provide precise location by emitting audible alerts at leak sites. Never rely on soap bubbles for permanent leak diagnosis—they miss 60% of micro-leaks in modern systems.
Leak Detection Method Effectiveness Comparison
| Method | Detects Leaks As Small As | Accuracy | Cost | Professional Use |
|---|---|---|---|---|
| Electronic Detector | 0.25 oz/year | ★★★★★ | $200+ | Standard |
| UV Dye + Blacklight | 0.5 oz/year | ★★★★☆ | $30 kit | Common |
| Nitrogen Pressure Test | 0.1 oz/year | ★★★★★ | $500+ | Gold Standard |
| Soap Bubbles | 2 oz/year | ★★☆☆☆ | $5 | Temporary fix only |
Step-by-Step Recharge Process: Avoid These Deadly Errors
System Preparation Protocol
Power down completely before connecting gauges. Turn off the thermostat, then shut off the 240V breaker. Wait 30 minutes for pressures to equalize. Connect blue hose to low-pressure service valve (larger 3/8″ port) and red hose to high-pressure valve (smaller 1/4″ port). Never force connections—cross-threading causes catastrophic leaks. Verify ambient temperature matches pressure charts; a 90°F day should show 65-75 PSI low-side pressure for R-410A systems.
Vacuum Evacuation: The Non-Negotiable Step
Skipping evacuation introduces moisture that destroys compressors. Connect vacuum pump to center manifold port and run for 45 minutes minimum. Monitor micron gauge—stop when reaching 500 microns or lower. Close valves and isolate system for 15 minutes; any rise above 700 microns indicates undetected leaks. Moisture in the system forms hydrochloric acid when mixed with refrigerant, corroding copper lines from within.
Precision Charging Techniques
Never “top off” by pressure alone—measure by weight. Start the system and set thermostat to 60°F. Open low-side valve slightly and add refrigerant in 2-ounce bursts. For R-410A systems with fixed orifice meters, target 10-12°F superheat (suction line temp minus evaporator saturation temp). For TXV systems, aim for 10-15°F subcooling (liquid line temp minus condenser saturation temp). Overcharging by just 10% reduces cooling capacity 15% and increases energy use 20%.
Professional vs. DIY: When $150 Service Calls Save $1,500 Repairs

Call a pro immediately if you see these red flags:
– Compressor making grinding noises
– Oil stains larger than a quarter
– System requiring more than 2 lbs refrigerant
– Frost extending beyond suction line
– Electrical burning smells
Cost-Benefit Analysis: DIY vs Professional
- Professional service: $150 diagnostic fee + $125/lb refrigerant + leak repair ($300-$800)
- DIY approach: $400 equipment + $350 EPA certification + refrigerant ($100/lb) + potential compressor replacement ($1,800)
- Break-even point: Requires 5+ recharges to justify DIY investment (most systems leak once yearly)
Prevent Future Leaks: 4 Maintenance Hacks That Work
Annual professional tune-ups prevent 85% of refrigerant issues. Install vibration dampeners on refrigerant lines where they connect to the compressor—this stops metal fatigue cracks. Apply corrosion-resistant coating to outdoor units in coastal areas. Replace air filters monthly during peak season to prevent coil freezing that stresses lines. Monitor temperature drop across the evaporator—15-20°F indicates healthy operation (less than 14°F suggests airflow problems mimicking low refrigerant).
Monthly Monitoring Routine
- Check temperature differential (return air vs supply air)
- Inspect service valves for oil residue with flashlight
- Clean condenser fins with garden hose (never pressure washer)
- Verify thermostat calibration using separate thermometer
Final Verification: 5-Minute Post-Recharge Checklist
Monitor operation for 30+ minutes before declaring success. Confirm 15-20°F temperature drop across the evaporator coil. Check compressor amp draw against nameplate rating (exceeding by 10% indicates overcharge). Verify no new oil stains appear on lines. Document exact refrigerant amount added—future technicians need this for leak diagnosis. If cooling capacity remains below 90% of rated BTUs, professional calibration is required.
Remember: Recharging treats symptoms—not the underlying leak. The EPA mandates leak repairs before recharging, and repeated “top-offs” violate environmental regulations. Most homeowners save money long-term by investing in professional leak detection and repair rather than temporary fixes. When your AC struggles this summer, prioritize finding the leak over adding refrigerant—your wallet, compressor, and the environment will thank you.


