
Tired of watching your electricity bill climb every summer? Building your own solar panel system at home slashes energy costs while giving you complete control over your power supply. Most beginners waste weeks—and hundreds of pounds—by skipping critical preparation steps that determine whether your DIY solar project succeeds or fails within months. This guide reveals the exact process to prepare solar panels at home correctly, using only proven methods from verified construction data. You’ll learn how to calculate your actual energy needs, avoid dangerous wiring errors, and create weatherproof panels that withstand British weather for decades—not just survive the next rainstorm.
Forget generic “solar basics” advice. We’re diving straight into the actionable steps that prevent the three most common DIY failures: undersized systems that never power your fridge, moisture-damaged panels after six months, and battery explosions from improper wiring. By the end, you’ll know precisely how to prepare solar panel components for assembly, test connections before sealing, and position your system for maximum daily output—even on cloudy UK days.
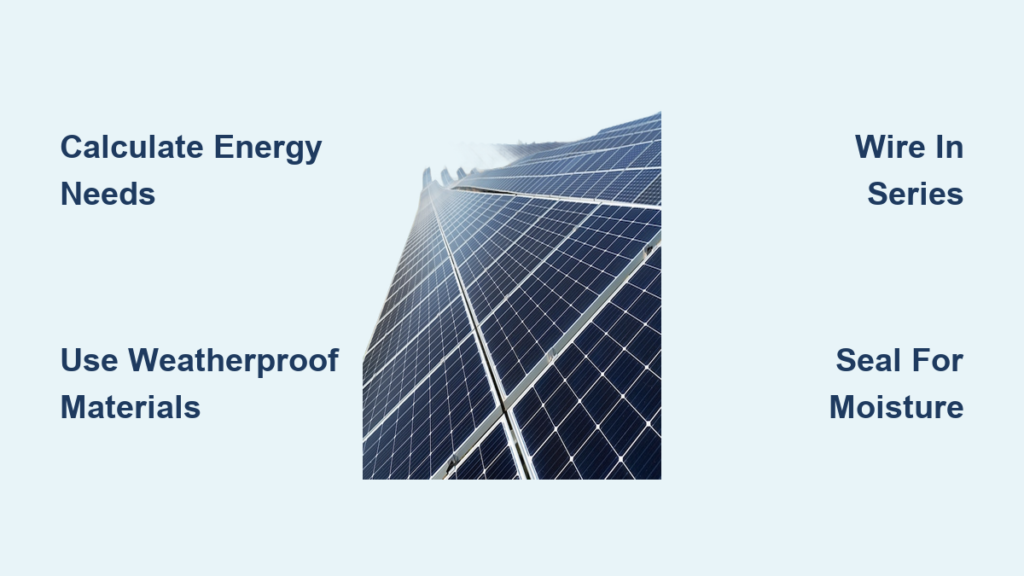
Calculate Your Exact Energy Requirements

Why Your First Solar Panel Fails Without This Step
Most DIY solar projects collapse because homeowners guess their energy needs instead of calculating them. Grab your last electricity bill showing kilowatt-hour (kWh) usage—this number is your starting point. Multiply each appliance’s wattage by daily usage hours: a 150W fridge running 24 hours consumes 3,600 watt-hours daily, while a 65W laptop used 4 hours adds 260 watt-hours. Add 25% extra capacity—this critical buffer accounts for cloudy days, battery inefficiencies, and future device additions. Skip this, and your system will consistently underperform when you need it most.
For a typical UK household, a functional starter system requires 300-500 watts to power essential devices. This means 12-18 solar cells wired in series (each producing 0.5V) to generate the 18V needed for 12V battery charging. Track your usage for three days to capture realistic patterns—weekend consumption often differs significantly from workdays.
On-Grid vs. Off-Grid: The Cost-Saving Decision
Your connection choice dramatically impacts preparation requirements. On-grid systems require only basic metering equipment to sell excess power back to the National Grid, avoiding expensive battery banks. Off-grid setups demand lithium iron phosphate (LiFePO4) batteries storing 3-5 days’ worth of energy—adding £300-£800 to initial costs. For first-time builders, start with a small on-grid system powering just lighting and phone charging. This approach lets you validate your calculations with real-world data before investing in complex off-grid components. Always consult your local DNO (Distribution Network Operator) about grid connection rules before purchasing parts.
Gather Weatherproof Solar Panel Materials
:max_bytes(150000):strip_icc()/what-are-solar-panels-made-of-5179704-Add-COLOR-V1-2-e5a199583dd84161ad30c17b4da5f932.png)
Essential Components That Won’t Fail in Rain
Your panel’s survival depends on these non-negotiable materials:
– Solar cells: 36 monocrystalline cells (0.5V each) for 12V systems—never use polycrystalline for DIY as they crack during soldering
– Frame materials: 26×36 inch exterior-grade plywood base + 1×2 inch pressure-treated pine strips
– Sealants: Clear silicone adhesive (not epoxy) for cell mounting—rigid adhesives cause thermal stress cracks
– Covering: 3mm UV-resistant plexiglass (standard glass risks shattering)
– Electrical parts: MPPT charge controller (30% more efficient than PWM), 100Ah LiFePO4 battery
Pro Tip: Source broken commercial panels from solar installers—they often sell damaged units with 90% functional cells for £15-£25. Test cells with a multimeter before purchase; discard any below 0.45V output.
Tools That Prevent Costly Mistakes
Skip these tools and your panel fails within months:
– Temperature-controlled soldering iron (60W minimum)—excess heat cracks cells
– Multimeter with DC voltage testing—verifies connections before sealing
– Tile spacers—maintain 3mm gaps between cells for thermal expansion
– Silicone sealant gun—creates waterproof perimeter seals
– Stainless steel hardware—resists corrosion vs. standard screws
Warning: Never use regular wood glue or clear epoxy on cells—they degrade under UV exposure, causing delamination within 12 months. Exterior-grade paint on wooden frames is mandatory for UK weather resistance.
Build a Rainproof Solar Panel Frame
Frame Construction That Survives British Winters
Cut plywood to 26×36 inches for 36-cell layouts, then build a 1.5-inch deep perimeter frame using pine strips. Secure with wood screws (not nails) every 6 inches—glue alone fails under thermal cycling. Drill 1/4-inch drainage holes at the frame’s bottom corners to prevent condensation buildup. Paint all wood twice with exterior satin paint, waiting 48 hours between coats. This step is non-negotiable: untreated wood swells in rain, cracking your plexiglass cover within months.
Create wire channels by routing 1/2-inch grooves along the frame’s inner edge. This hides connections from moisture while allowing easy access for repairs. Install rubber grommets in junction box holes—the smallest gap lets water penetrate and destroy your cells.
Critical Weatherproofing Techniques
Seal every seam before adding cells: Apply silicone sealant along the plywood-frame joint, then press firmly for 30 seconds. Position tile spacers at cell corners to maintain even gaps—never let cells touch the frame as wood expansion stresses brittle cells. When installing plexiglass, use stainless steel screws with rubber washers every 4 inches. Smooth sealant with a gloved finger in a continuous bead—gaps cause moisture ingress that corrodes connections within weeks.
Wire Solar Cells Without Damaging Them
Series Wiring That Maximizes Output
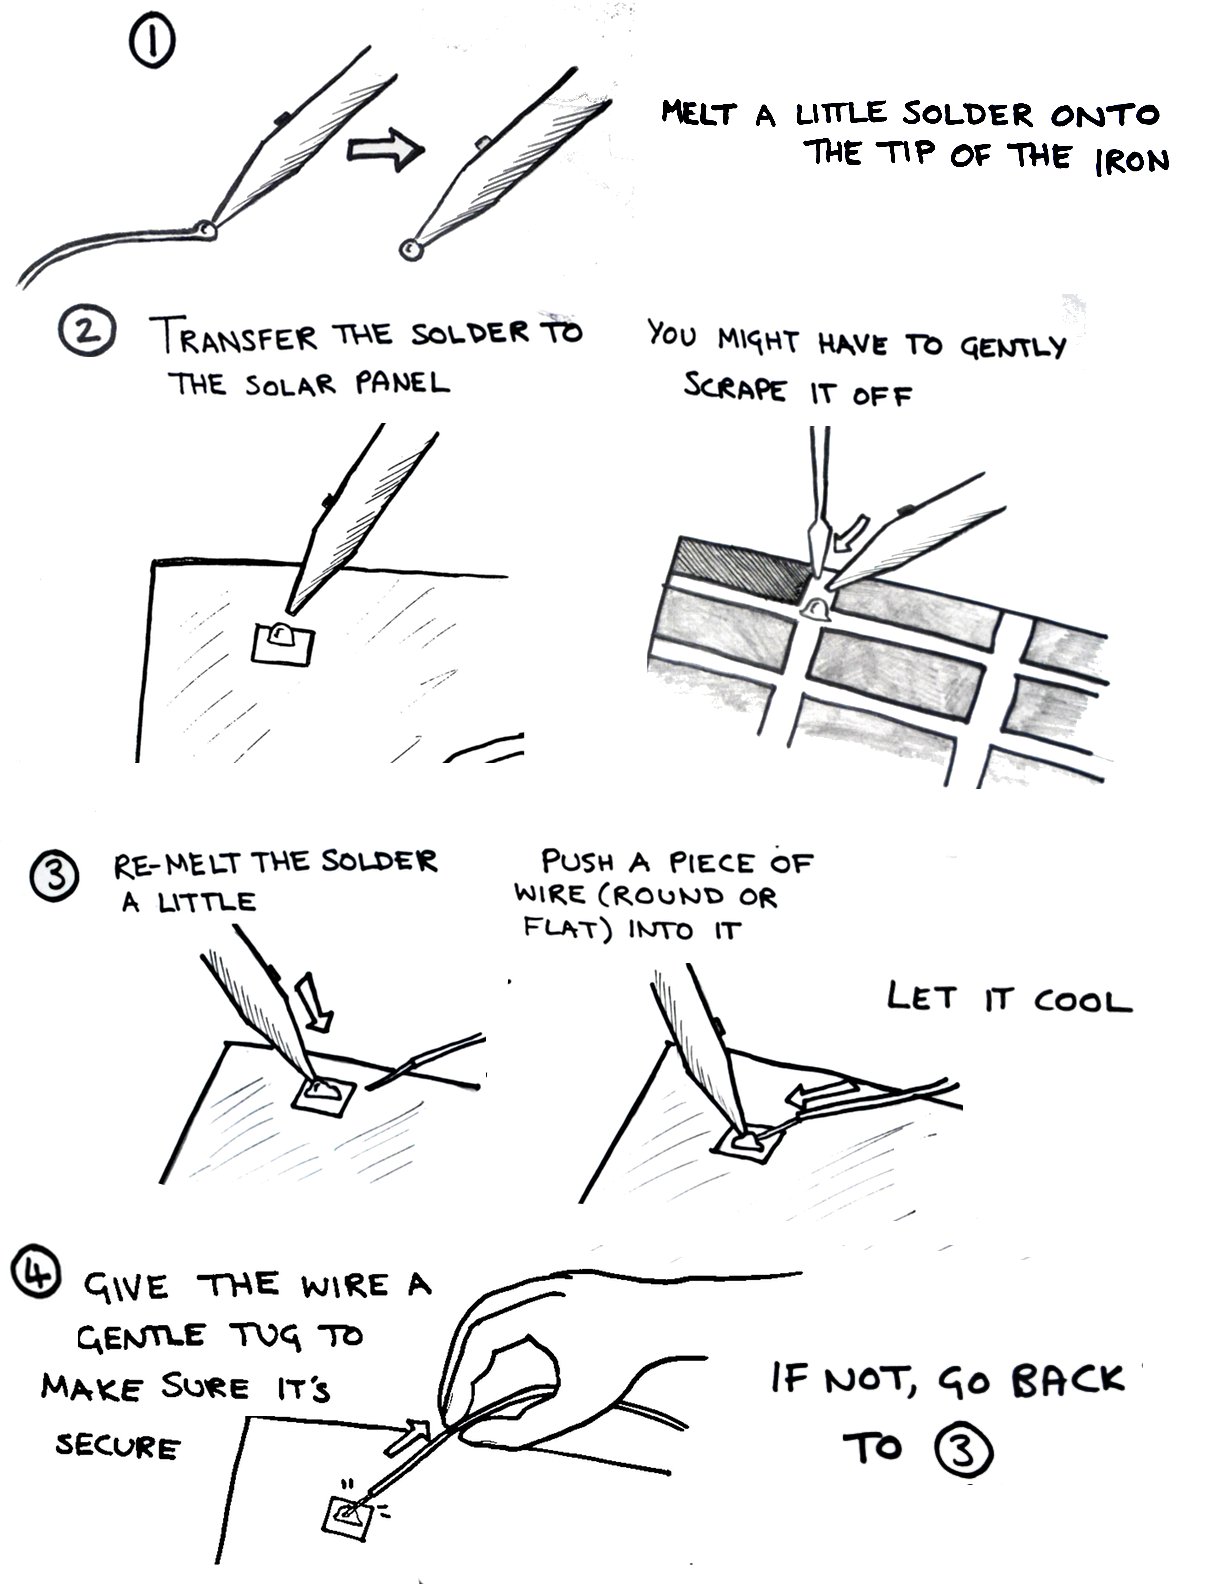
Place cells face-down on a soft cloth to prevent micro-cracks. Solder tabbing wire from the back busbar of one cell to the front of the next using this sequence:
1. Apply flux to connection points
2. Rest soldering iron tip on busbar for 2 seconds max
3. Feed solder until joint shines (not blobs)
4. Test voltage immediately with multimeter
Critical: Wire cells in series (positive to negative) to build voltage—36 cells create 18V ideal for 12V batteries. Parallel wiring (positive to positive) increases current but requires identical cell output, which DIY builders can’t guarantee. A single weak connection drops entire panel output by 20%; test each joint before proceeding.
Connection Testing That Prevents Total Failure
Verify every string before final assembly: Cover cells with a cloth, then shine a bright lamp on one cell while measuring voltage across the string. You should see 0.5V per cell—36 cells = 18V. If voltage drops below 16V, disconnect and re-solder suspect joints. Never skip this step—sealed panels with faulty wiring become expensive landfill. Record each cell’s output voltage; group similar-performing cells together to minimize mismatch losses.
Assemble and Seal Your Panel Correctly
Cell Mounting That Prevents Thermal Cracking
Apply pea-sized silicone dots on plywood (not full coverage) to allow expansion. Position cells using tile spacers—never force cells into tight gaps as UK temperature swings (0°C to 35°C) cause expansion. Route wires through pre-drilled holes to the junction box, securing with cable clamps every 6 inches. Loose wires vibrate and break connections within months.
Connect positive/negative leads to the junction box using MC4 connectors—you’ll thank yourself during future expansions. Test open-circuit voltage before sealing; it must match your earlier string test.
Final Sealing That Blocks Moisture Forever
Place plexiglass over cells with 1/8-inch spacers at corners. Apply silicone sealant in a continuous bead around the frame’s top edge, then lower plexiglass into position. Press firmly for 60 seconds, then wipe excess sealant with isopropyl alcohol. Critical test: Spray panel with hose for 5 minutes—no moisture should appear inside. Let cure 72 hours before installation; premature use causes sealant shrinkage and leaks.
Connect Your System Without Blowing Components
Battery-First Wiring Sequence
Always connect in this order to prevent catastrophic failures:
1. Charge controller to battery terminals (red to positive, black to negative)
2. Solar panel to charge controller
3. Inverter to battery
Never connect panel directly to battery—this bypasses voltage regulation, causing battery explosions. Install a 30A inline fuse within 18 inches of the battery positive terminal. For UK homes, use 10mm² solar cable for runs under 10 meters to prevent dangerous voltage drop.
Inverter Setup for Sensitive Electronics
Plug small devices (phone chargers, LED lights) into your inverter first—never connect refrigerators or microwaves initially. Pure sine wave inverters are mandatory for UK appliances; modified sine wave units damage electronics. Test with a 50W load for 30 minutes: if the inverter overheats, your cable gauge is too small or connections are loose.
Position Panels for Maximum UK Sun Exposure
Angle Adjustment That Boosts Winter Output
Set fixed panels at latitude + 15° (e.g., 55° for London) for optimal winter sun capture. This 15-degree increase over standard angles counters low sun angles during UK winters, boosting output by 22% compared to flat mounting. Use a simple tilt kit that allows seasonal adjustment—summer angle = latitude – 15°. Even 5° off true south (or north in Southern Hemisphere) reduces output by 8%; use a compass app for precision.
Pro Tip: Install panels 6 inches above roof surfaces—this airflow cools panels by 15°C, increasing efficiency by 10% versus flush mounting.
Maintain Peak Performance Year-Round
Monthly Cleaning That Prevents 15% Output Loss
Clean panels at dawn with lukewarm water and microfiber cloth—never use abrasive scrubbers that scratch plexiglass. Focus on bird droppings and pollen buildup common in UK springs. Test output before/after cleaning; a 10%+ increase confirms dirt was blocking light. Check wire seals during cleaning—brittle or cracked silicone needs immediate replacement.
Inspect mounting hardware quarterly; thermal cycling loosens bolts. Tighten all connections to manufacturer specs—overtightening cracks frames. Document monthly output in a spreadsheet; sudden drops indicate shading issues or failing components.
Final Note: Your DIY solar panel preparation determines whether you gain decades of free energy or face costly repairs. Focus on weatherproofing, precise energy calculations, and battery-first wiring to avoid the top three failure points. Start with a single 100W panel powering essential devices—this lets you master the process before scaling up. Within six months, you could generate 30% of your household electricity, with the system paying for itself in under five years. Remember: properly prepared solar panels last 25+ years, turning today’s preparation effort into generations of clean power.


