
Standing at your kitchen window watching rain pour down, you might wonder exactly how much water is falling on your property. Is it enough to skip watering the garden? Could this storm cause flooding issues you’ve noticed before? Measuring rainfall at home transforms weather watching from passive observation into valuable data that helps with everything from lawn care to home maintenance decisions.
Learning how to measure rainfall at home opens up a world of practical insights. You’ll know precisely when to adjust irrigation schedules, identify drainage problems before they become expensive, and contribute to local weather networks. This guide walks you through everything from selecting the right rain gauge to maintaining accurate records for years of reliable data.
Choose Your Perfect Rain Gauge Type
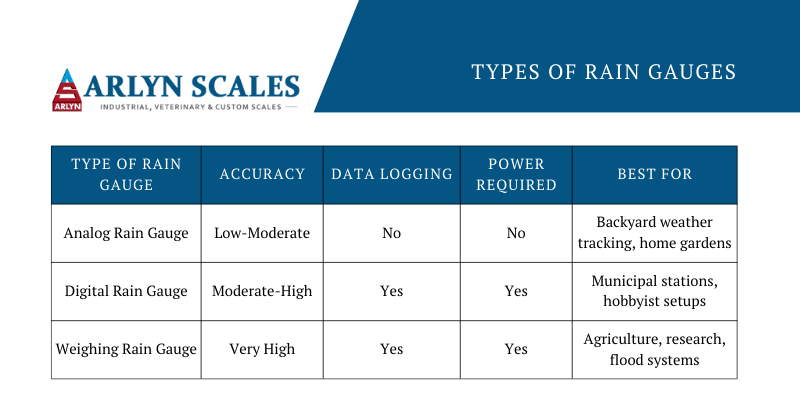
Manual Rain Gauges: Simple and Reliable
Manual rain gauges remain the most accurate option for measuring rainfall at home due to their straightforward design. The standard model features a 203mm (8-inch) opening that captures rain effectively while minimizing evaporation losses. These gauges typically hold 280-300mm of rainfall and include precise 0.5mm markings for detailed measurements.
When selecting a manual gauge, look for UV-resistant plastic or weatherproof glass construction that withstands years of sun exposure without yellowing. The Stratus Precision Rain Gauge delivers ±2% accuracy that’s suitable for serious weather enthusiasts, while the AcuRite Manual Rain Gauge includes thoughtful features like a removable funnel for effortless emptying. Properly maintained, these gauges provide reliable data for a decade or more with minimal upkeep.
Digital Rain Gauges: Set and Forget
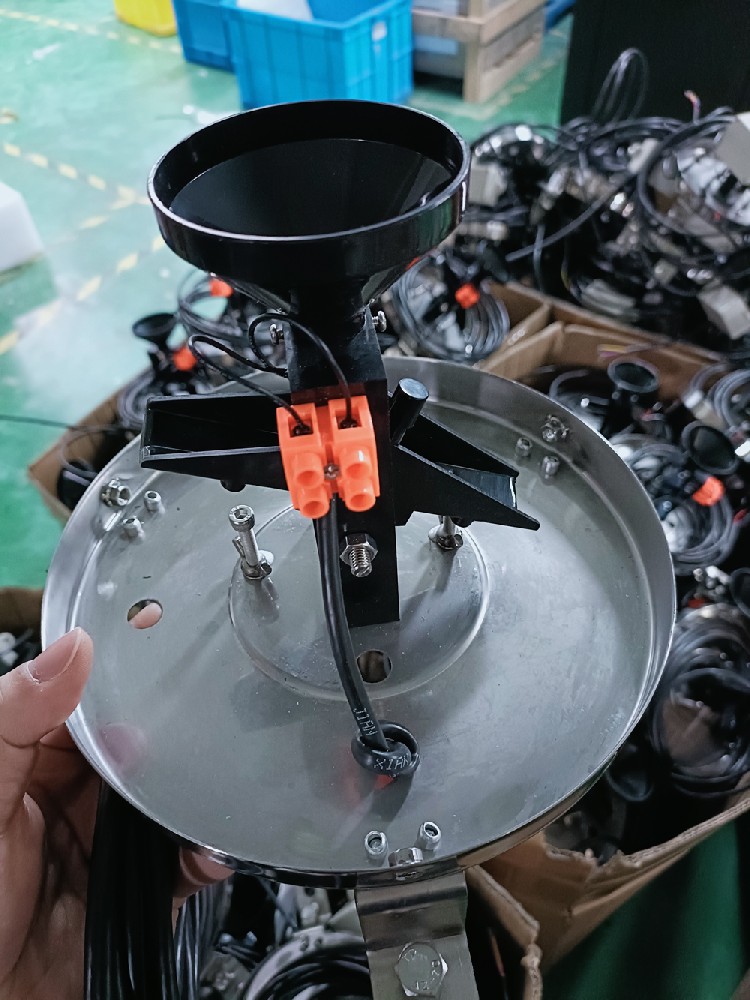
Electronic rain gauges eliminate the daily chore of manual readings through automated tipping bucket mechanisms. These devices measure rainfall by counting bucket tips, storing 30-90 days of detailed history while transmitting data wirelessly up to 300 feet away. Battery life typically spans 12-24 months, making them truly low-maintenance solutions.
Smart weather stations take automation further with WiFi connectivity that uploads data to cloud services. You’ll receive real-time monitoring from your phone, severe weather alerts, and historical analysis tools. Premium electronic models achieve ±1% accuracy rivaling manual gauges while offering features like API access for custom data integration with home irrigation systems. Just be aware that electronic sensors require occasional calibration and may struggle with freezing precipitation.
Build a Functional DIY Rain Gauge
Creating your own rain gauge costs under $10 and takes just 30 minutes. Start with any clear container featuring straight sides and a flat bottom—large mason jars or straight-sided plastic bottles work perfectly. The opening should exceed 10cm diameter for proper sampling, and you’ll need at least 30cm height capacity for heavy storms.
Construction Steps:
1. Mark measurement lines every 2mm using a permanent marker and ruler
2. Mount the container 30cm above ground level using a level surface
3. Add a funnel to reduce evaporation and prevent debris entry
4. Install fine mesh screening over the opening to block leaves and insects
5. Create a stable base using sand, gravel, or concrete to prevent tipping
Position Your Gauge for Maximum Accuracy

Optimal Site Selection Guidelines
Where you place your rain gauge determines data quality more than any other factor when measuring rainfall at home. The golden rule: position your gauge twice as far from obstacles as they are tall. A 10-meter tree requires 20 meters of clearance minimum to prevent rain shadow effects that can reduce readings by 15-25%.
Choose natural ground surfaces over concrete or asphalt, which create splash-back and thermal effects. The standard height of 30cm above ground prevents ground splash while remaining accessible for readings. Ensure the area drains well—avoid spots where water pools around the gauge base during heavy rain. Never place gauges within 5 meters of buildings, under trees, or near irrigation systems.
Secure Mounting Solutions for All Conditions
Ground mounting provides the most stable setup for long-term measurements. A simple 30x30cm concrete pad, 10cm thick, creates a permanent foundation that prevents tilting. Alternatively, drive a 1.5m galvanized steel post into the ground, ensuring at least 45cm below surface for stability. Add cross-bracing or guy wires in windy locations to maintain vertical alignment.
Wall mounting works when ground placement isn’t possible, but requires careful positioning. Extend brackets at least 60cm from building surfaces to prevent splash-back from walls. Use anti-vibration pads to eliminate false readings from building movement, and angle the gauge slightly away from the structure to shed wind-driven rain. Always verify gauge levelness after installation.
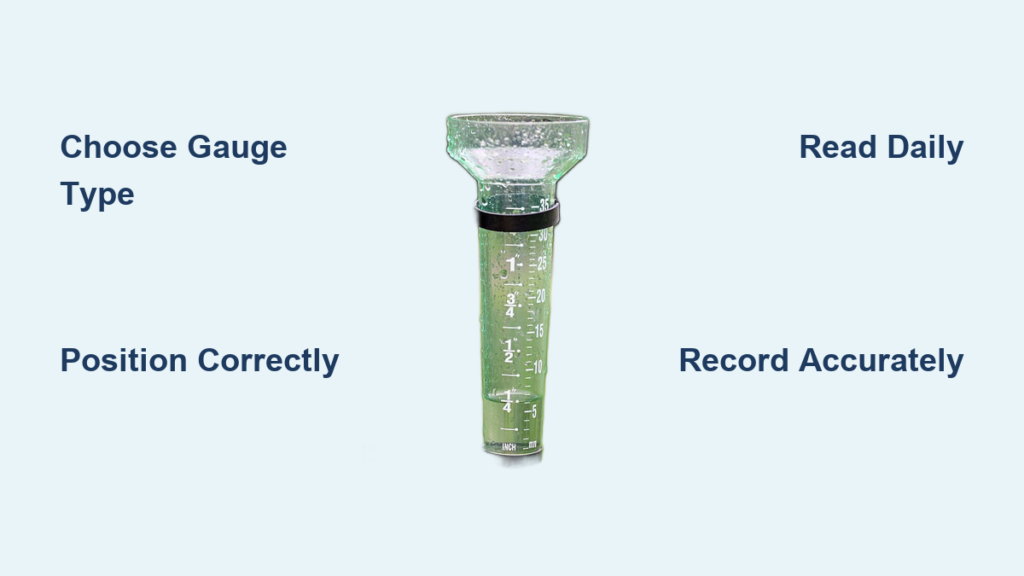
Master Daily Measurement Techniques
Consistent Morning Reading Protocol
Establish consistency by reading your gauge at 8:00 AM daily, using the same time year-round. This timing captures the previous 24 hours while avoiding afternoon evaporation. During heavy rain events, check every 3-6 hours to prevent overflow and capture intensity data.
Proper measurement technique:
1. Approach from downwind to avoid disturbing catch
2. Remove funnel slowly to prevent spills
3. Read at eye level, viewing the meniscus bottom
4. Record to nearest 0.5mm increment
5. Empty completely with smooth, controlled pouring
6. Replace funnel securely—loose fittings cause false readings
Boost Accuracy with Professional Tricks
Double your accuracy by taking two measurements and averaging the results. This simple step eliminates random errors and reveals systematic issues. When reading the water level, always view the gauge straight-on—parallax errors from angled viewing can add 2-3mm of error.
For professional-grade accuracy, perform weekly calibration using a known water volume. Measure 100ml of water using a graduated cylinder, pour into your gauge, and verify the reading matches the expected 10mm. Document any discrepancies and adjust your technique accordingly. Add a thin layer of cooking oil to reduce evaporation losses on hot days.
Record Data That Provides Real Value
Effective Manual Logging Systems
Create a daily rainfall log with four essential columns: date, time, rainfall amount, and notes. Include a notes section for unusual events like “gauge tipped by wind” or “heavy debris from neighbor’s tree.” Monthly summary tables with running totals help identify patterns quickly.
Transfer manual records to digital format monthly using simple spreadsheet templates. Include automated calculations for weekly, monthly, and annual totals. Create visual charts showing rainfall patterns—most spreadsheet programs generate these automatically from your data columns. This transforms raw numbers into actionable insights for garden planning and water management.
Digital Recording Advantages for Serious Trackers
Weather apps like Weather Underground and NOAA Weather offer seamless data integration for electronic gauges. These platforms provide historical analysis tools and comparison with nearby official stations. Cloud storage ensures your years of data survive computer failures or moves.
For manual gauges, smartphone apps like “Rain Log” streamline data entry with voice-to-text features and automatic weather context. Set reminders for daily readings and receive alerts for unusual patterns that might indicate gauge problems. Digital records make it easy to share data with local weather networks or contribute to citizen science projects.
Fix Common Rainfall Measurement Problems
Eliminate Evaporation and Contamination Issues
Evaporation can reduce readings by 5-10% on hot, windy days. Combat this with narrow-necked containers or add a thin layer of oil to create an evaporation barrier. Position gauges in partial shade during summer months, but ensure they still receive direct rainfall.
Quick fixes for specific issues:
– Splash-over errors: Install wind screens or relocate away from obstacles
– Overflow problems: Check gauges more frequently during storms or upgrade capacity
– Debris contamination: Add fine mesh screening and clean weekly
– Ice formation: Use heated gauges or bring containers indoors during freezing
Maintain Calibration for Long-Term Accuracy
Systematic measurement bias creeps in over time through scale wear and environmental factors. Compare your readings with nearby official weather stations monthly—differences exceeding 10% indicate calibration issues. Create correction factors if consistent patterns emerge.
Perform quarterly calibration checks using precise water volumes. Mark any scale drift on your gauge and consider replacement after 3-5 years of UV exposure. Document all calibration activities to maintain data quality over decades of measurements. This disciplined approach ensures your rainfall records remain scientifically valuable.
Preserve Your Rainfall Data for Years
Create a Sustainable Maintenance Routine
Daily tasks take just 2 minutes: empty the gauge, check for damage, and verify clear openings. Weekly maintenance requires 15 minutes for thorough cleaning with a soft brush and mild detergent. Remove any algae buildup that can affect readings and check mounting hardware tightness.
Monthly procedures include deep cleaning and calibration verification. Use known water volumes to check measurement accuracy and document any gauge changes. Inspect the surrounding area for new obstacles like growing vegetation or construction that might affect readings. This consistent care ensures your gauge remains accurate season after season.
Contribute to Weather Science with Your Data
Join networks like CoCoRaHS (Community Collaborative Rain, Hail and Snow Network) to contribute your data for meteorological research. These organizations provide standardized equipment and training while creating valuable records for climate studies. Your backyard measurements become part of official weather records used by scientists and emergency managers.
Key Takeaway: Accurate rainfall measurement requires proper equipment, consistent technique, and long-term commitment to data quality. Start simple with a quality manual gauge, establish good habits, then expand your system as your expertise grows. Your rainfall records will serve you—and potentially your community—for decades to come. Whether you’re monitoring garden irrigation needs or contributing to climate science, learning how to measure rainfall at home delivers practical value that keeps on giving.


