
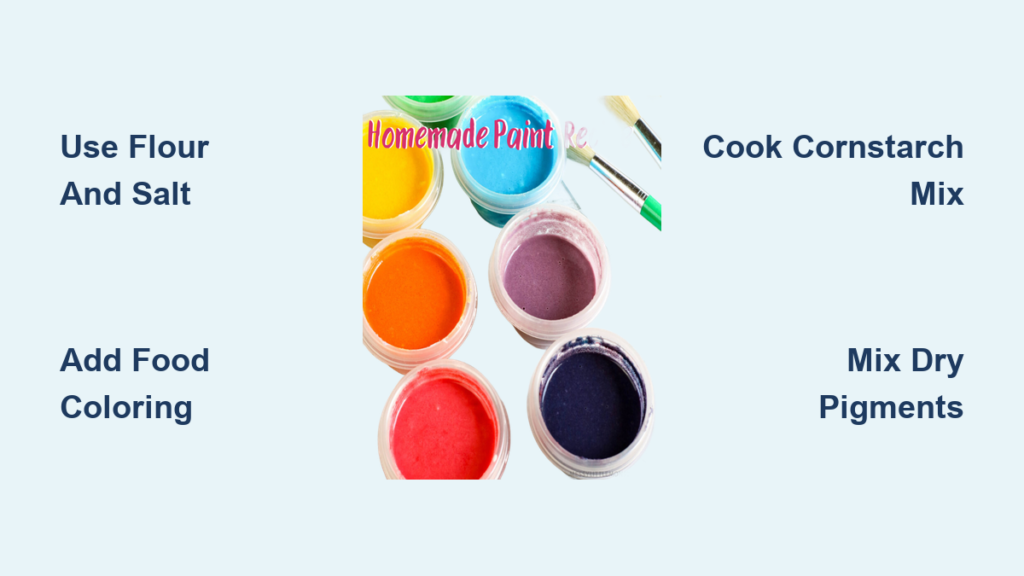
Nothing transforms a rainy afternoon like discovering how to make paint at home using ingredients already in your pantry. From the satisfying crunch of salt crystals in flour paint to the velvety smoothness of cornstarch creations, homemade paint unlocks creative possibilities while avoiding toxic chemicals found in commercial options. This guide reveals proven methods that cost pennies per batch and work for everything from toddler finger painting to professional art projects.
Whether you’re looking for non-toxic alternatives for your children’s crafts or seeking to create custom artist-grade acrylics, making paint at home gives you complete control over ingredients and texture. You’ll learn how to transform basic kitchen staples into vibrant colors that perform better than store-bought options for specific applications, all while saving significant money over time.
Grainy Flour Paint Recipe for Kids’ Textured Art Projects
This flour-based paint creates delightfully bumpy textures perfect for young artists exploring tactile sensations. The salt crystals provide natural sparkle as they dry, making each project uniquely dimensional and visually interesting without expensive additives.
Why Your Flour Paint Needs Salt Crystals for Texture
The magic happens when salt partially dissolves in boiling water but leaves tiny crystals suspended in the mixture. These crystals create the signature puffy texture as the paint dries—no glitter required! For best results, don’t try to dissolve all the salt completely.
What You’ll Need:
– 1 cup table salt
– 1 cup all-purpose flour
– 1½ cups boiling water
– Liquid food coloring
– Medium mixing bowl
– Whisk or immersion blender
Step-by-Step Process:
1. Dissolve salt: Combine salt with boiling water and whisk vigorously for 30 seconds. Some undissolved salt crystals are essential for texture.
2. Add flour: Gradually pour flour into the salt water while whisking continuously to prevent lumps.
3. Smooth mixture: Use an immersion blender for 10-15 seconds to eliminate large clumps while preserving salt graininess.
4. Portion colors: Divide mixture into small containers before adding colors for efficient mixing.
5. Add color: Mix in food coloring drop by drop—start with 3-4 drops per ¼ cup of paint for vibrant results.
6. Stir before use: Natural separation occurs, so mix thoroughly before each application.
Pro tip: This paint dries with a unique puffy texture that lifts off the page, making it ideal for salt dough ornaments and greeting cards with dimensional effects.
Puffy Squeeze Paint Variation for Fine Motor Development
This thicker version works beautifully in squeeze bottles, allowing children to create raised designs while developing crucial hand strength and coordination.
Quick preparation method:
1. Mix ½ cup flour and ½ cup salt thoroughly in a bowl
2. Gradually add ½ cup warm water while stirring until smooth
3. Divide into plastic bags, add coloring, then knead to distribute
4. Snip bag corners to transfer into squeeze bottles
Troubleshooting: If mixture becomes too thick for squeezing, add warm water one teaspoon at a time until reaching toothpaste consistency. The ideal texture should hold its shape briefly when squeezed.
Smooth Cornstarch Paint for Sensory Play and Easy Cleanup
Cornstarch paint creates silky-smooth results perfect for easel work or sensory tables. Unlike flour paint, this version produces a uniform consistency that covers beautifully on standard paper while washing easily from skin and surfaces.
Basic Cornstarch Recipe Ready in 5 Minutes
Ingredients:
– 4 heaping tablespoons cornstarch
– Small amount cold water
– 1 cup boiling water
– Food coloring
Cooking process:
1. Create paste: Place cornstarch in heatproof bowl and add cold water gradually to achieve custard-like consistency.
2. Cook starch: Slowly pour boiling water while whisking continuously until mixture thickens.
3. Adjust consistency: Add more hot water for easel painting, less for finger painting.
4. Color portions: Divide into containers and mix in colors as desired.
Storage secret: Refrigerate in sealed containers for up to one week. Thickened paint loosens with warm water addition—simply microwave for 10 seconds and stir.
How to Make Professional Acrylic Paint with Dry Pigments
Creating artist-grade acrylic paint at home costs a fraction of commercial alternatives while giving you complete control over ingredients. One tablespoon of dry pigment produces enough paint for multiple projects with superior lightfastness.
Essential Safety Setup Before Mixing
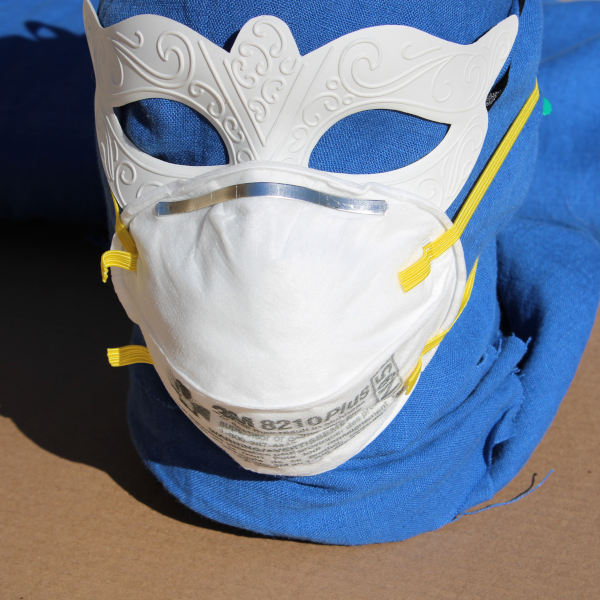
Required tools:
– Acrylic medium (fluid matte recommended)
– Dry pigments (earth pigments for beginners)
– Glass palette or ceramic tile
– Metal spatula
– Dust mask (non-negotiable for safety)
– Pipette for precise water addition
Starter pigment recommendations:
– Black Iron Oxide (versatile dark)
– Red Iron Oxide-Y (warm red)
– Titanium White (strong opacity)
– Ultramarine Blue (primary blue)
Step-by-Step Pigment Mixing for Perfect Consistency
Safety first: Always wear a dust mask when handling dry pigments. Work in a well-ventilated area.
Mixing process:
1. Prepare pigment: Place 1 tablespoon pigment on glass surface
2. Add water: Using pipette, add water drop by drop until pigment forms smooth paste
3. Eliminate lumps: Work paste with spatula for 2-3 minutes until completely smooth
4. Add medium: Begin with 2:1 ratio (medium:pigment) and adjust as needed
5. Test consistency: Paint should flow smoothly without being runny
6. Adjust opacity: More medium creates transparent glazes, less medium produces opaque coverage
Pro tip: Create glazing medium using 4:1 ratio for luminous watercolor effects. Some pigments disperse more easily—experiment with ratios for each color.
Spice Paint Color Guide: Natural Hues from Kitchen Pantry

Kitchen spices transform into vibrant, aromatic paints perfect for sensory exploration. These natural alternatives create beautiful earth tones while engaging multiple senses during the creative process.
Color combinations:
– Paprika: Rich brick red tones
– Cumin: Warm orange-yellow hues
– Turmeric: Bright golden yellow
– Cocoa powder: Deep chocolate brown
– Beet powder: Magenta pink tones
Mixing instructions: Combine 2 tablespoons spice with 1 tablespoon water until reaching paint-like consistency. The paint retains subtle aromatic properties during use, enhancing the sensory experience.
3-Day Storage Solution for Homemade Paint Without Mold
All homemade paints except dry pigment mixes require refrigeration. Proper storage extends usability and prevents waste, saving you from daily preparation.
Best practices:
– Use airtight containers or mason jars with tight-fitting lids
– Label with date and color name (flour paint lasts 3 days, cornstarch paint 7 days)
– Add 1-2 drops of lemon juice as natural preservative
– Freeze portions for extended storage (cornstarch paint freezes well)
– Keep backup containers for separating large batches
Surface recommendations:
– Grainy paints: Cardboard, wood, salt dough
– Cornstarch paints: Regular paper, construction paper, canvas
– Spice/coffee paints: Watercolor paper, cardstock
– Professional acrylics: Canvas, wood panels, primed surfaces
Fixing Common Homemade Paint Problems: Too Thin, Too Thick, or Lumpy
Even experienced paint makers encounter consistency issues. These quick fixes solve the most common problems without starting over.
Consistency Correction Techniques for Perfect Flow
Too thick: Add warm water gradually, 1 teaspoon at a time. Stir thoroughly between additions. For cornstarch paint, microwave for 5 seconds to loosen before adding water.
Too thin: Sift in additional base ingredient (flour or cornstarch) while whisking continuously. For professional acrylics, add more pigment paste.
Lumpy texture: Strain through fine mesh or use immersion blender for 30 seconds. For dry pigment mixes, insufficient grinding causes lumps—work paste longer with spatula.
Color Intensity Troubleshooting Guide
Pale colors: Increase food coloring concentration gradually. Gel colors provide more intensity than liquids. For spice paints, use less water to concentrate color.
Unwanted separation: Store in smaller containers and stir before each use. Separation is natural and doesn’t affect quality—just part of homemade paint chemistry.
Mold development: Discard immediately and reduce storage time. Always refrigerate and add lemon juice as natural preservative.
Key takeaways: Making paint at home offers unlimited creative possibilities while saving money and eliminating toxic ingredients. Start with simple cornstarch or flour recipes for kids’ projects, then progress to professional acrylics as skills develop. Remember that experimentation leads to discovery—adjust recipes based on your specific needs and preferences.
Next steps: Try combining techniques, such as using coffee paint as an underpainting layer beneath cornstarch colors, or create custom color charts to document successful ratios. Share your homemade paint creations and inspire others to explore this rewarding craft—your kitchen holds all the ingredients for artistic magic.


