
That subtle slope in your living room isn’t normal—it’s a warning sign. When your coffee cup rolls across the counter or doors won’t stay closed, your mobile home has settled unevenly. This isn’t just an inconvenience; it’s structural damage in progress. Every year, thousands of manufactured home owners face cracked walls, leaking pipes, and costly repairs because they ignored early leveling signs. The good news? You don’t need to pay $2,500 for professional help. With the right approach, you can safely level your mobile home yourself and prevent thousands in future damage.
Mobile homes naturally settle due to soil movement, moisture changes, and seasonal freeze-thaw cycles. Left unaddressed, this uneven settling stresses your home’s structure, causing doors to bind, walls to crack, and plumbing to leak. Proper leveling redistributes weight evenly across all support points, restoring structural integrity and preventing expensive repairs. This guide gives you the exact process professional installers use, tailored for confident DIY execution.
Essential Safety Gear and Tools You Must Have
Before you touch a single jack, shut down all utilities—flip the main electrical breaker, close the water valve, and disconnect gas lines. One spark near a settling gas line could be catastrophic. Your safety gear isn’t optional: steel-toed boots, heavy-duty gloves, safety glasses with side shields, and a hard hat if working underneath.
Must-Have Tools Checklist:
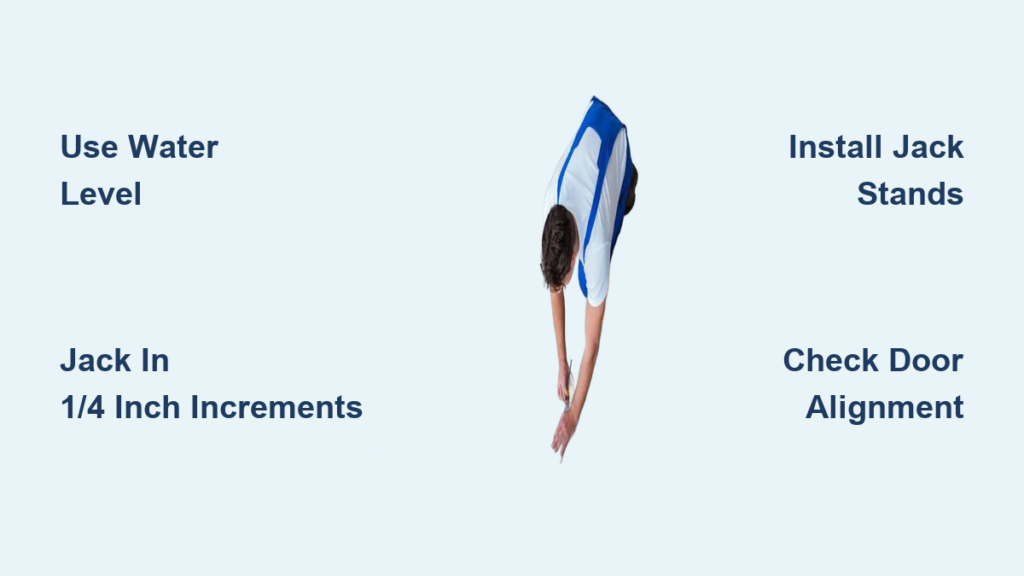
– 20-foot water level (more accurate than laser for this job)
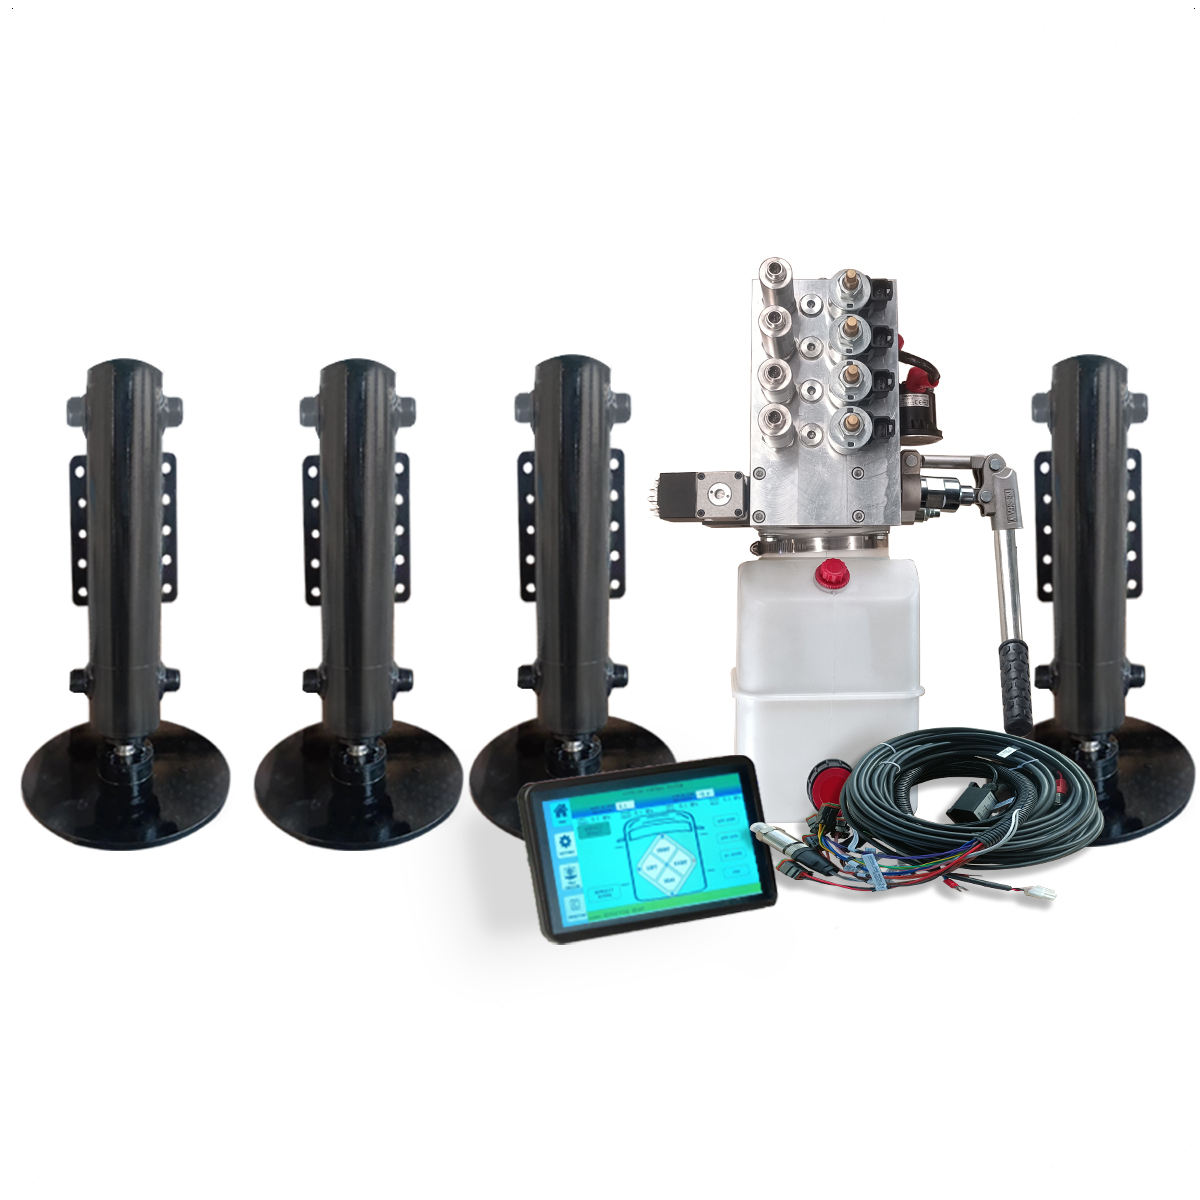
– Two 20-ton hydraulic bottle jacks (minimum 50% over expected load)
– Concrete blocks or steel plates for stable jack bases
– Galvanized steel shims (never use random lumber scraps)
– 4-foot level for spot checks
Skip the scissor jack from your car—it lacks the capacity and stability needed. Budget $400-$800 for quality tools if starting from scratch; this investment pays off after your second leveling project.
Recognizing Critical Leveling Warning Signs
Don’t wait for major damage to act. Place a marble on your floor in multiple rooms—if it rolls consistently in one direction, your home needs leveling. Interior red flags include doors that swing open or slam shut, gaps between walls and ceiling, and cracks appearing above windows. Externally, watch for skirting panels separating, visible slope in your home’s line, gutters draining oddly, or steps pulling away from doors.
Document everything with photos before starting. These “before” shots help track progress and become crucial evidence if problems persist. Measure floor slopes using your marble test—anything over 1/2 inch difference needs correction. Homes with more than 2-3 inches of slope require professional help; attempting DIY could cause structural damage.
Setting Up Your Precision Water Level System
Your water level system is the foundation of accurate leveling. Fill clear tubing with water tinted with food coloring for visibility, then run it around your home’s entire perimeter. Mark reference points on the steel frame (not the skirting, which moves independently) every 8-10 feet.
Pro Tip: Start at one corner, fill the tubing until water appears at both ends, then clamp each end. Have a helper hold one end while you move to the opposite corner. The water level will equalize, showing height differences instantly.
Measure the height difference between your highest and lowest points at each reference mark. Your lowest point becomes the reference height—never raise higher points to match; always lift low points to the correct level. Double-wide owners: treat each half as separate homes initially, addressing the marriage line connection only after both halves are individually level.
Strategic Jack Placement for Safe Lifting

Position jacks adjacent to the main I-beams running your home’s length, never directly under the frame. Create rock-solid bases using concrete blocks or steel plates—soft ground causes jacks to sink, creating dangerous instability. Follow these critical jack placement rules:
Jack Positioning Essentials:
– Place within 2 feet of existing support pads
– Ensure bases are perfectly level (use your 4-foot level)
– Never exceed jack capacity (always use 50% over expected load)
– Keep jacks perfectly vertical—any angle creates dangerous leverage
Double-wide units require special attention. Level each half independently first, then carefully address the marriage line connection. This prevents separation between units and maintains the critical seal that keeps weather out.
Raising Low Points Without Structural Damage
Start at your lowest reference point—that’s your new baseline height. Here’s where patience prevents disaster: raise the jack no more than 1/4 inch at a time, then pause for 5-10 minutes. The structure needs time to adjust before the next lift. Watch your water level constantly during this process.
Critical Safety Protocol: Never work under the home while it’s supported only by jacks. After each 1/4 inch lift, immediately install jack stands rated for your home’s weight before proceeding. Your water level readings should guide incremental adjustments—don’t rush this process.
Installing Permanent Support Adjustments
Once you’ve achieved proper height at each point, lock it in permanently. Most mobile homes use either steel jack stands or concrete block piers. When shimming, follow these non-negotiable guidelines:
Shimming Best Practices:
– Maximum three shim pieces per stack
– Alternate shim direction for stability (like brickwork)
– Use only galvanized steel or pressure-treated wood rated for ground contact
– Check local building codes before purchasing materials
Double-wide units need marriage line supports specifically designed for this purpose. These specialized supports maintain the seal between units and prevent separation. Verify proper connection by checking for even pressure along the entire marriage line after leveling.
Troubleshooting Common Leveling Problems
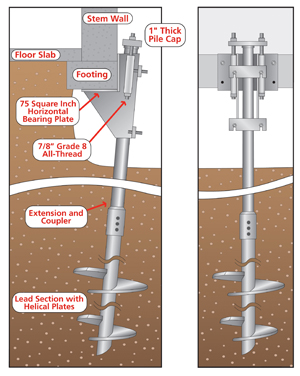
Severe Settling Solutions: When settling exceeds 3 inches, standard leveling won’t hold long-term. Consider helical piers—giant screws driven into stable soil layers below problem zones. These cost $3,000-$12,000 but provide permanent stabilization.
Foundation-Specific Fixes:
– Pier systems: Adjust using built-in mechanisms or add shims between pier head and frame
– Block foundations: Replace blocks or install steel stands—never adjust blocks under load
– Slab foundations: Call professionals immediately—these require specialized lifting
Post-Leveling Adjustments: Doors and windows often need tweaking after leveling. Check door frames with diagonal measurements—they must match for proper operation. Plane sticking doors instead of forcing them. Windows that bind indicate frame distortion; minor hinge adjustments usually solve this.
Verification Process: Did You Level Correctly?
Your work isn’t done when the jacks come down. Test every door and window for smooth operation. Run water in all fixtures, checking for new leaks at pipe joints. Walk the perimeter looking for gaps in skirting or new separation at the marriage line.
Maintenance Schedule Checklist:
– First year: Check level every 6 months
– Year two+: Annual inspections
– After major weather: Immediate checks
– Keep written log of all measurements
DIY vs Professional Leveling: Cost Breakdown
Your DIY Investment:
– Initial tool purchase: $400-$800
– Materials per leveling: $50-$200
– Total first-time cost: $600-$1,000
– Break-even: After second leveling
Professional Service Costs:
– Single-wide: $1,200-$2,500
– Double-wide: $2,000-$4,000
– Includes warranty and code compliance
Save for professionals only when settling exceeds 4 inches, structural damage exists, or you’re uncomfortable with any step. For most routine leveling, DIY pays for itself quickly.
Preventing Future Settling: Smart Maintenance
Control water around your foundation—the #1 cause of settling. Install gutters with downspouts extending 5+ feet from your home. Grade soil away from the foundation at 2% slope for 10 feet. In drought areas, use soaker hoses around the perimeter to prevent soil shrinkage.
Seasonal Maintenance Strategy:
– Spring: Post-thaw inspection (best time for annual checks)
– Summer: Monitor during dry spells (soil shrinkage risk)
– Fall: Pre-winter preparation (check drainage)
– Winter: Avoid work during freeze (inaccurate readings)
Leveling your mobile home properly isn’t just maintenance—it’s protecting your largest investment. Done correctly, this process adds decades to your home’s lifespan while preventing costly structural repairs. Take your time, follow safety protocols, and don’t hesitate to call professionals when situations exceed your comfort zone. Your mobile home (and your wallet) will thank you for the attention.


