
Picture this: you’ve just created the perfect meal planner for your kitchen, only to have it ruined by a splash of sauce. Or your child’s precious artwork starts fading after just a few weeks of display. Learning how to laminate paper at home solves these problems instantly while saving you money on professional services. Instead of paying $1-4 per sheet at local print shops, you can achieve professional-quality results for just 25-45 cents per document with the right home lamination setup.
Whether you’re protecting important documents, creating reusable reference materials, or preserving sentimental items, home lamination provides immediate value. This guide cuts through the confusion and gives you exactly what you need to know to laminate paper successfully on your first try—no prior experience required. By the end, you’ll be confidently producing durable, professional-looking laminated items that withstand daily use.
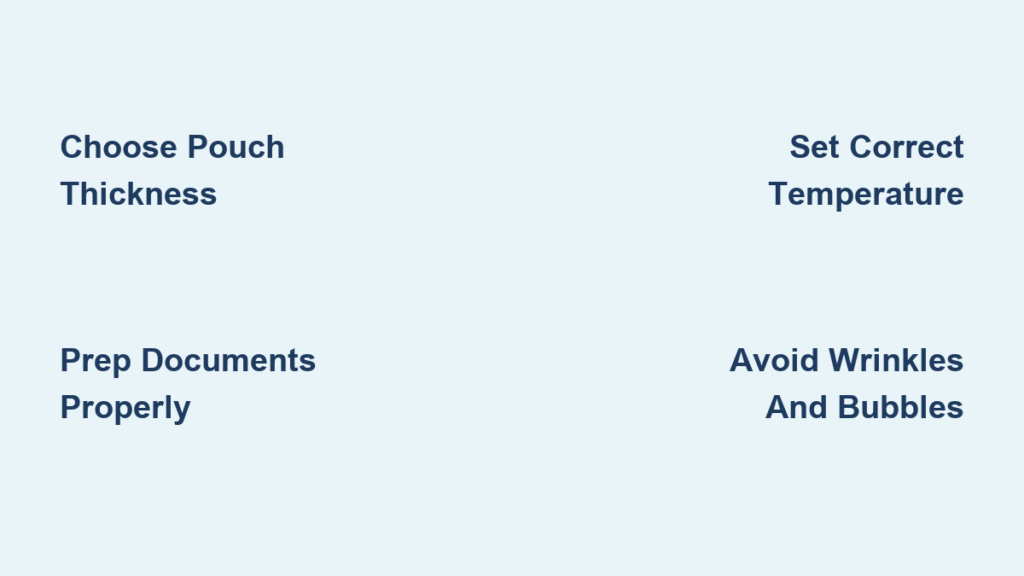
Choose the Right Lamination Method for Your Needs
Thermal Pouch Laminators for Everyday Use
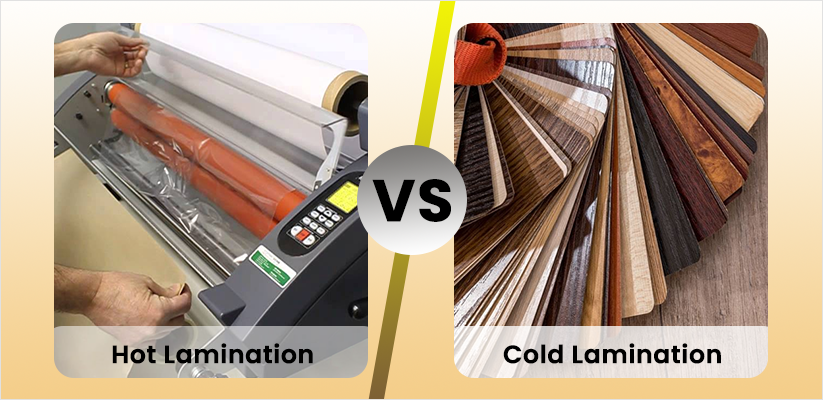
Thermal pouch laminators are the most common home option, using heated rollers to melt adhesive inside plastic pouches. These machines range from $25 for basic 9″ models to $500 for professional units. For most households, a 9″ or 12″ model handles standard documents like letter-size papers, photos, and certificates effectively.
Critical factors when selecting a thermal laminator:
– Temperature control range (180°F to 300°F)
– Warm-up time (1-5 minutes)
– Pouch thickness capacity (3-10 mil)
– Roller quality (affects final appearance and durability)
Cold Lamination for Heat-Sensitive Materials
Cold laminators use pressure instead of heat to create a seal, making them ideal for photographs, thermal paper, or documents with heat-sensitive inks. While these units cost more upfront ($150-400), they require no warm-up time and won’t damage delicate materials.
Use cold lamination when:
– Preserving old photographs or newspaper clippings
– Laminating thermal receipts that darken with heat
– Working with wax-based inks or specialty papers
– Handling heat-sensitive craft materials
No-Machine Alternatives for Occasional Use
Self-adhesive laminating sheets provide the simplest entry point for infrequent lamination needs. These pressure-activated films cost 30 cents to $1.50 per sheet and work like applying a large sticker. Though less durable than machine lamination, they’re perfect for quick projects or when you need just one or two items protected.
Properly Prepare Your Documents Before Lamination
Document Inspection and Cleaning Protocol
Start with completely flat documents free of wrinkles or folds. Remove all staples, paper clips, or bindings that could puncture the pouch or damage rollers. Gently clean the paper surface with a lint-free cloth to eliminate dust—this prevents bubbles and cloudy spots in the finished laminate.
Critical drying times:
– Inkjet prints require 24 hours to fully dry before lamination
– Laser prints are ready immediately
– Thermal paper will darken when heated—use cold lamination instead
Precise Trimming Guidelines for Perfect Results
Trim documents before lamination, leaving a consistent 1/8″ border on all sides. This border ensures complete sealing around edges and prevents moisture infiltration. Rounded corners reduce sharp edges that could cause injury or snag on other materials. Use a paper trimmer for clean, straight edges rather than scissors.
Set Up Your Laminator for Flawless Results
Temperature Calibration Based on Pouch Thickness
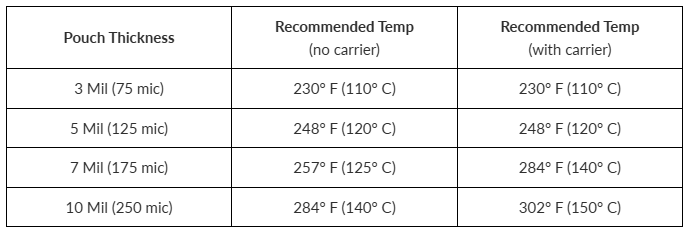
Match your temperature setting precisely to your pouch thickness:
| Pouch Thickness | Ideal Temperature Range | Best For |
|---|---|---|
| 3 mil | 230-250°F | Recipe cards, temporary signs |
| 5 mil | 250-270°F | Standard documents, reference sheets |
| 7 mil | 270-290°F | Frequently handled items, menus |
| 10 mil | 290-310°F | Maximum protection for outdoor use |
Pro tip: Start 10°F below recommended temperature and increase gradually if needed. Overheating causes wrinkling and cloudiness that ruins your project.
Warm-Up and Testing Procedure
Power on your laminator and select the appropriate temperature. Allow the full 3-5 minutes for complete heating—rushing this step causes poor sealing and bubbles. Before committing important documents, test with scrap paper to verify settings and technique.
Execute Perfect Lamination Technique Every Time
Document Positioning and Feeding Method
Place your document centered in the pouch with a consistent 1/8″ border on all sides. Insert the sealed edge first into the laminator—this edge has stronger adhesive and prevents jamming. If your machine requires a carrier sheet, use it to protect both document and rollers.
Feeding technique:
– Guide the pouch straight into the entry slot without forcing
– Maintain gentle pressure on the leading edge to prevent curling
– Let the rollers pull the document through at their own pace
– Never force or pull the document through
Cooling and Finishing Process
After lamination, let the document cool for 30 seconds before handling. Hot laminate remains pliable and can stretch or distort during this critical cooling phase. Once cool, trim excess laminate if needed, leaving a 1/16″ seal around all edges. Round corners with scissors for safety and professional appearance.
Troubleshoot Common Lamination Problems Like a Pro
Eliminate Wrinkles and Bubbles Immediately
Wrinkling typically indicates temperature problems. Reduce heat by 10-15°F and ensure complete warm-up. Moisture in paper also causes bubbles—pre-dry documents in a low-temperature oven (150°F for 5 minutes) before laminating. Clean rollers with isopropyl alcohol on a lint-free cloth while warm to remove adhesive buildup causing sticking.
Clear Cloudy or Hazy Lamination
Cloudy appearance signals insufficient heat or pressure. Increase temperature gradually in 5°F increments. Check roller alignment—misaligned rollers create uneven pressure and hazy spots. Replace worn rollers every 2-3 years or after 500+ documents for consistent results.
Resolve Jamming Issues Without Damage
If your document jams, immediately power off the machine and let it cool completely. Never force a jammed document—this damages rollers permanently. Most jams occur from:
– Over-thick documents exceeding machine capacity
– Misaligned feeding or off-center placement
– Insufficient warm-up time
Create Professional-Quality Projects at Home
Multi-Document Efficiency Techniques
Arrange multiple small items in a larger pouch with 1/4″ spacing between documents. Maintain consistent orientation for clean trimming. After lamination, use a paper trimmer to separate individual pieces. Space-saving tip: Create study cards by laminating 3×5 index cards back-to-back, then cutting them apart.
Specialty Material Guidelines
Photographs: Use UV-resistant pouches and lower temperature settings to prevent image distortion. Cold lamination offers the safest option for irreplaceable photos.
Fabric pieces: Pre-press fabric to remove moisture and wrinkles. Use fabric-specific laminating pouches with reduced temperature settings to maintain flexibility.
Magnetic sheets: Laminate only the printed side, leaving magnetic backing exposed. Use magnetic-receptive pouches that won’t interfere with magnetic properties.
Calculate Your Home Lamination Savings
Cost Comparison Analysis
Professional lamination costs $1-4 per sheet at local shops. Laminating 20 documents monthly saves $15-70 after the first month. With equipment costing $25-200, break-even occurs after just 50-100 documents. Standard letter-size pouches cost 25-45 cents each, making home lamination 50-90% cheaper than professional services.
Maintain Your Equipment for Long-Term Reliability
Daily Care Routine
Wipe rollers with a lint-free cloth after each use while still warm to prevent adhesive buildup. Allow complete cooling before storing, and always close the entry guide to prevent dust accumulation. Store your laminator in a temperature-controlled environment away from direct sunlight.
Safety Considerations for Home Lamination
Heat Safety Protocol
Always allow 5-10 minutes cooling time after use—the rollers remain hot enough to cause burns even after powering off. Keep the machine away from children and pets during operation and cooling periods. Work in a well-ventilated area to avoid inhaling fumes from heated plastic.
Alternative DIY Methods When Machines Fail
Emergency Iron-On Technique
When your laminator breaks down, use a household iron as backup:
- Sandwich document between two laminating film sheets
- Cover with parchment paper to protect your iron
- Set iron to medium heat (275°F, no steam)
- Apply even pressure for 30-60 seconds
- Cool completely before handling
Mastering how to laminate paper at home opens endless possibilities for creating durable, professional-quality documents without ongoing service costs. Start with simple projects like recipe cards or study guides, then progress to complex applications as your confidence grows. With proper technique and maintenance, even a basic laminator serves reliably for years, protecting your important documents and creative projects from everyday wear and tear.


