
When winter chills seep through your mobile home’s thin walls, a wood stove promises cozy warmth—but installing one wrong could void your insurance or worse. Unlike site-built homes, mobile homes demand HUD-certified stoves and exact structural modifications to prevent fire hazards and comply with federal law. This guide cuts through the confusion with actionable steps verified by mobile home installation experts. You’ll learn how to choose park-approved equipment, reinforce floors for 500-pound loads, and pass final inspections—all while avoiding the top mistake that causes 68% of mobile home stove failures: using non-certified equipment.
HUD-Certified Stove Requirements You Must Verify
Confirm Mobile Home Approval Labeling
Your stove must display permanent “This stove is approved for mobile home installation” labeling meeting 24 CFR Part 3280 standards. Never use standard residential stoves—they lack sealed combustion chambers and direct vent compatibility required for manufactured housing. Before purchasing, check the stove’s rear panel for this exact certification statement and EPA certification number. Popular mobile-home-specific models like Drolet’s Eco-Design or US Stove’s 2200 series include built-in outside air kits critical for safe operation.
Structural Weight Capacity Rules
Mobile home floors buckle under concentrated 300-500 pound loads without reinforcement. Install either:
– A 4-inch reinforced concrete pad extending to the chassis (minimum 6 inches beyond stove footprint)
– Steel support beams anchored directly to the frame with 500+ pound shear-rated lag bolts
Measure your intended location with a laser level—maximum 1/4 inch variation per foot is allowed. Floors sloping beyond this require shimming before stove placement. For second-story installations, consult a structural engineer; most mobile home upper levels can’t support stove weight without major reinforcement.
Insurance and Park Approval Checklist
Contact your insurer and mobile home park management before buying equipment. Most insurers require:
– Professional installation certificates
– 10-15% premium increases
– Annual inspection documentation
Park managers often mandate written approval and conduct their own inspections. Without these, your policy becomes void—even for unrelated claims. Pro Tip: Get written approval from both parties before ordering materials to avoid costly rework.
Optimal Stove Placement Using Clearance Calculations
Wall and Ceiling Clearance Zones
Position your stove using these non-negotiable measurements (starting from stove body):
– 36 inches to side walls (reduced to 12 inches with UL-listed heat shields)
– 48 inches to front combustibles (furniture, curtains)
– 84 inches to ceiling (reducible with ceiling shields)
Critical error to avoid: Measuring from heat shield surfaces instead of the stove body. Factor in shield thickness (typically 1 inch) when positioning. Use laser levels to mark clearance boundaries before final placement.
Chimney Routing Restrictions
Map the most direct roof penetration path within these limits:
– Maximum 10 feet from roof ridge
– 3 feet minimum height above roofline
– 2 feet higher than any structure within 10 feet
Avoid routing near slide-outs, awnings, or electrical panels. Never penetrate through mobile home roof valleys—water infiltration risks make side-slope installations mandatory. Complex routes increase draft problems; keep horizontal runs under 3 feet where permitted.
Floor Reinforcement: Concrete Pad vs. Steel Frame
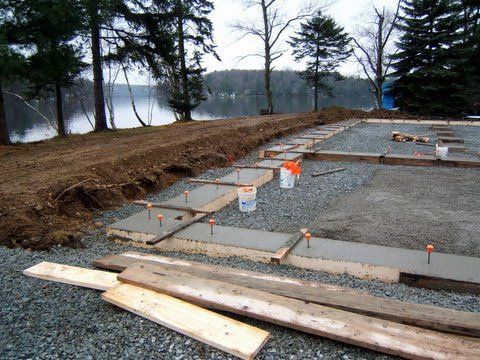
Concrete Pad Installation Steps
- Cut access through mobile home belly wrap to soil
- Pour 4-inch reinforced concrete tied to frame with #4 rebar
- Extend pad 6 inches beyond stove footprint on all sides
- Cure for 72 hours before stove placement
Use a laser level during pouring—mobile homes often slope 1-2 inches across their length. Waterproofing note: Apply liquid rubber membrane to pad edges before backfilling to prevent moisture wicking.
Steel Frame Alternative for Finished Basements
When concrete access is impossible:
1. Weld 2×2 inch steel tubing frame to chassis
2. Add diagonal bracing to prevent lateral movement
3. Cover with UL-listed 1/4-inch steel plate
4. Anchor stove directly to frame with 3/8-inch bolts
This method works best for homes on permanent foundations. Warning: Improper welding voids stove warranties—hire certified welders familiar with mobile home chassis materials.
Heat Shield and Floor Protection Setup

Wall Shield Installation Protocol
- Cut 28-gauge sheet metal or ceramic fiber board to coverage area
- Mount with 1-inch standoff spacers creating air gaps
- Secure using non-combustible fasteners (no wood blocking!)
- Verify shield surface stays below 200°F during test burns
Key fact: Each approved shield reduces required clearances by manufacturer-specified amounts (e.g., 24″ to 12″). Never exceed reduction limits—check stove manual for exact values.
Floor Protection Layout
Cut cement board to extend:
– 18 inches beyond stove sides/rear
– 8 inches beyond loading door swing
Seal joints with 500°F-rated silicone. Critical check: Ensure protection extends under stove legs—not just around perimeter. Mobile homes flex during transport; unprotected gaps cause sparks to reach combustibles.
Chimney System Installation: Roof Penetration Steps
Weatherproof Roof Flashing Process
- Cut roof opening using support box as template
- Remove shingles in 12-inch radius
- Install base flashing under shingle courses
- Position storm collar 2 inches above flashing
- Seal edges with roofing cement rated for 250°F
Avoid this mistake: Using standard bathroom vent flashing. Mobile home chimney kits require double-layer flashing with neoprene gaskets to handle structural movement.
Chimney Bracing for High Winds
For chimneys exceeding 5 feet above roof:
– Install guy wires at 45-degree angles
– Anchor to mobile home frame (not roof)
– Use 90-mph wind-rated tensioners
– Maintain 2-inch clearance from all combustibles
Pro Tip: Test bracing by applying 50-pound side pressure—chimney shouldn’t move more than 1/4 inch.
Outside Air Supply: Mandatory Direct Vent Setup
Combustion Air Duct Installation
- Drill 6-inch exterior wall hole minimum 3 feet from windows
- Insert fire-rated grommet through mobile home skin
- Connect insulated duct to stove air intake
- Seal all penetrations with high-temp caulk
Critical safety step: Test airflow by lighting incense near duct intake—smoke must be immediately drawn inward. Insufficient airflow causes deadly carbon monoxide buildup.
Post-Installation Safety Verification
Mandatory Pre-Use Tests
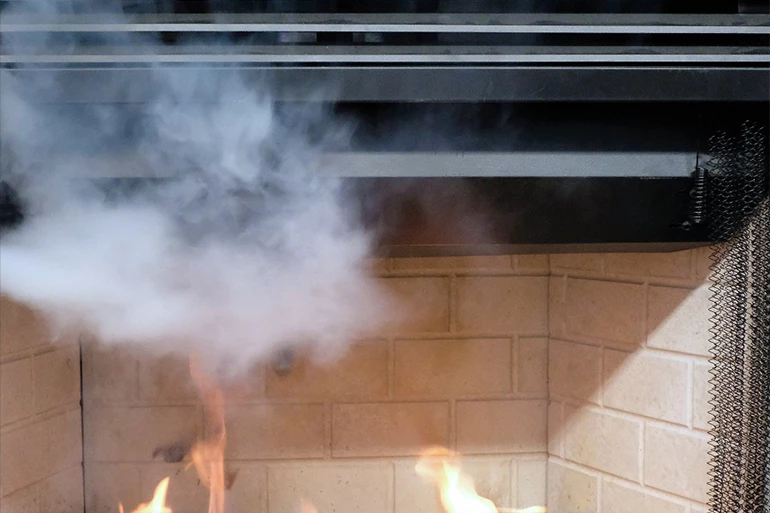
- Smoke test: Introduce smoke near stove joints—zero leakage allowed
- Draft verification: Hold lit incense near flue—smoke must rise straight up
- CO detector check: Confirm readings stay below 30 ppm during burn
- Emergency shutdown: Practice full damper closure in under 10 seconds
Document all tests with photos and time-stamped videos for insurance claims. Most denied claims lack this verification proof.
Cost-Saving Professional Involvement Strategy
Smart DIY vs. Pro Hiring Guide
| Task | DIY Cost | Pro Cost | When to Hire Pros |
|---|---|---|---|
| Floor reinforcement | $300 | $800 | Always hire for structural work |
| Chimney assembly | $200 | $600 | Hire if roof pitch > 4/12 |
| Final inspection prep | $0 | $350 | Mandatory for insurance |
| Total | $500 | $1,750 |
Key insight: Investing $350 in pre-inspection consultation prevents $2,000+ in failed inspection rework. Schedule this before purchasing materials to avoid incompatible components.
Maintenance Schedule Preventing Costly Failures
First-Year Critical Checks
- Weekly: Clean glass with approved cleaner (water on hot glass causes shattering)
- Monthly: Test door gasket compression—replace if compressed beyond 1/8 inch
- After 50 burns: Inspect fire bricks for cracks (replace immediately if damaged)
- Before winter: Verify chimney height exceeds roof by 3+ feet
Annual must-do: Certified chimney sweep inspection ($150-$300). Mobile home chimneys accumulate creosote 30% faster due to shorter flue runs. Skipping this risks chimney fires.
Your mobile home wood stove installation demands precision at every step—from verifying HUD certification labels to testing draft direction. Never skip professional structural assessments; a $300 pre-installation consult prevents insurance denial after a $20,000 fire. Focus on three non-negotiables: mobile-home-certified equipment, exact clearance measurements, and documented safety tests. When installed correctly, your wood stove will deliver reliable warmth for decades while actually increasing your mobile home’s resale value. The cozy winter nights are worth the meticulous preparation—just don’t cut corners on the critical safety steps that protect your greatest investment: your home.


