
Sticky humidity clinging to your skin even with the AC running? A whole-home dehumidifier solves this by maintaining ideal 30-50% humidity levels year-round, letting you raise thermostat settings by 6-8°F while feeling more comfortable. But how to install a whole home dehumidifier correctly separates effective systems from costly mistakes. Unlike portable units that only treat single rooms, these integrated systems work with your HVAC to dry every corner of your house—especially critical in humid climates like Atlanta where moisture lingers from March through October.
This guide breaks down the professional installation process so you can make informed decisions whether you’re researching DIY feasibility or preparing for contractor discussions. While licensed HVAC technicians must handle the complex 4-6 hour installation, understanding these steps ensures your $1,300-$2,800 investment delivers maximum comfort and energy savings. You’ll learn exactly where to place the unit, how to size it correctly, and which of three integration methods delivers optimal performance without straining your existing HVAC system.
Best Locations for Whole-Home Dehumidifier Installation
Your installation location directly impacts efficiency and maintenance access. Basements provide the simplest setup with natural structural support and gravity drainage options near existing furnaces. Position the unit within 10 feet of your HVAC system to minimize ductwork complexity. Utility rooms offer climate-controlled environments and easy filter access—ideal for homes without basements. Attics require reinforced mounting brackets and secondary drip pans but work when space is limited.
Critical Placement Mistakes to Avoid
- Crawl spaces with moisture issues: Accelerates corrosion and voids warranties
- Locations blocking HVAC service access: Technicians need 24-inch clearance around units
- Areas requiring condensate pumps: Gravity drainage is always more reliable
- Poorly ventilated closets: Units need 18 inches of clearance on all sides for airflow
Correctly Sizing Your Whole-Home Dehumidifier Unit
Oversized units short-cycle while undersized models run constantly—both waste energy. Start by measuring your home’s square footage and current humidity with a $15 hygrometer. Take readings at 9 AM and 3 PM for three days to account for daily fluctuations. Match your results to these capacity guidelines:
- 70-pint units: Homes under 1,800 sq ft in moderate humidity zones
- 90-pint units: 1,800-2,600 sq ft homes or high-humidity regions like coastal areas
- 120-pint units: 2,600+ sq ft homes or extreme climates with 60%+ year-round humidity
Pro Tip: In Atlanta’s extended humid season (March-October), choose the next size up. A 2,200 sq ft home performs better with a 90-pint unit than a borderline 70-pint model.
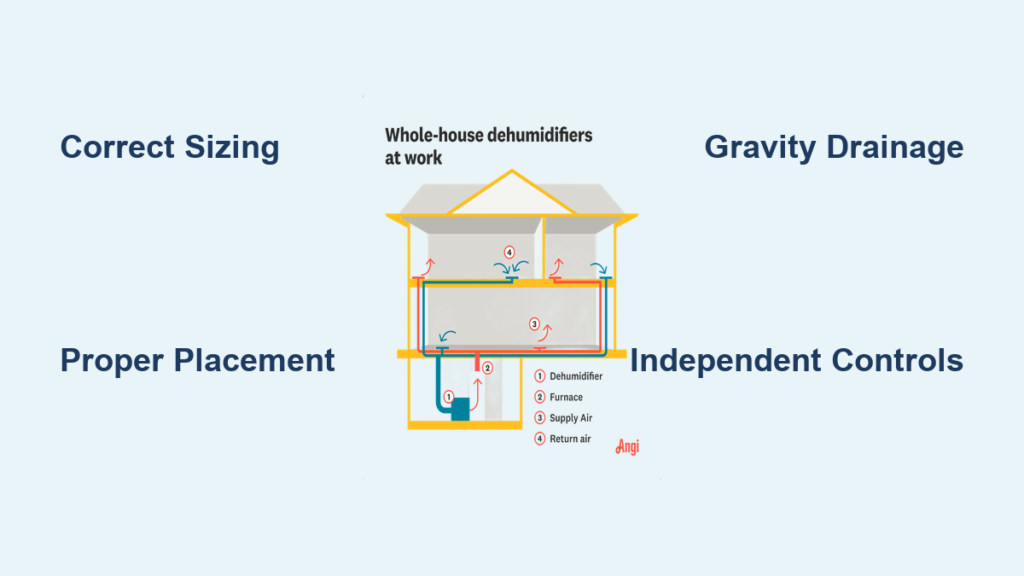
Method 1: Dedicated Return to Supply Installation (Most Efficient)

This premium approach delivers independent operation and 15-20% better efficiency by bypassing constant HVAC fan use.
Step 1: Install Central Return Grille
Cut a 6-10 inch opening in a ground-floor hallway ceiling—the optimal spot for capturing air from multiple rooms. Use insulated flex duct to connect this new grille to your dehumidifier inlet. Seal all joints with mastic to prevent air leaks that undermine performance.
Step 2: Connect to Supply Plenum
Route the dehumidifier discharge directly into your main supply ductwork. A bottom connection works if side access is blocked, but always install a backdraft damper to stop reverse airflow during AC cycles. This prevents moist air from re-entering your system.
Step 3: Configure Independent Controls
Set your humidistat to 35% RH initially—it’ll automatically activate the dehumidifier without running your HVAC fan. This independent operation is why homeowners report raising thermostat settings from 68°F to 78°F while maintaining comfort.
Method 2: Return-to-Return Installation (When Supply Access Is Limited)
Use this alternative when supply plenum access is impossible, but expect 5-10% lower efficiency due to continuous HVAC fan operation.
Critical Configuration Steps
- Install a dedicated return grille identical to Method 1
- Discharge dry air into the return duct before the air handler
- Add a backdraft damper to prevent reverse flow during cooling cycles
- Program controls to trigger HVAC fan operation whenever dehumidification runs
Performance Note: This method still achieves 45-50% humidity but reintroduces some moisture from the evaporator coil during AC operation.
Setting Up Reliable Condensate Drainage
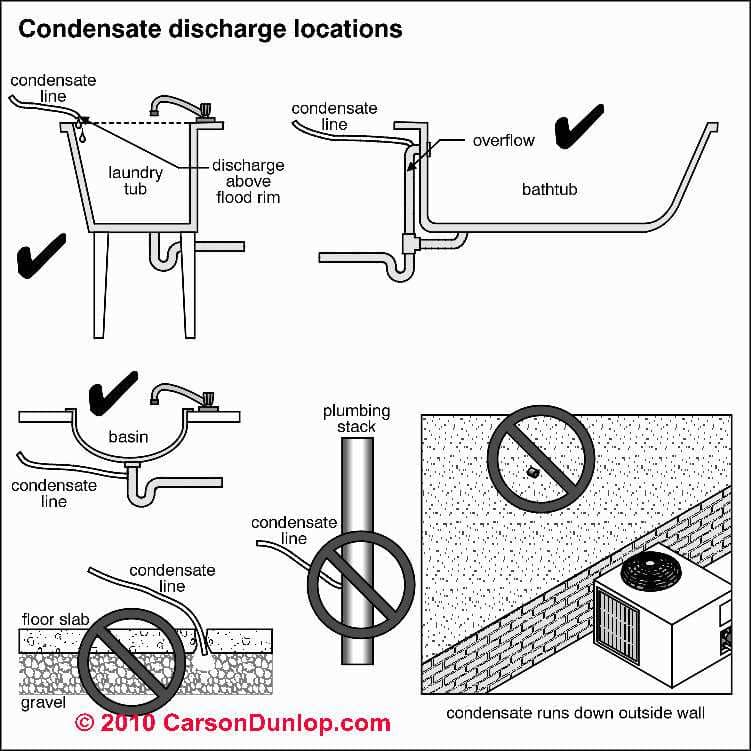
Gravity drainage prevents 90% of water-related failures. Run Schedule 40 PVC pipe with a consistent 1/4-inch-per-foot downward slope toward your floor drain or exterior discharge point. Always include these non-negotiable elements:
- P-trap installation: Prevents air infiltration that reduces efficiency
- Cleanout tee: Allows easy clearing of algae buildup every 6 months
- Secondary drip pan: Mandatory for attic installations with overflow sensor
When pumps become necessary, select models with built-in float switches that shut off the unit during overflows. Never connect drains directly to sewer lines—always maintain an air gap to prevent backflow contamination.
Electrical Wiring and Safety Protocols
Licensed technicians handle these high-risk connections, but you should verify:
- Dedicated circuit: Most units require a new 120V circuit (larger models need 240V)
- Disconnect switch: Must be mounted within sight of the unit for emergency shutoff
- Low-voltage wiring: 24V control wires run from the humidistat to the unit
Critical Safety Check: Power must be cut at the breaker before any wiring begins. Improper connections risk electrical fires and void manufacturer warranties.
Integrating Fresh Air Ventilation

Transform your dehumidifier into an ASHRAE 62.2-compliant ventilation system:
Ventilation Installation Sequence
- Run a 6-inch duct from an exterior wall to the unit’s fresh air intake
- Set temperature lockouts (40°F-90°F) to block extreme air during harsh weather
- Verify external air passes through the dehumidifier’s filter for purification
This setup delivers filtered fresh air while maintaining target humidity—eliminating the “stale air” problem in tightly sealed modern homes.
Testing and Verifying System Performance
Skip these checks and you’ll never know if your whole home dehumidifier installation succeeded:
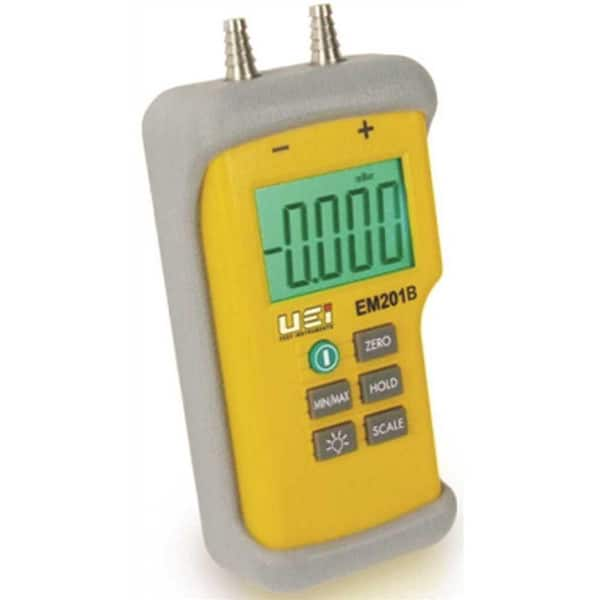
- Static pressure test: Use a manometer to confirm readings stay within HVAC manufacturer limits
- 24-hour humidity verification: Place hygrometers in multiple rooms—target 45-50% RH consistently
- Drainage flow test: Pour 1 quart of water into the drain pan to confirm unobstructed flow
Performance red flags: Humidity above 55% after 48 hours, condensate backup, or HVAC runtime exceeding pre-installation levels.
Essential Maintenance Schedule for Long-Term Operation
Prevent failures with this technician-approved routine:
- Filters: Replace every 2-3 months (monthly with pets)—clogged filters reduce capacity by 30%
- Drain lines: Inspect monthly for algae; flush with vinegar solution quarterly
- Coils: Schedule professional cleaning annually to prevent mold growth
- Humidistat calibration: Verify accuracy every spring using a reference hygrometer
Pro Tip: Store replacement filters and a small wet/dry vacuum near the unit for emergency drain line clogs.
Quick Fixes for Common Whole-Home Dehumidifier Problems
Address these issues before calling a technician:
High Humidity Persists? Check These First
- Humidistat setting: Confirm it’s at 35-45% (not accidentally set to 60%+)
- Drain line clog: Disconnect the condensate hose and blow air through it
- Filter condition: A visibly dirty filter restricts airflow by 50%
- Oversized AC unit: Common cause requiring dehumidifier compensation
Note: Uneven humidity between floors usually indicates disconnected ductwork—check basement ceiling returns first.
Maximizing Energy Efficiency After Installation
Leverage these settings to offset dehumidifier energy use:
- Thermostat adjustment: Maintain 76-78°F (up from 70°F) since dry air feels cooler
- Away-mode programming: Allow 50-55% humidity when unoccupied, dropping to 45% when home
- Winter humidity boost: Increase settings to 40-45% in cold months to prevent static electricity
Homeowners in humid zones typically see net energy savings of 10-15% after installation due to reduced AC runtime—proving how to install a whole home dehumidifier correctly transforms both comfort and utility bills.
Your whole-home dehumidifier installation delivers immediate relief from sticky air and long-term protection against mold and structural damage. While professional installation is non-negotiable for safety and performance, understanding these steps ensures your system operates at peak efficiency for 15+ years. Within days of activation, you’ll notice consistent comfort even during Atlanta’s muggy springs and falls—no more clammy sheets or musty closets. Start monitoring humidity levels today, and prepare to experience your home as a true moisture-controlled sanctuary.


