
That first harvest of homegrown peanuts—fresh from your soil to your snack bowl—beats store-bought every time. Unlike typical garden crops, peanuts develop underground after yellow flowers send pegs burrowing into the soil. This unique growth cycle requires specific timing and techniques, but with the right approach, even balcony gardeners can yield 50-100 nuts per plant. Forget grocery store peanuts; they’re roasted and won’t sprout. Instead, follow this proven roadmap to cultivate your own protein-packed treasures in just 100-150 days. You’ll learn exactly when to plant, how to spot critical growth stages, and why calcium matters more than nitrogen for plump pods.
Pick Your Perfect Peanut Variety
Virginia Peanuts: Giant Kernels for Roasting
Choose Virginia types like ‘Virginia Jumbo’ when you want showstopper peanuts for cracking and roasting. These demand 140 frost-free days and need 18-24 inches between plants to develop their massive pods. Expect 50-60 pods per plant, each holding two oversized kernels. Northern gardeners succeed by starting seeds indoors 6-8 weeks before last frost and using black plastic mulch to warm soil. Pro tip: Space wider in clay soil—compaction stunts these giants.
Runner Varieties: High-Yield Workhorses
‘Georgia Green’ delivers maximum harvests with smaller, oil-rich kernels ideal for homemade peanut butter. Maturing in 130 days, these spread aggressively with 12-18 inch spacing. Their dense foliage naturally shades out weeds after 60 days—cutting your weeding time in half. Plant Runner types in double rows 12 inches apart to maximize garden real estate. Warning: Avoid nitrogen-heavy fertilizers; they’ll trigger leafy growth but empty pods.
Spanish Peanuts: Fastest Harvest for Short Seasons
If frost arrives early, Spanish varieties like ‘Tamspan 90’ save your season with maturity in just 100 days. Their small, high-oil kernels pack intense flavor perfect for roasting. Plant them 8-12 inches apart in tight grids—square foot gardeners fit four plants per square. Critical step: Add gypsum at flowering; Spanish types suffer “hollow heart” (crumbly kernels) without calcium.
Valencia Peanuts: Sweet Treats for Fresh Eating
‘Tennessee Red’ offers sugary sweetness with three to four red-skinned kernels per pod—ideal for boiling or trail mixes. These mature in 110 days and thrive with 12-15 inch spacing. Unlike other types, Valencia peanuts often roast in-shell. Pro tip: Grow them with corn; the taller stalks provide afternoon shade during summer heat spikes.
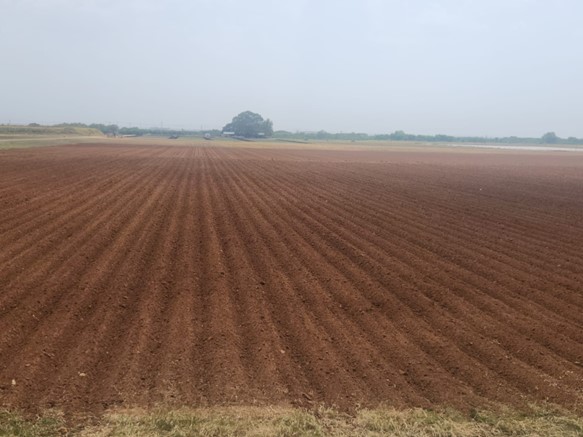
Create Loose, Sandy Soil Beds
Skip Nitrogen—Boost Calcium Instead
Peanuts fix their own nitrogen through root bacteria, so skip standard fertilizers. Instead, mix 1 pound of gypsum per 10 feet of row into your soil before planting. This delivers essential calcium that prevents “pops” (empty pods) and ensures full kernel development. Warning: Never use lime—it raises pH above the ideal 5.8-6.2 range and blocks calcium uptake.
Break Up Clay with Sand and Compost
Heavy soil stops peanut pegs cold. For clay gardens, till 8-10 inches deep and blend in coarse sand at a 2:1 ratio with native soil. Top with 2-3 inches of compost to improve drainage. Build raised rows 6-8 inches high—this extra depth gives pegs room to burrow. Visual cue: Squeeze damp soil; it should crumble like shortbread, not form a muddy ball.
Plant Seeds at the Right Time and Depth

Use Certified Seed—Never Grocery Store Peanuts
Roasted peanuts won’t sprout. Buy certified disease-free seed like ‘OLin’ or ‘Tifguard’ online. Shell seeds 24 hours before planting and dust with Rhizobium inoculant to boost nitrogen fixation. Pro tip: Soak seeds in lukewarm water for 2 hours to speed germination—but skip this if soil is already warm.
Direct Sow When Soil Hits 65°F
Plant seeds 1.5-2 inches deep once soil consistently reaches 65°F. Space Spanish types 8 inches apart in rows 24 inches apart; Virginia types need 18 inches in rows 36 inches apart. Critical timing: Cold soil below 60°F causes rot. Use a soil thermometer—don’t guess.
Container Success in 5-Gallon Buckets
Grow 2-3 plants in 5-gallon fabric pots filled with 2 parts potting mix, 1 part compost, and 1 part perlite. Place containers where they get 6-8 hours of sun. Water daily in summer heat—container soil dries fast. Harvest hack: Tip pots onto tarps for 100% pod recovery.
Water Like a Peanut Pro
Water Heavily During Flowering (60-80 Days)
Peanuts need 1-1.5 inches of water weekly, but timing is critical. Keep soil moist for the first 21 days after planting, then double down during flowering (60-80 days). This is when pegs form pods underground. Reduce watering 10-14 days before harvest to concentrate flavor. Warning: Wet leaves invite leaf spot disease—water at soil level with drip irrigation or soaker hoses.
Stop Watering 2 Weeks Before Digging
Overly wet soil during harvest causes mold. Check weather forecasts; stop watering when leaves start yellowing (7-14 days before harvest). Visual cue: Mature pods have darkened interiors and prominent veins. If rain is coming, harvest early—waiting risks sprouting in the ground.
Fight Pests Without Chemicals
Block Cutworms with Cardboard Collars
These pests sever seedlings overnight. Protect plants by wrapping cardboard 2 inches deep around stems like mini-fences. Pro tip: Sink collars 1 inch into soil to block underground entry.
Stop Aphids with Ladybug Armies
Aphids cluster under leaves, causing curling and virus spread. Release ladybugs or lacewings early in the season—they eat 50 aphids daily. Natural spray: Mix 1 teaspoon dish soap with 1 quart water; spray undersides of leaves weekly.
Harvest at Peak Maturity
Dig When Leaves Turn Yellow (100-150 Days)
Count days from planting: Spanish types mature at 100 days, Virginia at 140. When leaves yellow and drop, it’s time. Kernel test: Open a pod—mature peanuts feel firm and fill the shell.
Lift Plants with a Garden Fork
Insert a fork 6-8 inches from the base to loosen soil. Lift gently while shaking off dirt—never pull by the stems. Critical: Check 4-6 inches deep; deeper-set Virginia pods hide in loose soil.
Cure Peanuts for Maximum Flavor
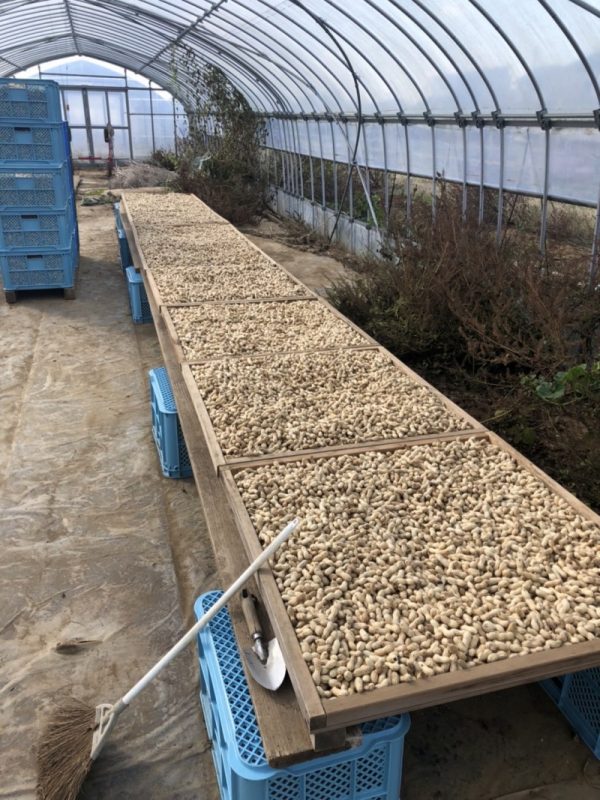
Dry Pods for 2-4 Weeks Indoors
Hang plants upside-down in a warm, airy garage (75-85°F). Pods are ready when they rattle and kernels snap cleanly when bitten. Moisture check: Aim for 10% moisture—use a meter or wait until shells feel papery.
Never Store Wet Peanuts
Mold ruins harvests. If rain threatens during field curing, cover plants with tarps—but move indoors if damp for over 12 hours. Warning: Skipping curing causes bland, rubbery nuts.
Store Harvests for Year-Long Freshness
Freeze Shelled Peanuts for 2 Years
Blanch shelled nuts 3-5 minutes, dry thoroughly, then vacuum-seal. Freeze at 0°F for crisp, fresh flavor up to 24 months. Pro tip: Label bags with harvest date—peanuts lose viability after 2 years even frozen.
Keep Unshelled Nuts in Breathable Bags
Unshelled peanuts last 3x longer than shelled. Store in burlap or mesh bags at 40-50°F with 60-70% humidity. Never use plastic: Trapped moisture causes mold. Check monthly for musty smells.
Growing peanuts transforms ordinary soil into a treasure chest of protein-packed nuts. With Virginia types yielding 50+ pods per plant and Spanish varieties maturing in just 100 days, your first harvest is closer than you think. Remember the golden rules: plant in loose, sandy soil warmed to 65°F, boost calcium with gypsum at flowering, and harvest within 14 days of leaf yellowing. Start with a single 10-foot row of ‘Tennessee Red’ for sweet, fresh-eating peanuts, then expand to ‘Virginia Jumbo’ for roasting. Within two seasons, you’ll master the underground journey from flower to harvest—and never settle for store-bought again.


