
You’re getting changed in your bedroom when you notice a tiny red light blinking from the smoke detector. Your heart races—could someone be watching? With 47% of Americans discovering hidden cameras in vacation rentals and 64% admitting they don’t know how to check, this fear is more common than you think. Whether you’re in a rental, hotel, or your own home, knowing how to find spy cameras at home protects your privacy and peace of mind.
This comprehensive guide walks you through proven detection methods that security professionals use daily. You’ll learn simple techniques using just your smartphone, plus advanced strategies with specialized equipment. By the end, you’ll confidently sweep any space and know exactly what to do if you find something suspicious.
Spot Hidden Cameras in Common Household Objects
Spy cameras hide in everyday items you’d never suspect. The most convincing disguises blend seamlessly into your environment while maintaining a clear view of private areas. Knowing exactly where to look saves critical time during your sweep.
Top hiding spots with specific red flags:
– Smoke detectors with misaligned vents or extra LEDs beyond standard safety features
– Alarm clocks featuring second display holes where none should exist
– USB wall chargers with tiny holes positioned between ports
– Power outlets showing misaligned screws or micro-holes in wall plates
– Picture frames facing beds with unusual thickness behind the glass
– Screws in furniture with off-color heads and drilled center dots
Pro tip: Pick up and rotate suspicious objects—hidden cameras often feel heavier due to internal components. Pay special attention to any object with direct line of sight to bedrooms, bathrooms, or changing areas. Check toilet brushes, shampoo bottles, and stuffed toys in bathrooms and children’s rooms, as these frequently conceal tiny lenses under labels or mesh.
Perform a Flashlight Sweep for Lens Reflections in Minutes

A simple flashlight becomes your most powerful detection tool in dark conditions. Camera lenses reflect light uniquely, creating telltale glints you can’t miss with proper technique.
Perfect your flashlight sweep:
– Turn off all lights and close curtains completely
– Hold flashlight 12-20 inches from surfaces
– Sweep in slow, overlapping arcs—lens reflections persist while legitimate reflections disappear
– Check multiple angles for persistent pin-point reflections
– Focus on electrical fixtures, vents, and objects facing private zones
Best flashlights for detection: High-lumen tactical flashlights (500+ lumens) work better than phone torches for thorough sweeps. Use strobe mode to distinguish lens reflections from ordinary shiny surfaces. This method catches cameras even when powered off, making it essential for your initial inspection.
Use Your Smartphone to Detect Infrared Spy Cameras
Your phone’s front camera can spot infrared LEDs invisible to the naked eye. This technique takes 30 seconds and works for night-vision cameras commonly used for 24/7 surveillance.
Quick detection steps:
1. Turn off all lights completely
2. Open your camera app (use front camera only—rear cameras have IR filters)
3. Disable flash and auto-focus
4. Scan the room slowly—IR LEDs appear as bright purple/white dots
5. Mark locations with sticky notes for closer inspection
Critical limitations: This method won’t work with rear cameras, gives false positives from TV remotes, and misses cameras without night vision. Always combine this with other detection techniques for comprehensive coverage.
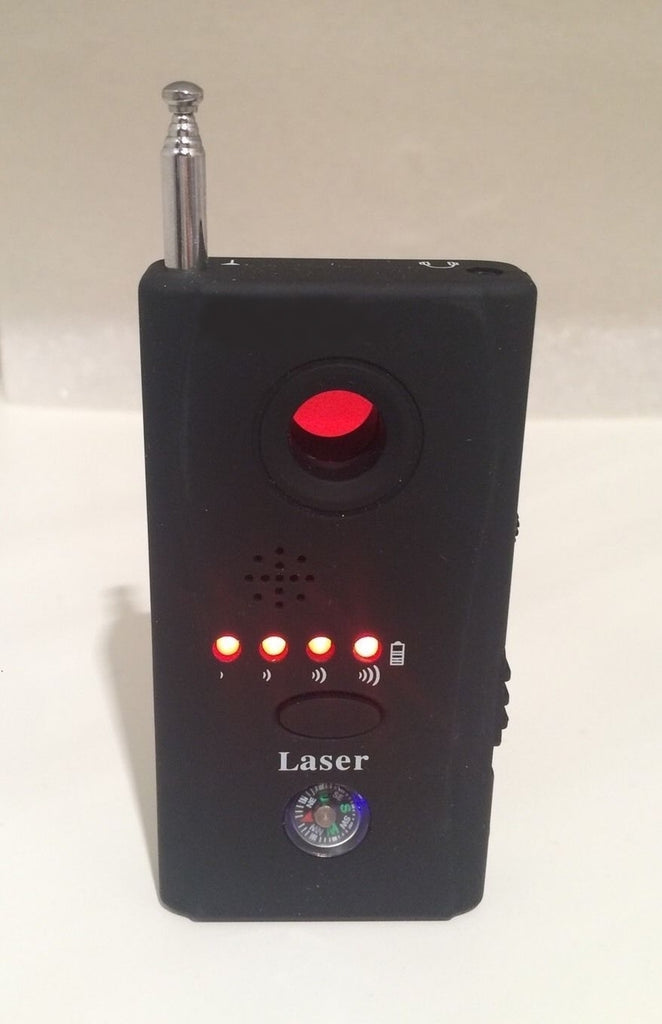
Conduct a Professional RF Detector Sweep Protocol
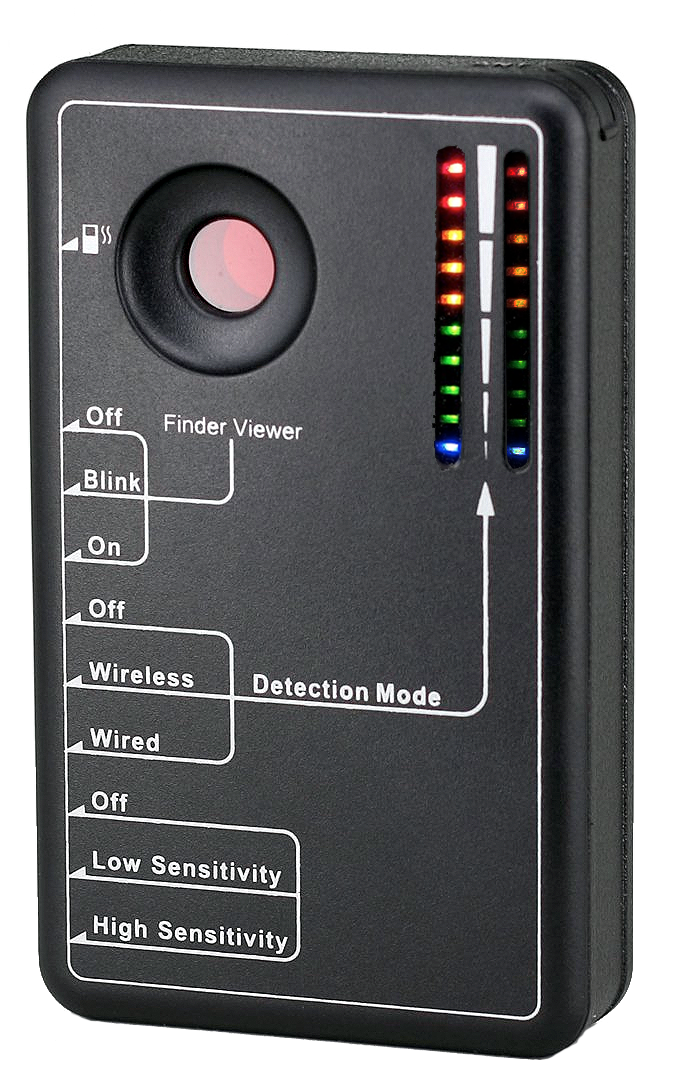
Radio frequency detectors pick up wireless camera transmissions. Even basic models ($25-$35) cover frequencies used by most spy cameras, while professional units provide spectrum analysis for precise identification.
Effective sweep sequence:
– Power down WiFi routers and baby monitors first
– Set detector to maximum sensitivity
– Scan methodically: ceiling → walls → furniture → outlets
– Mark signal spikes with painter’s tape
– Reduce sensitivity and rescan marked areas
– Switch to lens-finder mode for visual confirmation
Pro tip: Move slowly—30 seconds per square foot ensures nothing is missed. Entry-level detectors like the JMDHKK K18 work well for basic detection, while models like the SpyHawk Pro offer vibration mode and signal strength graphs for more precise location.
Scan Your Wi-Fi Network for Unauthorized Camera Devices
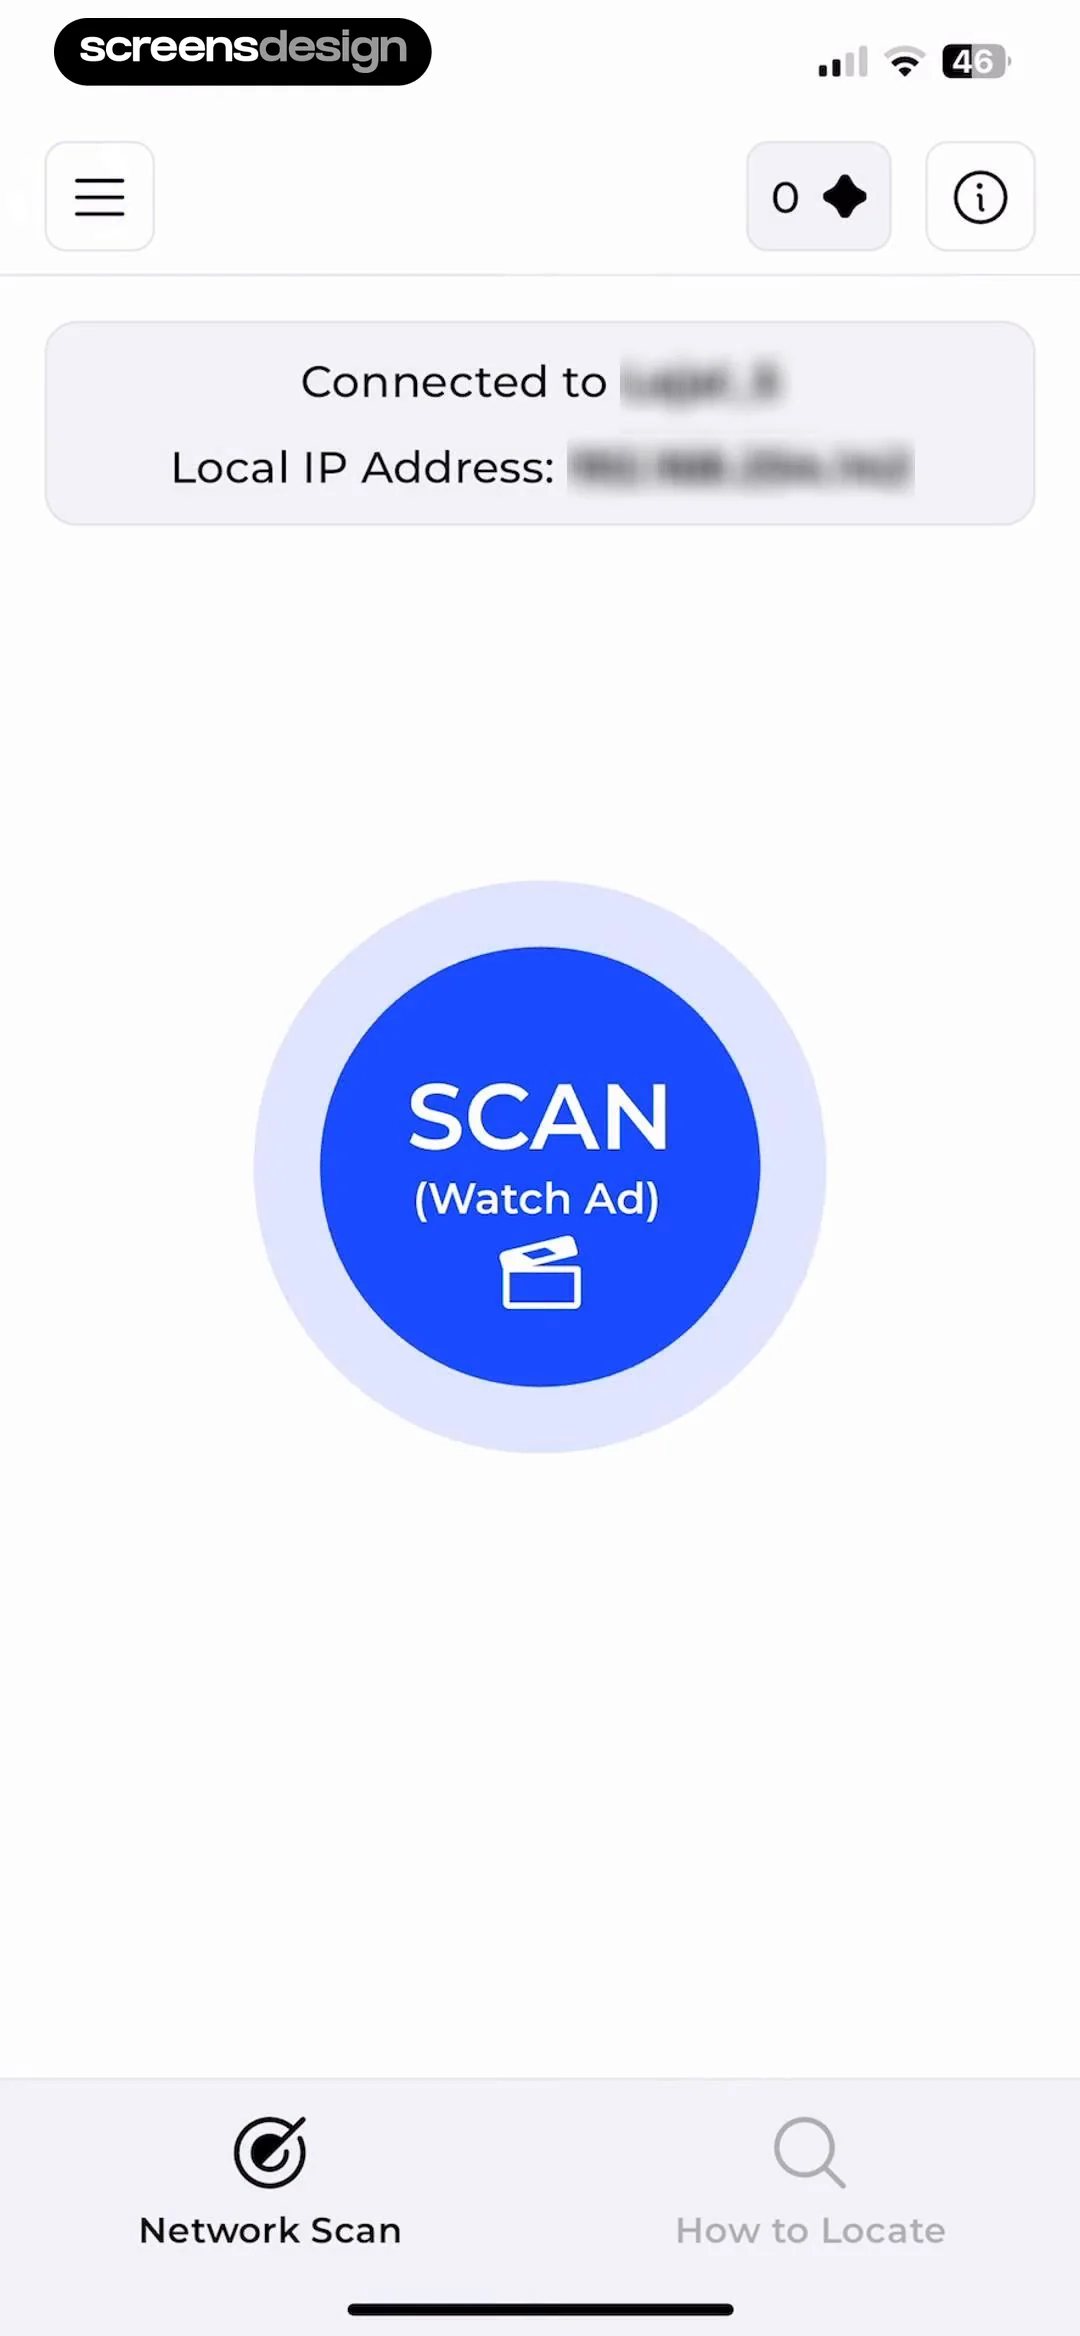
Hidden cameras often connect to your Wi-Fi. Network scanning reveals unauthorized devices in under two minutes using tools you already have.
Router admin method:
– Access 192.168.1.1 or 192.168.0.1
– Check DHCP table for unknown devices
– Look for vendor codes: Foscam, Dahua, Hikvision, ESP32-CAM
– Block suspicious MAC addresses immediately
Mobile app alternatives:
– Fing (free): Identifies device types and vendors
– Net Analyzer: Shows signal strength for triangulation
– Peek App: Combines AI lens detection with network scanning
Signal triangulation trick: Walk closer to suspected devices while watching signal strength increase on your scanning app. This works for cameras transmitting wirelessly, even if they’re hidden behind walls or furniture.
Expose Two-Way Mirrors Hiding Surveillance Equipment
Two-way mirrors hide cameras in seemingly innocent reflective surfaces. These two tests expose them instantly with household items.
Fingernail test:
– Press fingertip against mirror surface
– Normal mirror: visible gap between finger and reflection
– Two-way mirror: finger and reflection touch with no gap
Flashlight confirmation:
– Shine torch at eye level toward mirror
– Normal mirror: light reflects directly back
– Two-way mirror: light passes through, creating translucent glow behind
Pro tip: Test mirrors in bathrooms and changing areas thoroughly. Tap the surface—two-way mirrors often sound hollow compared to solid-backed regular mirrors. Pay special attention to full-length mirrors in bedrooms and dressing areas.
Execute a Complete Room Sweep in 15 Minutes
Follow this proven workflow for complete coverage in any space. The entire process takes 15-20 minutes once you’re familiar with the steps.
Phase 1: Setup (2 minutes)
– Power down non-essential electronics
– Close curtains, turn off lights
– Gather flashlight, phone, RF detector
Phase 2: Physical inspection (5 minutes)
– Inspect ceilings and smoke detectors
– Check every object facing private areas
– Look for lenses, LEDs, and mismatched screws
Phase 3: Light detection (3 minutes)
– Darken room completely
– Sweep flashlight for lens glints
– Mark suspicious reflections
Phase 4: IR scan (2 minutes)
– Use phone camera for IR LEDs
– Scan low and high areas
– Note purple/white dots on screen
Phase 5: RF sweep (5 minutes)
– Turn on detector at high sensitivity
– Methodical room coverage
– Confirm with lens-finder mode
Take Proper Action When You Discover a Hidden Camera
Discovering a hidden camera requires immediate, careful action to preserve evidence while protecting your privacy.
Immediate steps:
1. Don’t touch or remove the device—fingerprints matter
2. Photograph from multiple angles including power connections
3. Cover the lens with opaque tape or towel if needed
4. Document exact placement with measurements
5. Preserve the scene—avoid moving furniture
Who to contact:
– Law enforcement: 911 for immediate threats, non-emergency for evidence
– Property managers: Through app messaging or direct contact
– Platforms: Use “Report safety issue” for Airbnb, Vrbo, Booking.com
– Hotel security: Front desk or corporate security team
Evidence to provide:
– Exact address and room number
– Timestamp of discovery
– Multiple photos and videos
– Any booking confirmations or communications
Build Your Essential Detection Kit by Budget
Create a personalized detection toolkit based on your needs and budget. Even basic gear dramatically improves your detection success.
Budget setup ($30 total):
– High-lumen flashlight ($15)
– RF detector with lens finder ($25)
Travel kit ($100):
– Compact RF detector (SpyHawk Pro)
– Fing app subscription
– Portable flashlight
Professional kit ($400):
– Recon-IR Plus detector
– FLIR thermal camera
– Peek app premium subscription
Pro tip: Store your RF detector with batteries removed to avoid degradation. For frequent travelers, the JMDHKK K18 offers the best value as a compact, reliable entry-level detector.
Bottom line: Hidden cameras threaten your privacy, but systematic detection puts you back in control. Start with the free flashlight and phone methods, then add RF detection for comprehensive coverage. Remember—if you find something suspicious, document everything before taking action. Your privacy is worth protecting, and these techniques ensure no camera stays hidden from your trained eye. Perform quarterly sweeps in your home and always sweep rental properties immediately upon arrival—your peace of mind depends on it.


