
Imagine transforming your wedding bouquet into a permanent keepsake or capturing summer’s garden beauty to enjoy all winter. Learning how to dry flowers at home gives you the power to preserve nature’s fleeting beauty with simple techniques anyone can master. Whether you’re working with delicate roses from your garden or vibrant sunflowers from the farmer’s market, this guide reveals the exact methods professionals use—no expensive equipment required. You’ll discover which flowers dry best with each technique and avoid the common mistakes that cause mold, fading, and collapsed petals.
Air Dry Flowers Without Special Equipment
Pick Flowers That Won’t Mold During Drying
Not all blooms survive air drying equally. For foolproof results, choose lavender, statice, or baby’s breath—they retain shape and color beautifully when hung upside down. Roses and peonies work moderately well but lose some volume, so harvest them when 75-85% open for best results. Avoid moisture-heavy flowers like orchids, tulips, or thick-petaled blooms that will rot before drying completely. Harvest in the morning after dew evaporates but before midday heat stresses the plants.
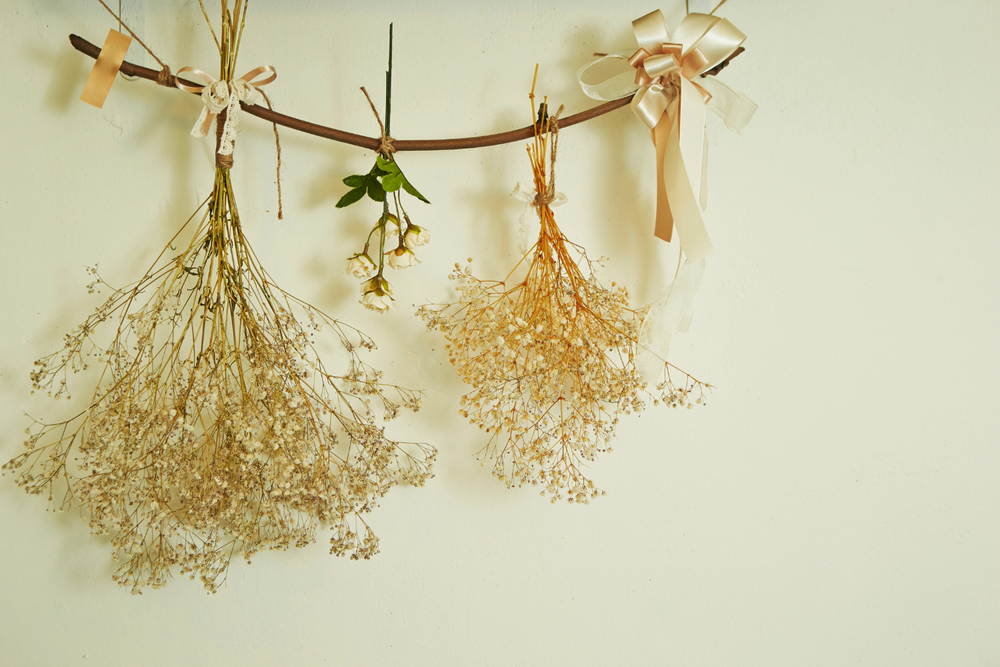
Perfect Hanging Technique for Crisp Results

Strip all leaves from stems below your binding point—these moisture traps cause mold that spreads to blooms. Group 6-10 similar flowers together and secure with rubber bands (they tighten as stems shrink during drying). Hang bundles upside down in a dark closet or attic with consistent 65-75°F temperatures and humidity below 50%. Critical mistake to avoid: placing near windows—sunlight bleaches colors within days. Check dryness after one week by gently squeezing a bloom—it should feel papery and crisp with no soft spots.
Know Exactly When Flowers Are Fully Dry
Drying times vary significantly by flower type:
– Lavender: 7-10 days (harvest when 1/3 of florets open)
– Roses: 10-14 days (remove thorns before hanging)
– Baby’s breath: 5-7 days
– Hydrangeas: 2-3 weeks (they develop lovely vintage tones)
Gently shake stems to check for loose petals—a sign they’re ready. Store dried flowers away from direct light immediately after drying to prevent fading.
Press Flowers Flat in Minutes or Weeks
Speed Up Pressing With Your Microwave
Skip the month-long book method and get vibrant flat flowers in minutes using your microwave. Place blooms between two paper towels inside a microwave-safe flower press or between ceramic tiles. Heat at 50% power for 30-60 seconds, checking between intervals. Pro tip: cover with another paper towel to absorb steam and prevent scorching. This works best for small, thin flowers like pansies or daisies—thicker blooms need silica gel instead.
Traditional Book Pressing Done Right
For zero-cost pressing, sandwich flowers face-down between coffee filters inside heavy books. Stack 20-30 pounds of additional weight on top and place in a dry location. Change the absorbent papers every 2-3 days to prevent moisture damage. While slow (2-4 weeks), this method produces perfect specimens for greeting cards or framed art. Always press flowers at their peak—slightly opened buds won’t expand further during pressing.
Silica Gel Method for 3D Preservation
Container Setup That Prevents Crushed Petals

Fill an airtight plastic container with 1-inch layer of silica gel crystals. Trim flower stems to 1-2 inches and stand blooms upright in the gel. Gently pour more gel around and over flowers until completely covered—this support prevents shape collapse. Seal the container and store at 70-75°F. Critical step: don’t shake the container—this disturbs delicate petals. Silica gel with color-changing indicator crystals shows when it’s saturated and needs reactivation.
Budget Alternatives That Work Nearly as Well
When professional silica gel isn’t available, try these effective substitutes:
– Borax-cornmeal mix: 1 part borax to 2 parts cornmeal (best for roses)
– Unscented clay kitty litter: Cheap but may transfer color
– Oven-dried sand: Heat fine sand at 200°F for 30 minutes first
These alternatives cost 70% less than silica gel but require more drying time. Store leftover desiccants in sealed containers—they reuse 3-5 times.
Oven and Dehydrator Methods for Fast Results
Oven Drying Without Burning Petals
Preheat your oven to the lowest setting (170-200°F). Place flowers on parchment-lined baking sheets with space between blooms. Prop the oven door open 2-3 inches using a wooden spoon to release moisture. Dry for 2-4 hours, checking every 30 minutes after the first hour. Warning: flowers scorch quickly—remove when petals feel crisp but before any browning appears. This method works best for sturdy blooms like marigolds.
Dehydrator Advantage for Consistent Color
Set your food dehydrator to 95-115°F for gentle, even drying. Arrange flowers in single layers on trays without overlapping. Rotate trays every 2 hours for uniform results. Most flowers dry completely in 4-8 hours with minimal color loss—significantly faster than air drying. Hydrangeas and delicate roses particularly benefit from this controlled environment. Clean trays thoroughly after use to prevent cross-contamination.
Prevent Common Drying Disasters
Stop Mold Before It Ruins Your Bouquet
Mold appears when humidity exceeds 60% during drying. Combat this by:
– Adding a small fan for air circulation (not blowing directly on flowers)
– Placing moisture absorbers like silica packets near drying areas
– Discarding any moldy flowers immediately—they spread spores rapidly
Test humidity with an inexpensive hygrometer from any hardware store. If mold appears, gently brush affected areas with 70% isopropyl alcohol using a soft paintbrush.
Fix Color Fading With Simple Solutions
Accept that some color change is natural—many flowers develop beautiful antique tones. For significant fading:
– Spray with UV-protective floral sealant before display
– Store away from direct sunlight and fluorescent lighting
– Refresh faded blooms with fabric dye or acrylic floral paints
White flowers particularly benefit from a 5-10 minute soak in diluted bleach (1:10 ratio) before drying to maintain brightness.
Store Dried Flowers to Last Years
Long-Term Storage That Prevents Crumbling
Keep dried arrangements in dark, climate-controlled spaces below 70°F with humidity under 50%. Use acid-free tissue paper in archival boxes—never plastic bags which trap moisture. Add silica gel packets to containers for extra protection. Pro tip: lightly mist arrangements with hairspray to reduce petal shedding during handling. Dust displays every few months with a soft brush or cool hairdryer on lowest setting.
Realistic Longevity Expectations by Method
- Air dried: 1-3 years (lavender, strawflowers last longest)
- Silica gel dried: 2-5 years (roses maintain shape best)
- Microwave pressed: 1-2 years (ideal for craft projects)
- Oven dried: 6 months-2 years (higher heat reduces longevity)
Wedding bouquets preserved at home typically last 2-3 years—70% less expensive than professional $150-$400 services.
Choose the Right Method for Your Flowers
Air drying works best for: lavender bouquets, herbs, baby’s breath, and statice
Silica gel shines with: roses, peonies, and delicate wedding flowers needing 3D preservation
Pressing excels for: creating bookmarks, greeting cards, and framed botanical art
Oven/dehydrator wins when: you need results in hours rather than weeks
Start with inexpensive air drying for your first attempt—most garden flowers respond beautifully with zero investment. Once you’ve mastered the basics, experiment with silica gel for show-stopping preserved roses. Within weeks, you’ll transform seasonal blooms into permanent treasures that capture nature’s beauty long after fresh flowers would have wilted away. Your dried creations will bring garden charm to your home year-round while saving hundreds compared to store-bought preserved arrangements.


