
Tired of foundation clinging to peach fuzz every morning? You’re not alone—over 70% of women struggle with vellus hair that sabotages smooth makeup application and serum absorption. Professional dermaplaning sessions cost $150-$250 each, but you can achieve identical glass-skin results at home for under $10 per treatment. This isn’t just DIY hair removal; it’s surgical-grade exfoliation that removes dead skin cells while eliminating fine facial hair without triggering stubble rebound.
When done correctly, how to dermaplane face at home delivers immediate radiance by revealing fresh skin cells beneath the dull surface layer. In this guide, you’ll discover the exact dermatologist-approved technique adapted for home use, including the critical 45-degree blade angle that prevents nicks and the post-care routine that extends results for 3-4 weeks. Forget expensive gadgets—your path to baby-soft skin starts with understanding proper tool selection and stroke direction.
Why Dermaplaning Beats Shaving for Peach Fuzz Removal
Dermaplaning surgically removes vellus hair and dead skin cells in one motion, unlike traditional shaving that only cuts hair at the surface. The blade’s 45-degree angle glides across dry skin, lifting peach fuzz by the root while exfoliating the top epidermal layer. This dual action prevents the coarse regrowth associated with razors since vellus hair remains fine when it grows back.
Immediate Benefits You’ll Notice
- Flawless makeup application as foundation stops catching on hair follicles
- 20% deeper serum penetration by removing the barrier of dead skin cells
- Brighter complexion within 24 hours from surface cell removal
- Reduced appearance of fine lines through physical exfoliation
- No stubble rebound since vellus hair texture doesn’t change
Who Should Avoid Home Dermaplaning
- Active cystic acne or inflamed breakouts
- Rosacea or eczema flare-ups
- Recent chemical peels (within 14 days)
- Accutane use (within 6 months)
- Sunburned or cut skin
- Thin, sensitive skin types (over 60)
Must-Have Tools for Safe Home Dermaplaning (No Expensive Kits Needed)

Skip the $200 devices—dermatologists confirm basic tools deliver professional results. The key is using a single-blade tool with a safety guard to prevent accidental cuts while maintaining surgical precision.
Top Tool Options by Budget
- $4 Tinkle Razors: Best for beginners with built-in safety covers
- $6 Schick Touch-Up: Ergonomic handle for precise lip/chin work
- $199 Dermaflash Luxe: Electric option with vibration control (overkill for most)
Pro Tip: Tinkle razors outperform premium devices for 95% of users. Replace blades every 3-4 uses—dull blades cause tugging.
Critical Supporting Products
- 70% isopropyl alcohol: Sterilizes blades pre-use (never skip)
- Gentle cleanser: Cetaphil or Vanicream only (no exfoliants)
- Hyaluronic acid serum: The Ordinary or Vichy for instant hydration
- SPF 50 sunscreen: EltaMD UV Clear is non-negotiable post-treatment
Avoid magnifying mirrors—they encourage over-scraping. Natural daylight or an LED ring light provides ideal visibility.
Critical Pre-Dermaplaning Prep: Timing and Skin Checklist
Timing determines success. Never dermaplane during hormonal breakouts (days 1-5 of your period) when skin sensitivity peaks. Evening treatments allow overnight recovery while avoiding sun exposure risks.
5-Step Skin Prep Protocol
- Double cleanse for 60 seconds with non-foaming cleanser
- Pat skin bone-dry with microfiber towel (damp skin = tugging)
- Sterilize blade with alcohol wipe, air-dry 30 seconds
- Section hair completely using satin hair ties
- Take natural-light before photo to track progress
Red Flag: Skip treatment if you see active pimples, redness, or irritation. Wait 48 hours after retinol use.
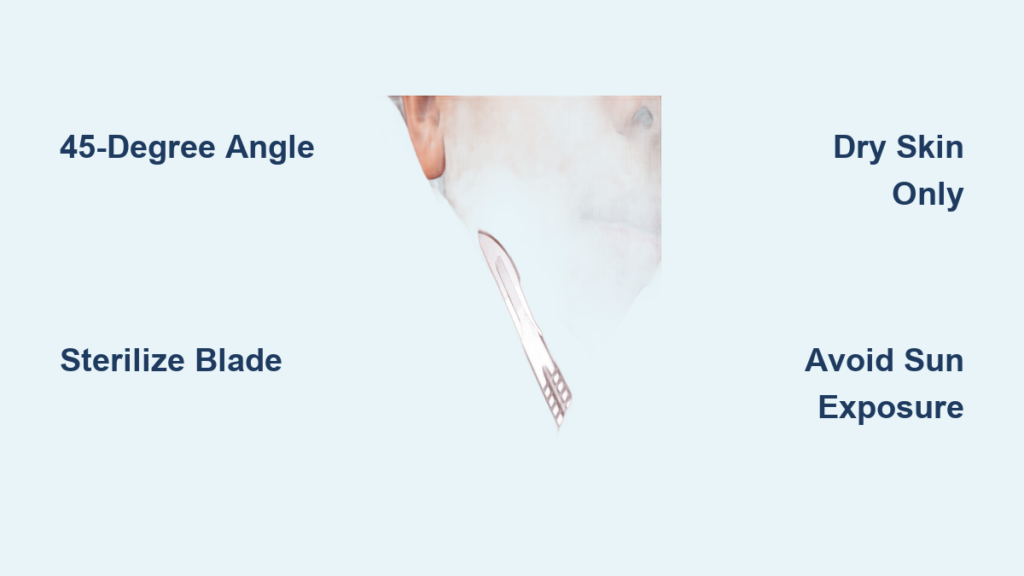
The 45-Degree Angle Technique That Prevents Cuts
Your blade angle makes or breaks the treatment. Hold the tool like a pencil at exactly 45 degrees—steeper angles cut skin, flatter angles miss hair. Dermatologists emphasize feather-light pressure; the blade’s sharpness does all the work.
Face Mapping: Stroke Guide for Each Zone
Forehead: Start between brows, use 1-inch downward strokes toward temples
Cheeks: Begin at sideburns, move toward nose in overlapping strokes
Upper Lip: Short ½-inch strokes downward from nose to lip line
Chin: Work from center outward toward jawline edges
Neck: Gentle downward strokes following natural contours
Pressure Test: Place blade on skin—if it moves without pressure, it’s correct. Any pain means stop immediately.
First 24 Hours: Post-Dermaplaning Care to Avoid Redness

Your skin is 30% more sun-sensitive after treatment. Skip these for 24 hours:
– Makeup
– Retinol or AHAs/BHAs
– Exercise/sweating
– Hot showers or steam
– Direct sun exposure
Recovery Routine
- Rinse with cool water only (no cleanser)
- Apply hyaluronic acid to damp skin
- Layer gentle moisturizer (CeraVe PM)
- Wear SPF 50+ every 2 hours if outdoors
Resume retinol on Day 3 and chemical exfoliants on Day 7 if no irritation occurs.
5 Safety Rules That Prevent Infections and Scarring
One contaminated blade can cause serious infection. Follow these non-negotiable protocols:
- Never touch blade edge with fingers (use tweezers for handling)
- Replace blades monthly even if unused (moisture dulls edges)
- Work in clean space with closed windows to prevent dust contamination
- Store tools dry in sealed container with silica gel packets
- Stop immediately if you see bleeding beyond 5 minutes or spreading redness
Warning Sign: Persistent redness after 2 hours requires hydrocortisone cream and dermatologist consultation.
Fixing Common Dermaplaning Mistakes (Razor Burn, Missed Spots)
Uneven Results Solution
- Missed spots: Work in 1-inch grid sections with bright lighting
- Tugging sensation: Blade is dull or skin isn’t completely dry
- Breakouts: Sanitize tools with alcohol before/after use
Razor Burn Emergency Fix
- Apply pure aloe vera gel immediately
- Use cold compress for 10 minutes
- Skip all actives for 72 hours
- Sleep on silk pillowcase to reduce friction
Pro Results: Dermatologist Tips for Long-Lasting Smoothness
Technique Hacks
- Skin tension trick: Pinch area between two fingers for flat surface
- Feather motion: Blade should barely kiss the skin (no scraping sound)
- Section method: Divide face into 8 quadrants for systematic coverage
Result Maximizers
- Pre-treat with AHA toner 24 hours prior for enhanced exfoliation
- Apply vitamin C serum the morning after for brightening
- Use silk pillowcases to maintain results 50% longer
Home vs. Pro Dermaplaning: Cost Breakdown and Savings

At-Home Annual Cost: $150-$400
– Tools: $50 (Tinkle razors × 12 packs)
– Products: $100 (alcohol, serums, SPF)
Professional Annual Cost: $900-$3,000
– $150/session × 6 treatments (minimum for results)
Real Savings: $750-$2,850 yearly with identical outcomes. Professionals use the exact same tools—just in a clinical setting.
Maintenance Schedule for Flawless Results
Tool Care Protocol
- Clean: Soap wash → alcohol wipe → air dry vertically
- Store: Individual sterile pouches (like contact lens cases)
- Replace: After 4 uses or monthly (whichever comes first)
Progress Tracking
- Take weekly photos in same natural light
- Note makeup application improvements
- Track sensitivity changes monthly
Dermaplaning at home delivers professional glass-skin results when you master the 45-degree angle and strict post-care routine. Start with $4 Tinkle razors, avoid magnifying mirrors, and never dermaplane over active breakouts. Your first treatment takes just 8 minutes and reveals visibly smoother skin by morning—no expensive spa visits required.
Your next step: Sterilize a blade tonight, follow the face-mapping guide, and wake up to skin that drinks in serums and makes foundation glide like silk. Remember: consistency beats intensity—stick to the 3-4 week schedule for cumulative radiance that builds over time.


