
Your foundation brush just streaked yesterday’s look across your cheek. That perfect eyeshadow blend turned muddy and uneven. Sound familiar? Dirty makeup brushes sabotage even the best products, harboring bacteria, oils, and weeks of product buildup that clogs pores and ruins application. The good news? Learning how to clean makeup brushes at home takes minutes with items you already own—no special products required. This guide transforms brush cleaning from a dreaded chore into a quick daily ritual, saving your skin from breakouts, your makeup from muddy results, and your wallet from premature brush replacement.
Professional-level brush care prevents skin irritation while maintaining the soft, precise bristles that justify your luxury brush investments. By dedicating just 10 minutes weekly to proper cleaning, you’ll achieve truer color payoff, seamless blending, and extend your brushes’ lifespan from months to years. Let’s dive into the exact methods that deliver salon-quality results at home.
Why Dirty Brushes Ruin Your Makeup Application
Every swipe deposits more than pigment—it leaves behind dead skin cells, facial oils, environmental pollutants, and bacteria breeding grounds. This buildup causes immediate makeup disasters: foundation streaks instead of blends, eyeshadow turns muddy, and powder applies patchily. More critically, these contaminated brushes transfer acne-causing bacteria to your skin with every use, triggering breakouts and infections you might not connect to your tools.
Clean brushes eliminate these issues while preserving your investment. Properly maintained natural hair brushes stay soft and springy for years, while synthetic fibers retain their precision edge. Neglecting cleaning accelerates bristle damage from product residue, making expensive brushes shed prematurely. When your makeup suddenly performs poorly, dirty brushes are almost always the culprit—not your technique or products.
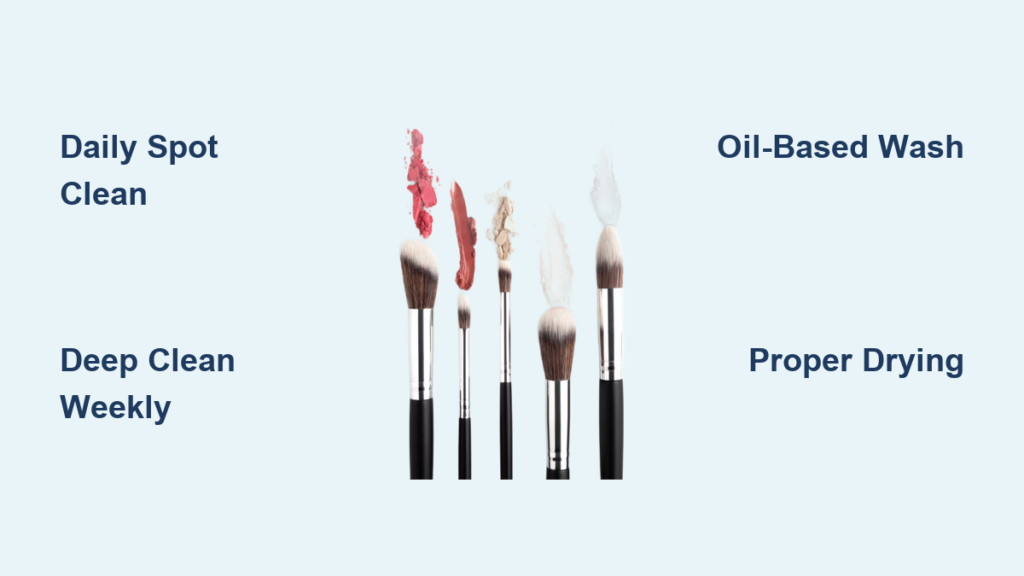
Brush Cleaning Schedule That Actually Works
Daily Quick Fixes for Flawless Blending
Spot clean between colors using alcohol-based sprays or micellar water on microfiber cloths. This prevents muddy color mixing during your routine and maintains brush shape between deep cleans. For cream products like concealer or lipstick, wipe bristles on a clean tissue immediately after use to remove excess product before it dries and hardens.
Targeted Weekly Deep Cleaning
Foundation and concealer brushes demand cleaning after every 3-4 uses maximum—these harbor the most bacteria from direct skin contact. Cream product brushes (eyeshadow, blush) need weekly deep cleaning to prevent bacterial growth from moisture-rich formulas. If you have acne-prone skin, clean all brushes after every single use to avoid reinfection. Skipping this step turns your tools into contamination vectors.
Strategic Monthly Maintenance
Powder brushes for blush, bronzer, and setting powder require deep cleaning only every 2-4 weeks since dry formulas build up slower. However, infrequently used specialty brushes (like lip or highlighter brushes) must be cleaned before each use to remove dust and accumulated debris that would otherwise transfer to your skin. Never assume a brush is “clean” just because it’s been stored—dust settles on bristles within days.
Essential Supplies Already in Your Kitchen
Primary Cleaners You Own
Gentle baby shampoo cuts through buildup without drying natural hair bristles. Dish soap (like Dawn) dissolves stubborn foundation residue on synthetics. Olive oil breaks down waterproof mascara and long-wear foundation when mixed with soap. Coconut oil provides natural antimicrobial properties for deep cleaning—melt a teaspoon for heavy-duty jobs.
Required Tools for Proper Technique
A textured silicone mat (or even your palm) creates the agitation needed to lift debris from bristle bases. Clean microfiber towels absorb water without linting during reshaping. Use small bowls for mixing solutions—never clean directly under running water, which forces product deeper into the ferrule. Always use lukewarm water; hot water loosens glue and damages bristles.
Optional Boosters for Special Cases
Add white vinegar (1:3 ratio with water) as a natural disinfectant for acne-prone skin. Tea tree oil (2-3 drops per cup) fights bacteria during deep cleans. Rubbing alcohol (70% isopropyl) sanitizes synthetic brushes between colors—spray lightly and air dry. Never use these on natural hair brushes or wooden handles.
Basic Rinse and Wash Method for Daily Maintenance
Prep Your Station Correctly
Lay brushes flat with bristles hanging over your counter edge—never point them upward. Run lukewarm water continuously, holding brushes at a downward angle to prevent water seeping into the ferrule. This protects the glue holding bristles in place. Gather all brushes you’ll clean to work efficiently in batches.
The 5-Step Cleaning Process
1. Wet only bristle tips under running water—keep ferrules bone dry
2. Dispense pea-sized cleanser onto your textured mat or palm
3. Swirl brush gently in circular motions for 30-60 seconds to release buildup
4. Massage bristles with fingers to check for hidden residue
5. Rinse downward until water runs completely clear (repeat if cloudy)
This method works for most powder and eyeshadow brushes. For stubborn foundation residue, add a second wash cycle with dish soap. Critical warning: Never scrub harshly—that frays bristles and causes shedding. Gentle circular motions only.
Oil-Based Deep Clean for Waterproof Makeup
Heavy Buildup Solution
Mix 2 parts gentle soap with 1 part olive oil in a small bowl. Dip foundation or concealer brush tips into the mixture, coating densely packed bristles thoroughly. Massage for 1-2 minutes using your textured mat—focus pressure where product accumulates near the ferrule. This oil breaks down waterproof formulas that water alone can’t remove.
Emulsify and Rinse Properly
Gradually add water while continuing to massage, creating a creamy emulsion that lifts dissolved makeup. Rinse under lukewarm water with bristles pointing down until runoff is crystal clear. For extremely dirty brushes, repeat the oil treatment once—never skip this step with waterproof products, as residue causes rapid bacterial growth.
Quick Daily Spot Cleaning Between Colors
Effective Spray Method
Hold brush 6 inches from alcohol-based cleaner (70% isopropyl). Spray until bristles are damp—not soaked—to avoid damaging glue. Swirl on a clean microfiber cloth until no color transfers (usually 10-15 rotations). Reshape bristles with fingers and lay flat for 5 minutes before reuse. This prevents color contamination during eyeshadow application.
Precision Dip Technique
Pour brush cleaner into a shallow dish just deep enough to cover bristle tips. Dip for 3-5 seconds only—never submerge the ferrule. Swirl on textured paper towel sections, rotating to clean areas as color transfers. Works perfectly for cream blush or concealer brushes between uses. Pro tip: Keep a travel-sized cleaner in your makeup bag for on-the-go touch-ups.
Natural vs Synthetic Brush Care Protocols
Natural Hair Brushes (Kolinsky Sable, Goat)
Use only baby shampoo or castile soap—never dish soap. Rinse with cool water to preserve bristle cuticles. After washing, condition monthly with 1 part hair conditioner to 3 parts water (soak tips 3 minutes). Dry horizontally with bristles over counter edge—never upright. These require 8-12 hours drying time but last 5-10 years with proper care.
Synthetic Brushes (Nylon, Taklon)
Tolerate dish soap and alcohol sanitizers safely. They dry in 4-8 hours and resist most damage. For stubborn buildup, use the oil-deep clean method without conditioning. Sanitize between clients by dipping tips in alcohol for 30 seconds—ideal for makeup artists. Their resilience makes synthetics perfect for cream products.
Special Care for Delicate Brushes
Duo-fiber brushes: Clean with minimal pressure to prevent fiber separation—use only baby shampoo. Dense foundation brushes: Pre-soak 5 minutes in oil solution before washing. Precision liners: Clean individually with micro-swirls to maintain sharp tips. Always reshape immediately after rinsing.
Drying Without Damage: The Critical Step

Proper Positioning for Longevity
Lay brushes flat on a clean towel with bristles extending over your counter edge—this allows air circulation while preventing water migration into ferrules. Never dry upright in cups; gravity pulls moisture into the glue line, causing shedding within weeks. In humid climates, add a fan on low setting to accelerate drying.
Reshaping Techniques That Work
Gently squeeze excess water with a towel, then reform shapes:
– Round brushes: Pinch bristles into perfect circles with damp fingers
– Flat brushes: Press between towel folds to flatten edges
– Angled brushes: Recreate precise angles by stroking against counter
Use brush guards only on synthetic fibers—they can trap moisture in natural hair brushes. Check reshaped brushes hourly until fully dry.
Fix Common Brush Problems Immediately
:max_bytes(150000):strip_icc()/ins-makeup-brush-cleansers-oct-24-test-clinique-before-after-ahuang-1038-1-db525f7fe5c24c64a5b0df1e8362a5d3.jpeg)
Stop Excessive Shedding
Water in ferrules is the #1 cause. Always clean with bristles angled downward. Never pull loose bristles—this damages surrounding hairs. If shedding persists after proper cleaning, replace the brush; damaged glue won’t reseal.
Remove Stubborn Residue
- Waterproof products: Pre-treat with oil-based makeup remover before washing
- Long-wear foundation: Soak in olive oil for 10 minutes pre-wash
- Glitter: Lift with tape before wet cleaning
- White residue: Rinse 2x longer—this is soap buildup, not damage
Restore Splayed Brush Shapes
For synthetic brushes, dip tips in hot water for 3 seconds, then reshape immediately. Natural hair brushes respond to coconut oil conditioning—massage oil into bristles, wait 5 minutes, then reshape. Trim only obviously damaged bristles with sharp scissors.
Professional Maintenance for Lasting Results
Invest in quality brushes that justify maintenance—they’ll last 5-10 years with proper care. Replace brushes every 3-5 years even with regular cleaning, as bristles lose elasticity. Never share brushes between people, and replace immediately after eye infections. Store clean brushes upright in breathable containers away from bathroom humidity. For travel, ensure complete dryness before packing and use protective sleeves—damp brushes develop mold within 24 hours in closed cases.
Clean brushes tonight, wake up to flawless application tomorrow. Your skin will thank you with fewer breakouts, your makeup will perform like new, and your investment brushes will last years longer. Start with tonight’s dirty foundation brush—you’ll see the difference immediately. Mastering how to clean makeup brushes at home transforms your entire beauty routine from the tools up.


