
Your energy bills just spiked 40% and the house won’t cool below 78°F despite the thermostat screaming at 65°F. Sound familiar? Dirty AC coils are the silent killer of cooling efficiency, turning your hardworking system into an expensive paperweight. Learning how to clean home ac coils properly can restore peak performance in under two hours with basic tools. The Environmental Protection Agency estimates dirty coils reduce efficiency by 5-15% annually—translating to hundreds in wasted energy costs each cooling season.
When dust, pollen, and debris clog your AC coils, your system works harder to achieve less cooling. This strain leads to premature component failure, higher repair bills, and uncomfortable indoor temperatures. Most homeowners don’t realize their evaporator and condenser coils need regular cleaning until performance plummets. Follow this comprehensive guide to breathe life back into your AC system and save money on both energy and future repairs.
Essential Safety Steps Before Cleaning AC Coils
Power down completely before touching anything. Flip the breaker labeled “HVAC” or “AC” at your electrical panel, then locate the outdoor disconnect switch (usually a gray box near the condenser unit) and pull it out. Wait 5 minutes for capacitors to discharge—electricity in HVAC systems can kill even when the unit appears off.
Protective Gear Checklist for Safe Coil Cleaning
- Safety glasses (metal fins are razor-sharp and can cause serious eye injury)
- Nitrile gloves (coil cleaners contain chemicals that irritate skin)
- Dust mask (mold spores thrive in dirty coils and can trigger respiratory issues)
- Closed-toe shoes (outdoor units often harbor wasp nests or sharp debris)
Tool Assembly for Effective AC Coil Cleaning
Basic toolkit: Phillips screwdriver, 1/4″ nut driver, soft paintbrush, shop vacuum with brush attachment. Specialized gear: Fin comb ($8), no-rinse coil cleaner ($12), garden sprayer ($15). Skip the pressure washer—it’ll bend delicate fins into useless metal spaghetti. For indoor evaporator coils, prepare a towel to catch drips and a small container for removed screws.
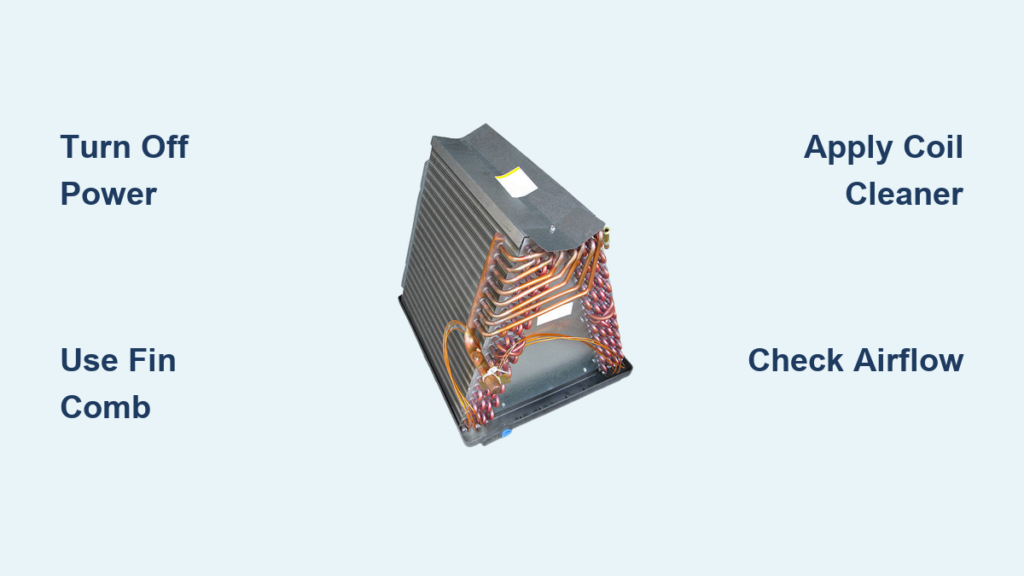
Identify Your Coil Types and Their Cleaning Needs
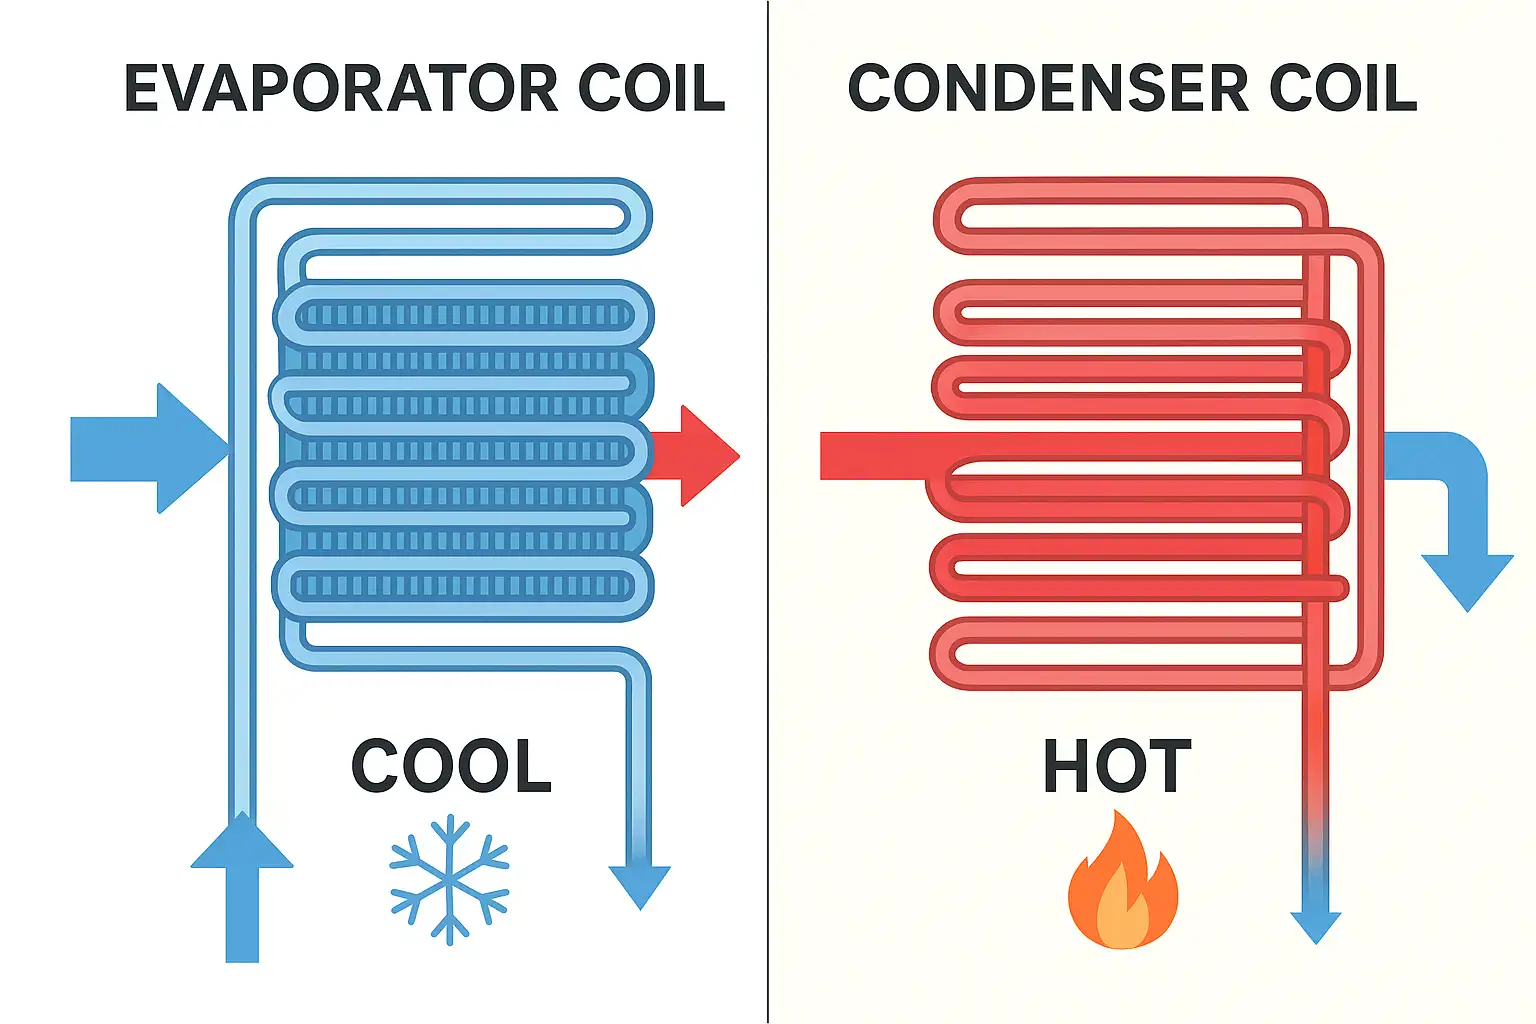
Evaporator coils hide inside your furnace or air handler, looking like an A-frame tent made of copper tubing. These absorb heat from indoor air and get clogged with dust, pet hair, and bio-growth. Condenser coils wrap around your outdoor unit like a metal cage, releasing heat to the outside while collecting grass clippings, cottonwood seeds, and pollution grime. Each requires different cleaning approaches based on location and exposure.
Quick Visual Assessment to Determine Cleaning Urgency
- Evaporator: Remove the access panel (usually 4-6 screws) and shine a flashlight inside—if you can’t see metal fins through the debris, cleaning is overdue.
- Condenser: Look through the side grilles—bent fins or visible dirt buildup means efficiency is plummeting. If you see more than ¼ inch of debris between fins, immediate cleaning is required.
Clean Evaporator Coils Efficiently in 4 Steps
Access and Prep Your Indoor Coil System
Remove the foil-faced insulation tape along the coil access panel. Most panels use 1/4″ hex screws—keep them in a cup to avoid losing them in the furnace. Place a towel below the coil to catch drips; coil cleaners will stain finished surfaces. Check the condensate drain line for clogs by pouring a cup of water into the drain pan—it should empty within 30 seconds.
Dry Debris Removal Without Damaging Fins
Start with your shop vacuum’s brush attachment, working from the clean side toward the blower. Never vacuum against airflow—you’ll just pack debris deeper. Follow with a soft paintbrush for stubborn buildup, brushing in the direction of the fins (usually upward). Remove the drain pan’s access panel and vacuum out algae, rust flakes, and that mysterious LEGO piece from 2017.
Chemical Cleaning Process for Maximum Effectiveness
Shake your foaming coil cleaner vigorously and apply generously to the coil face. Key timing: Let foam work for exactly 5-7 minutes—too short and it’s ineffective, too long and it drips into electrical components. The foam carries dirt downward into the drain pan, so ensure the condensate line isn’t clogged. For heavily soiled coils, mix mild dish soap with warm water in a spray bottle. Apply lightly, wait 3 minutes, then rinse with distilled water using a spray bottle. Never use tap water—it leaves mineral deposits.
Final Evaporator Coil Inspection and Reassembly
After cleaning, inspect fins with a straight edge to identify bends. Use a fin comb matching your coil’s fin spacing (typically 8-14 fins per inch) to straighten any damage. Reinstall the access panel securely and replace the insulation tape. Set your thermostat to “fan only” for 30 minutes to ensure complete drying before full operation.
Restore Condenser Coil Performance in 30 Minutes
Debris Removal Strategy for Outdoor Units
Remove the top grille (usually 4-8 screws around the perimeter). Critical mistake to avoid: Don’t pull wires attached to the fan motor. Cover the electrical compartment with a plastic bag secured by tape—water and 240V don’t mix well. Clear vegetation at least 24 inches around the unit to allow proper airflow.
Deep Cleaning Technique for Maximum Airflow
Use a garden hose with a trigger nozzle on medium pressure. Always spray from inside outward—this pushes debris out rather than deeper into the coil. Work in 2-foot sections from top to bottom, overlapping passes by 50%. For cottonwood seeds or grass clippings, use a fin comb gently—bent fins block airflow permanently. Apply coil cleaner to exterior coils following the same pattern. Let sit 10 minutes (outdoor coils handle longer exposure), then rinse thoroughly until water runs clear. Warning sign: If water backs up inside the unit, you’ve got internal blockage requiring professional service.
Prevent Future Coil Problems with Smart Maintenance
Monthly Maintenance Checklist
- Trim vegetation 24 inches around outdoor unit
- Hose off condenser coils monthly during high-use seasons
- Change air filters every 30-60 days (not the 90-day lie on the package)
- Inspect indoor coil access panel quarterly for visible debris
Seasonal Deep Cleaning Schedule to Maximize Efficiency
- Spring: Full service before cooling season (March-April)
- Mid-summer: Quick condenser rinse and filter check (July)
- Fall: Post-season condenser cleaning and cover (October)
Performance Monitoring to Catch Issues Early
Install a $15 temperature sensor at your main return vent. After cleaning, your system should achieve a 15-20°F temperature drop across the evaporator coil. If it’s less than 12°F, you’ve still got issues. Track your monthly energy bills—clean coils typically reduce cooling costs by 5-15% immediately.
When to Call Professionals for AC Coil Service
Red flags requiring expert help: Oil stains on coils (refrigerant leak), severely bent fins (>20% damage), or corrosion causing refrigerant line exposure. Professional coil removal costs $200-400 but prevents $3,000+ compressor failures. If you notice frost forming on coils during operation or hear unusual hissing sounds, shut down the system immediately and call a technician.
DIY vs Pro Comparison for AC Coil Maintenance

| Task | DIY Time | Pro Time | Cost Difference |
|——|———-|———-|—————–|
| Basic cleaning | 2 hours | 45 minutes | Save $150-250 |
| Coil removal | Not recommended | 2-3 hours | $300-500 |
| Refrigerant service | Illegal DIY | 1-2 hours | $200-600 |
Quick Reference: Best Cleaning Supplies for Home AC Coils
Must-have products:
– Nu-Calgon Evap-Fresh no-rinse cleaner (evaporator coils)
– Frost King ACF19 condenser coil cleaner
– 8-20 fin comb set (matches your system’s fin spacing)
Budget alternative: Blue Dawn dish soap and white vinegar work for light cleaning but won’t tackle heavy buildup. For fin straightening, ensure your comb matches your coil’s fin count—using the wrong size causes more damage.
Final Efficiency Check After Cleaning
After reassembly, run your system for 30 minutes and check:
– Outdoor unit: Warm (not hot) air discharge, quiet operation
– Indoor vents: Strong airflow, 15-20°F temperature drop
– Energy usage: First month’s bill should drop 5-15%
Your AC system is now breathing freely again. Mark your calendar for next cleaning—neglect these coils and you’ll be back to overpaying for underperforming cooling within 6 months. Properly maintained coils extend your system’s lifespan by 3-5 years while keeping your home comfortable and energy bills under control.


