
Brass fixtures lose their golden glow faster than you might expect, transforming from elegant statement pieces to dull, lifeless metal right before your eyes. That beautiful brass lamp on your nightstand or the antique candlesticks gathering dust in your cabinet don’t need professional restoration—learning how to clean brass at home puts the power back in your hands. This guide reveals proven brass cleaning techniques using items already in your kitchen, saving you money while restoring your treasured pieces to their original luster. You’ll discover exactly which method works for light tarnish versus heavy oxidation, how to protect brass after cleaning, and crucial mistakes that could ruin your pieces forever.
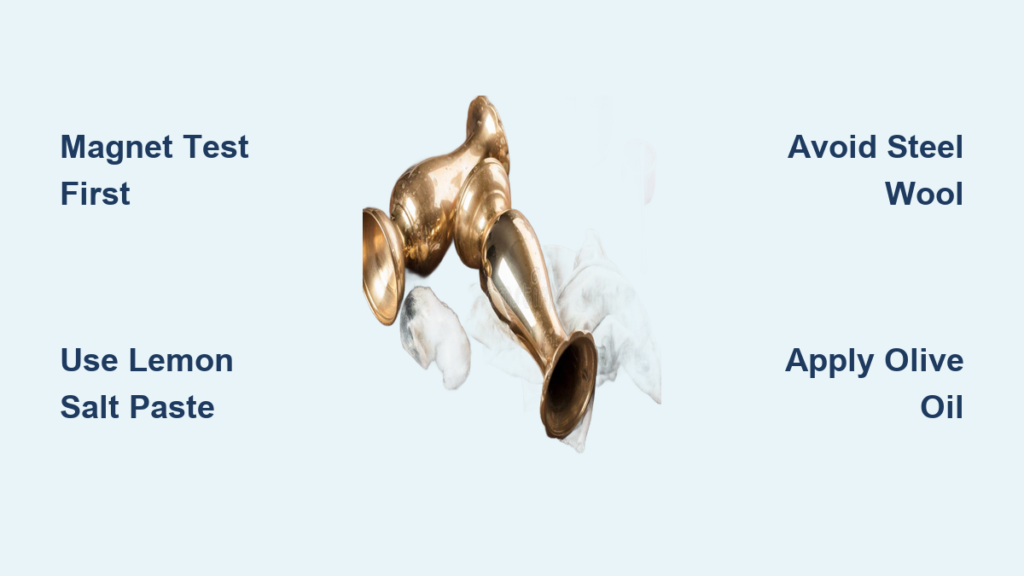
Identify Solid vs. Plated Brass Before Cleaning
.jpg)
Using the wrong cleaning method on brass-plated items can strip the thin brass layer permanently, exposing the base metal underneath. This critical identification step prevents costly damage before you even touch your cleaning supplies.
Magnet Test Method Reveals Metal Composition
Grab a standard refrigerator magnet and hold it against your brass item’s surface. If the magnet falls away cleanly, you’re working with solid brass that can handle more aggressive cleaning techniques. However, if the magnet sticks at all, you’re dealing with brass-plated steel or iron that requires gentler treatment. Never use abrasive methods like salt scrubs on plated items—you’ll permanently damage the thin brass layer and expose the underlying metal, ruining the piece’s appearance and value.
Scratch Test Alternative for Non-Magnetic Items
Examine your brass item closely for areas where the finish shows wear. Solid brass maintains consistent golden color even in worn spots, while plated pieces reveal a different colored metal—usually silvery gray—beneath the surface. Check hidden areas like the bottom or back of the item where wear might be less noticeable. This visual inspection confirms what the magnet test suggests, ensuring you select the appropriate cleaning method for your specific item.
Essential Safety Precautions for Home Brass Cleaning
Brass cleaning involves acidic solutions and abrasive materials that require basic safety measures to protect both you and your home surfaces during the cleaning process.
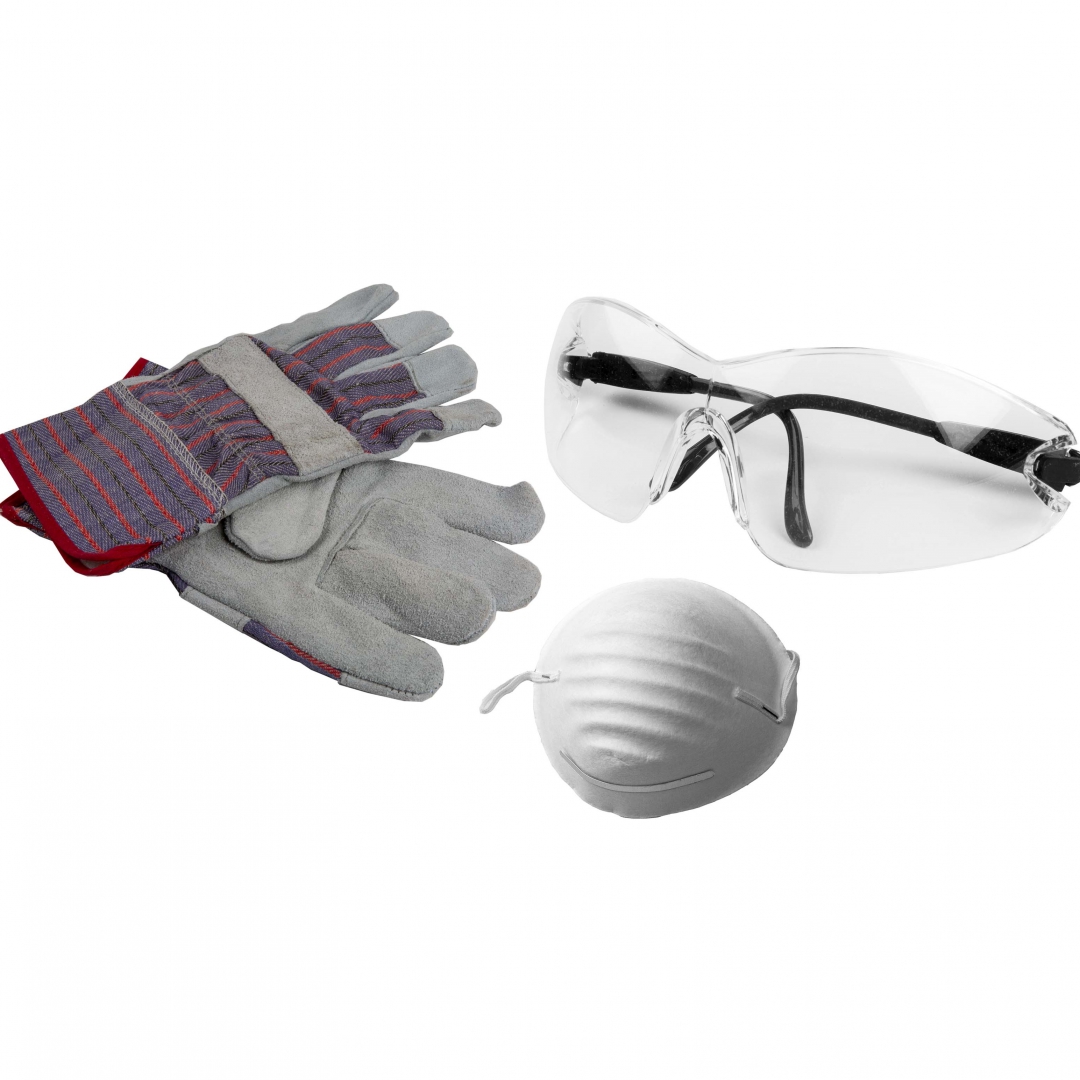
Protective Gear Checklist for Safe Cleaning
Gather these essential safety items before starting: rubber gloves to prevent skin irritation from acidic cleaners, safety glasses to shield your eyes from splashes, and work in a well-ventilated area especially when using vinegar or ammonia-based solutions. Wear old clothes you don’t mind staining, as some brass cleaners can leave permanent yellowish stains on fabric. These simple precautions make your brass cleaning project safe and worry-free.
Surface Protection Tips to Prevent Accidental Damage
Cover your work surface with newspaper or plastic sheeting to catch drips and spills. Brass cleaners can damage wood finishes and etch natural stone countertops, so never work directly on these surfaces. If using your kitchen sink, line it with a towel to protect both the sink and your brass item from scratches. Keep a dedicated container of clean water nearby for immediate rinsing if any solution gets on your skin.
Gather Your Cleaning Arsenal from Kitchen Staples
Most effective brass cleaners live in your kitchen already, eliminating the need for expensive specialty products that often contain harsh chemicals.
Natural Cleaning Ingredients You Already Own
Stock up on these proven items before starting: white vinegar cuts through heavy tarnish effectively, table salt acts as a gentle abrasive, lemon juice provides mild acid for light cleaning, baking soda neutralizes acids and polishes, flour creates paste consistency for vertical surfaces, and olive oil prevents rapid re-tarnishing. These common household items combine to create powerful cleaning solutions without toxic chemicals.
Required Tools for Complete Brass Cleaning
You’ll need soft microfiber cloths for polishing and drying (avoid paper towels which can scratch), an old soft-bristled toothbrush for detailed areas, a non-abrasive scrub sponge for textured surfaces, small glass bowls for mixing pastes (never metal bowls), and cotton swabs for tight crevices. Having these tools ready ensures you can tackle any brass cleaning challenge from simple flat surfaces to intricate decorative pieces.
Quick Daily Maintenance Routine Prevents Heavy Tarnish
Preventing heavy tarnish buildup takes just minutes each week but saves hours of deep cleaning later, keeping your brass looking its best with minimal effort.
Dust and Fingerprints Removal Protocol
Use a dry microfiber cloth to wipe brass surfaces weekly, removing dust and preventing oils from your hands from accelerating tarnish. For stubborn fingerprints, dampen your cloth with warm water only—no cleaners needed for light soil. Always wipe in the direction of the metal grain if visible, rather than circular motions, to maintain the finish. This simple habit keeps brass looking fresh between deep cleanings.
Immediate Spill Response Procedure
Blot spills immediately with paper towels rather than wiping, which spreads the liquid. Water spots etch brass if left to air dry, so follow blotting with a thorough drying using a soft cloth, paying special attention to crevices where moisture hides. For brass jewelry, remove pieces before washing hands or applying lotions to prevent chemical reactions that accelerate tarnish.
Lemon Salt Method for Light Tarnish on Brass
This classic kitchen staple combination tackles everyday dullness without harsh chemicals, perfect for maintaining recently cleaned brass or addressing minor tarnish.
Mix Your Cleaning Paste Properly
Combine 2 tablespoons table salt with enough lemon juice to form a spreadable paste—usually 3-4 tablespoons. The mixture should coat your finger without running off. Avoid metal bowls as they react with the acid and potentially contaminate your cleaning solution. Mix just before use for maximum effectiveness, as the solution loses potency over time.
Application Process for Best Results
Rub paste onto brass using circular motions with a soft cloth, working in small sections to ensure complete coverage. Focus extra attention on ornate details where tarnish collects. Let sit 5-10 minutes but don’t allow it to dry completely, as dried paste becomes difficult to remove. Rinse thoroughly with warm water and dry immediately with a clean microfiber cloth for a brilliant finish.
Vinegar Salt Flour Paste Recipe for Moderate Tarnish
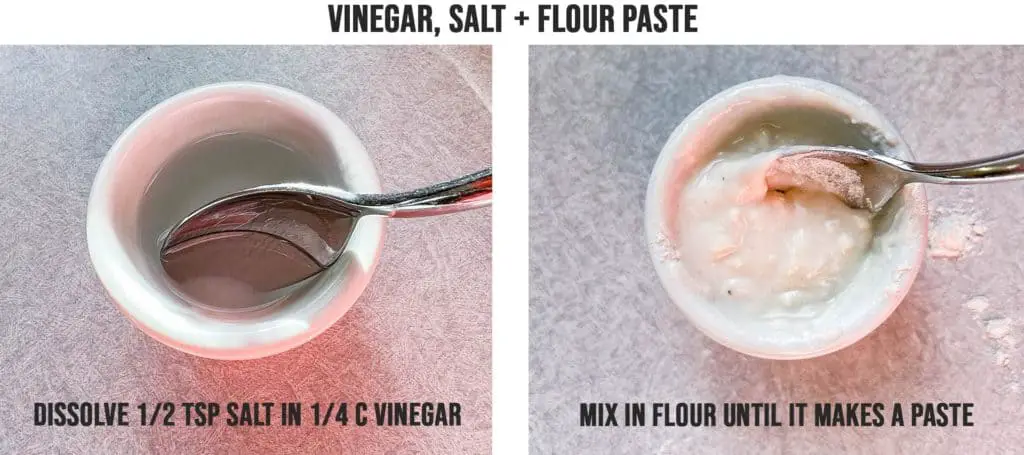
For brass with noticeable tarnish that hasn’t turned black yet, this thicker paste clings to vertical surfaces while the vinegar dissolves oxidation effectively.
Perfect Paste Consistency for Vertical Surfaces
Mix 1/2 cup white vinegar, 1 teaspoon salt, and enough flour to create toothpaste-like consistency. Adjust flour quantity until paste stays put on upside-down surfaces—this prevents messy drips during cleaning. Test consistency on a hidden area first to ensure it doesn’t run, adjusting with more flour or vinegar as needed before applying to visible surfaces.
Effective Application Technique for Complete Coverage
Apply paste with a soft cloth using gentle pressure—no scrubbing needed as the acid does the work. Cover entire piece evenly, including undersides and crevices where tarnish hides. Wait 10-15 minutes then rinse under warm running water, using your fingers to help remove paste from detailed areas. Buff dry immediately with a clean microfiber cloth to prevent water spots.
Ketchup Cleaning Hack for Unexpected Brass Shine
Believe it or not, ketchup’s mild acid and tomato paste texture clean brass surprisingly well, making this pantry staple a secret weapon against tarnish.
Simple Application Steps for Maximum Effect
Spread a thin layer of ketchup over brass surfaces using your fingers—no need for cloth application. The natural acids in tomatoes break down tarnish gently without scratching. Leave for 30-60 minutes depending on tarnish severity, checking periodically to avoid overexposure. For heavily tarnished areas, reapply fresh ketchup rather than extending time.
Rinsing and Finishing for Streak-Free Results
Rinse thoroughly under warm running water until all ketchup residue disappears—sugars in ketchup can leave sticky film if not completely removed. Use a soft toothbrush to dislodge ketchup from crevices. Dry immediately and polish with a clean microfiber cloth using straight-line motions for professional-looking shine without streaks.
Polish and Protect Your Brass After Cleaning
Proper finishing after cleaning prevents rapid re-tarnishing and maintains your hard work, extending the time between deep cleanings significantly.
Natural Polishing Method for Professional Shine
Mix 2 parts baking soda with 1 part water to create gentle polishing paste. Rub lightly with a soft cloth using straight-line motions rather than circles to remove micro-scratches and create uniform shine. This final polish step enhances the reflective quality of the brass, making your cleaning efforts show through brilliant results.
Protective Oil Application for Long-Lasting Results
Apply tiny amount of olive oil on clean, dry brass using a soft cloth—use barely enough to leave faint sheen as over-oiling attracts dust. Buff thoroughly with a clean cloth until no residue remains. This invisible barrier slows oxidation significantly, keeping your brass looking freshly cleaned for weeks rather than days.
Common Mistakes to Avoid When Cleaning Brass
Learning from others’ errors saves your brass from permanent damage, preserving both appearance and value of your brass items.
Never Use These Damaging Items on Brass
Avoid steel wool or metal brushes which scratch brass permanently, bleach cleaners that cause irreversible corrosion, ammonia on lacquered brass which strips protective coating, and dishwasher cleaning that ruins finishes and loosens joints. These common household items seem helpful but will permanently damage your brass pieces.
Timing Errors That Accelerate Tarnish
Don’t clean brass in direct sunlight—heat accelerates chemical reactions unpredictably. Avoid outdoor cleaning on humid days when brass re-tarnishes faster. Work in cool, dry conditions for best results, and never leave cleaning solutions on brass longer than recommended as overexposure causes etching and pitting that requires professional repair.
Troubleshooting Stubborn Tarnish on Brass

When standard methods fail to remove black spots or heavy oxidation, these advanced techniques tackle extreme tarnish without damaging the brass surface.
Spot Treatment for Black Spots That Resist Cleaning
Make concentrated paste: 1 tablespoon salt plus enough vinegar for thick consistency. Apply directly to black spots using cotton swab, then cover with plastic wrap for 2-3 hours to prevent drying. This creates a controlled environment where the acid works specifically on problem areas. Rinse and repeat if needed, but never leave on longer than 3 hours to prevent surface damage.
Restoring Etched Surfaces from Previous Over-Cleaning
For brass with rough, etched areas from previous over-cleaning, use 0000 steel wool very lightly with mineral oil. This ultra-fine steel wool smooths minor etching but requires extreme care—test on hidden area first before treating visible surfaces. Work with the grain of the metal, applying minimal pressure, and follow with thorough cleaning and oil protection.
Clean brass maintains its beauty with minimal effort when you establish a simple monthly maintenance routine using the daily dusting techniques. Deep clean only when necessary—over-cleaning accelerates wear on both solid and plated brass. Remember that gentle, consistent care prevents the need for aggressive restoration later. Keep your brass cleaning kit together in a dedicated container for quick touch-ups, and your fixtures will gleam for years to come while maintaining their value and beauty.


