
Frequent clinic visits for CD4 count monitoring create significant barriers for HIV patients, especially in remote areas where healthcare infrastructure is limited. Traditional CD4 testing requires expensive lab equipment and trained technicians, making regular immune health tracking impractical for many. But groundbreaking smartphone-based diagnostics are changing this reality—now you can get accurate CD4 counts from home using just a tiny blood sample and an affordable device attachment that transforms your phone into a powerful diagnostic tool.
This guide reveals exactly how emerging home CD4 testing technology works, what equipment you’ll need, and how to interpret your results safely. You’ll discover a clinically validated method that delivers 97% accuracy compared to standard lab tests, giving you control over your HIV management without sacrificing reliability.
Smartphone-Powered CD4 Testing Breakthrough
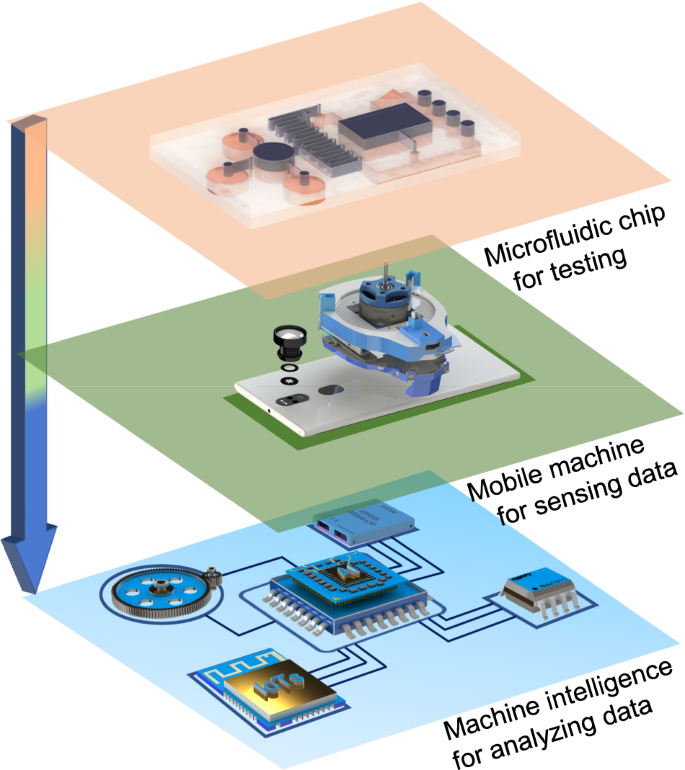
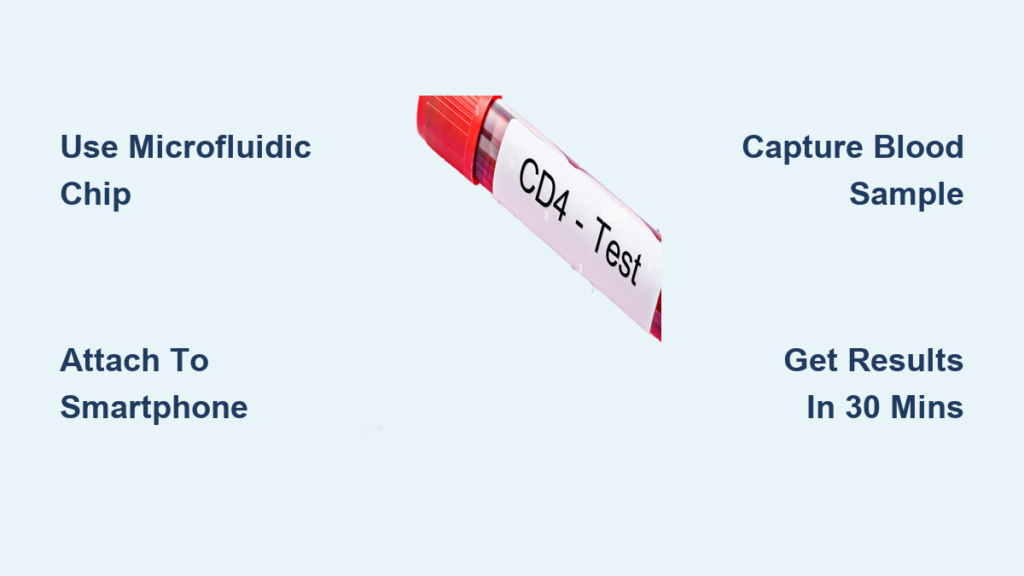
Your smartphone becomes a sophisticated CD4 counter through a simple optical attachment that costs less than $5. This innovative system replaces bulky laboratory equipment with a compact solution that fits in your pocket. The core technology uses a disposable microfluidic chip—essentially a miniature lab on a slide—that captures CD4 cells from just 30 μL of blood (about one-third of a standard glucose test).
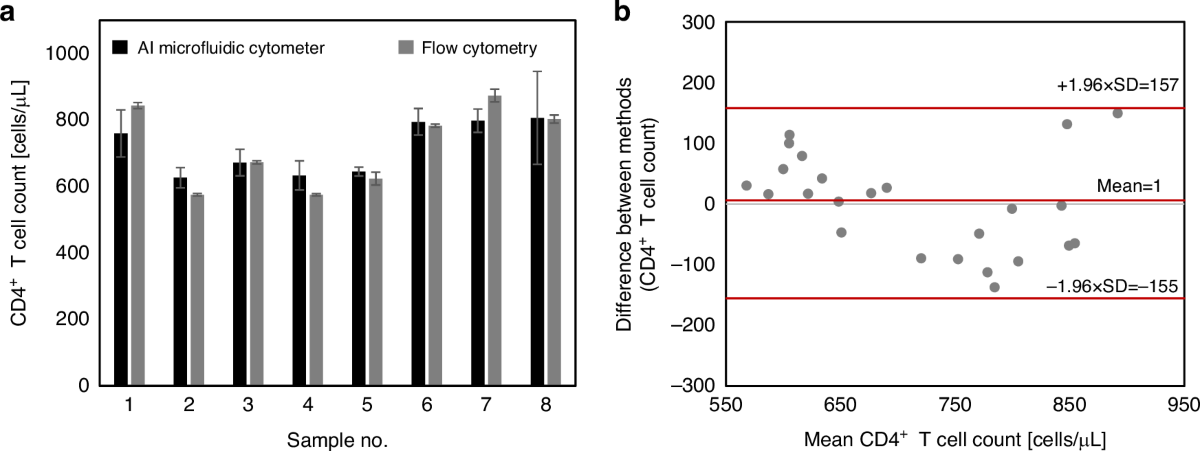
The optical attachment contains precision lenses harvested from DVD drives and an LED light source that transforms your phone’s camera into a high-powered microscope. When you slide this lightweight (22g) accessory onto your phone, it automatically aligns with your camera to capture clear images of your blood sample without manual focusing. Clinical trials confirm this system delivers results in just 30 minutes with 97% correlation to expensive flow cytometry machines—the gold standard for CD4 testing.
Essential Home Testing Kit Components
Smartphone Attachment and Microfluidic Chips
Your complete home CD4 testing kit consists of three critical components:
Optical Smartphone Attachment: A 3D-printed housing (6.1 × 8.3 × 3.1 cm) containing two aspheric lenses, an LED light source, and a 3V battery. This attachment slides directly onto your phone, creating the perfect optical alignment for accurate cell counting.
Disposable Microfluidic Chips: Each single-use chip (40mm × 5mm) contains microscopic channels pre-coated with anti-CD4 antibodies that specifically capture CD4+ T-cells from your blood sample. These chips require no refrigeration when properly stabilized.
Testing Accessories: You’ll need standard components including lancets for finger pricks, alcohol swabs, and phosphate-buffered saline (PBS) for washing steps. The entire process uses only 30 μL of blood—minimizing discomfort while maximizing accuracy.
Smartphone Requirements Checklist
For reliable results, your phone must meet these specifications:
- Android 6.0 or later (iOS version currently in development)
- At least 8-megapixel rear camera
- Sufficient storage for the custom CD4 testing app
- Regular software updates enabled
The dedicated app processes captured images using OpenCV algorithms in under 10 seconds, automatically calculating your CD4 concentration. It stores historical data for trend tracking and can securely share results with your healthcare provider through encrypted channels.
Complete Home Testing Procedure in 4 Steps
Prepare Your Testing Environment
Wash your hands thoroughly with warm water to increase blood flow to your fingertips. Gather all components on a clean surface: microfluidic chip, smartphone attachment, lancets, PBS solution, and alcohol swabs. Ensure your smartphone is fully charged—the LED and processing can drain battery quickly during testing.
Pro tip: Test in a well-lit room to help your camera focus properly, though the LED provides primary illumination for the sample.
Collect Blood and Load the Microfluidic Chip
- Clean your fingertip with alcohol swab and let it air dry completely
- Use lancet to prick the side of your finger (not the center for less pain)
- Gently massage to form a consistent blood drop without squeezing
- Touch the chip’s inlet port to the blood drop until it fills completely (30 μL)
- Insert the loaded chip into the optical attachment
The microchannels guide your blood over antibody-coated surfaces where CD4 cells bind specifically. This selective capture ensures accurate counting by eliminating interference from other blood cells.
Capture Images and Analyze Results
Launch the CD4 testing app and position the attachment over your camera. Press the capture button—the system automatically takes multiple images without manual focusing. The app uses adaptive thresholding to identify CD4 cells against the background.
Your results appear as cells/μL concentration within 10 seconds. The app categorizes your results based on WHO guidelines and stores previous readings for trend analysis. You can immediately share encrypted results with your healthcare team through the app’s secure portal.
Decoding Your CD4 Test Results
Understanding Critical Thresholds
Your CD4 count falls into three medically significant categories:
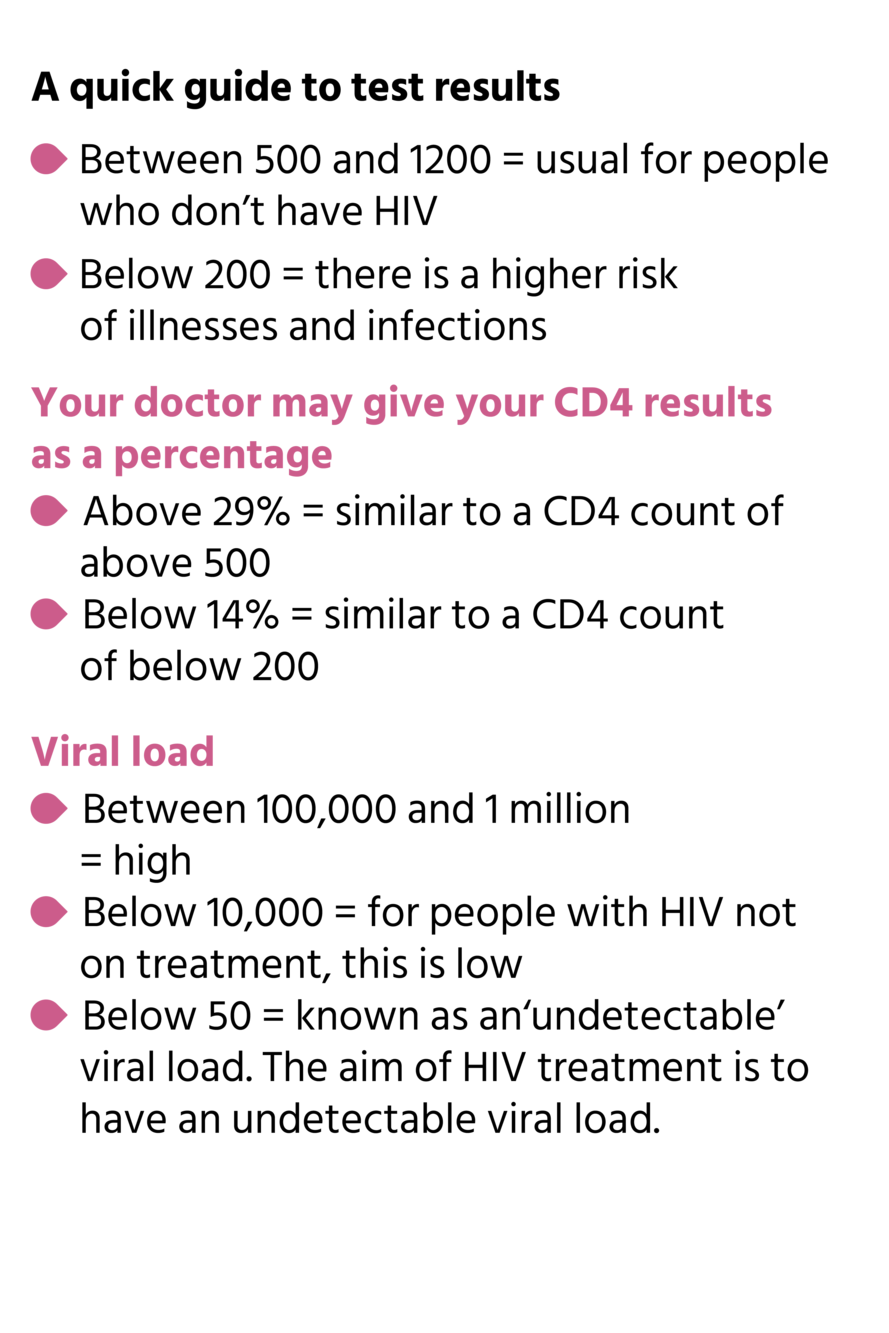
- Above 500 cells/μL: Normal immune function (healthy range is typically 500-1600)
- 200-500 cells/μL: Monitoring recommended (may indicate need for treatment adjustment)
- Below 200 cells/μL: Immediate medical attention needed (advanced HIV disease)
The app automatically flags critical thresholds established by WHO guidelines. Results below 200 cells/μL trigger an alert for advanced disease staging, while 500 cells/μL serves as the ART initiation point for most patients.
Important: Home testing supplements but doesn’t replace clinical consultation. Always discuss results with your healthcare provider, especially when making treatment decisions.
Accuracy Verification and Reliability Factors
Clinical Performance Metrics
Extensive validation shows your smartphone system matches expensive lab equipment:
- Sensitivity: 100% at detecting CD4 <200 cells/μL (critical threshold)
- Specificity: 91-92% across all measurement ranges
- Overall Accuracy: 93-97% compared to flow cytometry
These metrics meet or exceed commercial point-of-care devices costing thousands of dollars. The system reliably detects as few as 60 cells/μL, covering the full clinical range needed for HIV management.
Maximizing Test Reliability
Several variables affect result accuracy:
- Blood Volume: Ensure exactly 30 μL fills the chamber—too little causes undercounting
- Chip Storage: Use chips within 6 months and avoid extreme temperatures
- Camera Quality: Higher resolution improves detection at very low CD4 counts
- Washing Steps: Complete all PBS washes to remove non-specifically bound cells
For best results, perform tests at the same time of day and maintain consistent technique across measurements.
Cost Savings and Global Accessibility
Home Testing vs. Traditional Methods
Traditional lab CD4 testing costs $50-150 per test plus travel expenses. Commercial point-of-care systems require $7,500 initial investment plus $1,200 annual maintenance.
Your smartphone system costs under $5 for the attachment and less than $2 per disposable chip. Over a year of monthly testing, you’ll save approximately $1,000 compared to lab visits while gaining immediate results.
Expanding HIV Care in Resource-Limited Regions
This technology particularly benefits regions with limited infrastructure. No electricity required—the 3V battery powers the LED for hundreds of tests. Chips can be designed for ambient temperature storage using trehalose stabilization, eliminating cold chain requirements.
In Africa alone, smartphone adoption has doubled in two years, making this technology increasingly accessible where traditional lab infrastructure remains scarce. POC CD4 testing has been shown to nearly double ART initiation rates by reducing patient follow-up loss.
Troubleshooting Common Testing Issues
Zero Cells Detected
If your test shows no cells:
- Verify blood completely filled the microfluidic chamber
- Check chip expiration date and storage conditions
- Clean smartphone camera lens with microfiber cloth
- Ensure proper lighting during image capture
Inconsistent Results Between Tests
When readings vary significantly:
- Use fresh lancets for each test (reused lancets cause clotting)
- Wait 2-3 minutes between tests on the same finger
- Store chips in original packaging until immediate use
- Update the smartphone app regularly for algorithm improvements
Attachment Alignment Problems
The optical attachment includes built-in stoppers for automatic camera alignment. If images appear blurry:
- Remove phone case before attaching
- Clean attachment’s lens surfaces with lens cleaning solution
- Ensure phone sits flush in the attachment groove
Safety Protocols and Data Security
Blood Handling Safety
Always dispose of lancets and used chips in biohazard containers. Never share testing equipment between individuals—each kit is for single-user only. Clean the optical attachment with alcohol after each use to prevent cross-contamination.
Protecting Your Health Data
The app encrypts all test results and stores them locally on your device. Optional cloud backup uses end-to-end encryption. You control what data gets shared with healthcare providers through secure portal access with your explicit permission.
Current Limitations and Future Developments
Practical Considerations
While highly accurate, this technology requires:
– Manual blood collection via finger prick
– Single-use chips for each test
– Smartphone with adequate camera quality
– Basic technical comfort with mobile apps
Note: This technology remains in advanced clinical trials. Check with your healthcare provider about availability in your region and insurance coverage.
Next-Generation Improvements
Researchers are developing multi-analyte chips that could test CD4, viral load, and other HIV markers simultaneously. Integration with telemedicine platforms will enable real-time consultation with specialists regardless of location.
Regular CD4 monitoring from home empowers you to take control of your HIV management while reducing clinic visits and associated costs. This smartphone-based system brings laboratory-quality testing to your fingertips, making immune health tracking as routine as checking your temperature. Always coordinate home testing with your healthcare team to ensure optimal treatment decisions based on complete clinical information.


