
Your blood pressure reading at home can tell a completely different story than the one your doctor sees in the office—and getting it right could mean the difference between unnecessary medication and proper treatment. If you’ve ever wondered why your home readings fluctuate wildly or how to avoid the “white coat syndrome” that affects one in three patients, you’re not alone. This guide delivers the exact protocol for measuring blood pressure accurately at home, so you can catch dangerous hypertension early and provide your doctor with reliable data they actually use for treatment decisions.
High blood pressure rarely announces itself with symptoms until serious damage has occurred, making home monitoring your most powerful defense against silent cardiovascular damage. By mastering the precise technique outlined below, you’ll transform from a confused patient guessing at readings to an informed partner in your healthcare—tracking trends, verifying treatment effectiveness, and avoiding costly misdiagnoses from inaccurate measurements.
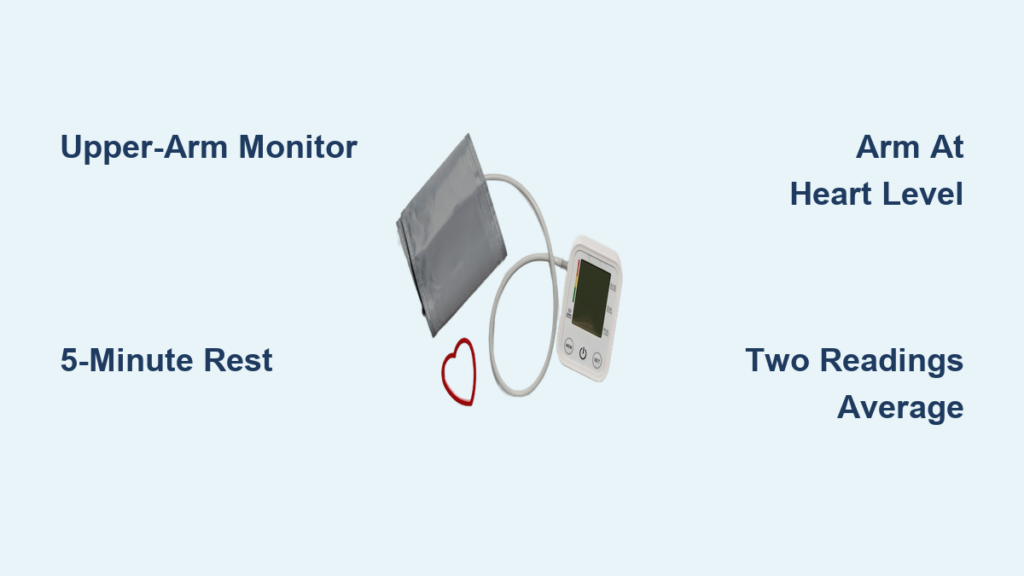
Select the Only Blood Pressure Monitor That Delivers Accurate Home Readings
.jpg)
Why Upper-Arm Digital Monitors Beat Wrist Models Every Time
Skip wrist and finger monitors entirely—they deliver unreliable results for home use due to positioning sensitivity and calibration issues. Upper-arm digital monitors with validated accuracy provide the gold standard for home blood pressure tracking. These devices use an inflatable cuff around your upper arm that automatically measures pressure as it deflates, eliminating human error from manual techniques. Your local pharmacy carries multiple validated options, but always verify your specific model appears on the American Heart Association’s list of approved devices before purchasing.
Annual Calibration Check That Prevents Dangerous Misreadings
Mark your calendar for a yearly accuracy test—most pharmacies offer free blood pressure monitor calibration services. An uncalibrated device can read 10-15 points higher or lower than your actual pressure, potentially leading to dangerous treatment decisions. If your monitor deviates more than 5 points from the pharmacy’s calibrated standard, replace it immediately. Remember: Your health decisions depend on this equipment’s precision, so never skip this critical maintenance step.
Master the Pre-Measurement Protocol That Eliminates False Highs
The 30-Minute Rule That Stabilizes Your Readings
Avoid coffee, cigarettes, alcohol, and exercise for at least 30 minutes before taking measurements—these substances artificially elevate blood pressure and invalidate your results. Never measure immediately after eating or using the bathroom, as both activities significantly impact circulatory dynamics. The most accurate readings happen when your body is in a true resting state, so schedule measurements during natural calm periods in your routine rather than forcing them into stressful moments.
The Non-Negotiable 5-Minute Rest Period Before Measurement
Sit quietly for a full 5 minutes before pressing start—this isn’t optional. Set a timer and resist the urge to check your phone or finish household tasks. This rest period allows your circulatory system to stabilize after movement, preventing falsely elevated readings from recent activity. Rushing this step causes the most common home measurement error, so build this mandatory pause into your routine like brushing your teeth.
Perfect Your Body Positioning to Avoid 10-Point Reading Errors

Chair Setup That Prevents Artificially High Measurements
Sit in a sturdy chair with your back fully supported and feet flat on the floor—never cross your legs, as this can inflate readings by 5-10 points. Position your arm on a table or armrest so the cuff sits precisely at heart level. Your elbow should rest slightly bent, not locked straight, with your entire arm completely relaxed. This seemingly minor detail prevents the most common positioning mistake that skews home readings upward.
Cuff Placement That Hits the Sweet Spot for Accuracy
Position the cuff snugly around your bare upper arm approximately one inch above your elbow bend—the bottom edge should align with your heart when seated properly. You should be able to slide one finger underneath the cuff for correct tightness; too loose or too tight both cause significant measurement errors. Always measure on the same arm for consistency, as readings can differ between arms.
Execute the Two-Reading Technique That Doctors Actually Trust
Digital Monitor Operation Without Common Mistakes
- Apply the cuff to your bare upper arm with the tubing facing downward toward your hand
- Press start and remain completely still—no talking, phone use, or movement
- Wait while the cuff automatically inflates and deflates (typically 30-60 seconds)
- Record both numbers displayed when complete (systolic/diastolic)
- Wait exactly one minute, then repeat the process for a second reading
Why Two Readings Beat Single Measurements Every Time
Always take at least two readings one minute apart and calculate the average—doctors consider single measurements unreliable. If your readings differ by more than 10 points, take a third measurement and discard the outlier. Your healthcare provider needs this averaged data to make treatment decisions, not just a single snapshot that could be skewed by momentary stress or movement.
Decode Your Results Using the Official Blood Pressure Categories

Understanding What Your Numbers Really Mean
Your reading shows two critical numbers in millimeters of mercury (mmHg):
– Systolic (top number): Pressure during heartbeats
– Diastolic (bottom number): Pressure between heartbeats
Normal: Below 120/80
Elevated: 120-129/<80
High Stage 1: 130-139/80-89
High Stage 2: ≥140/≥90
When to Contact Your Doctor Immediately
Call your healthcare provider right away if your systolic reading exceeds 180 or diastolic exceeds 120—especially if accompanied by headache, chest pain, or shortness of breath. These indicate a hypertensive crisis requiring urgent attention. For consistently elevated readings below this threshold, maintain your regular monitoring schedule but share the pattern with your doctor at your next appointment.
Build a Tracking System That Reveals Real Trends, Not Random Numbers
Create a Simple Log That Doctors Actually Use
Develop a consistent logging system with:
– Date and exact time of each measurement
– Both systolic and diastolic numbers
– Average of multiple readings
– Any symptoms or unusual circumstances
Record measurements daily for one week before each doctor visit—this provides the reliable home baseline your healthcare team needs to adjust medications accurately. Bring this log to appointments instead of relying on memory, as patterns matter more than single readings.
Eliminate the Top 5 Home Measurement Errors That Skew Results
Environmental Factors That Create False Readings
- Cuff over clothing: Always measure on bare skin
- Arm below heart level: Causes falsely high readings
- Talking during measurement: Increases readings by 5-10 points
- Crossed legs: Artificially elevates pressure
- Full bladder: Significantly impacts results
Technology Pitfalls That Undermine Accuracy
Don’t check your phone or watch videos during measurements—digital distractions cause subtle movements that affect cuff positioning. Store your monitor in a consistent location away from extreme temperatures, as heat and cold impact electronic components. Replace batteries immediately when readings become erratic or the display dims.
Maintain Your Monitor for Years of Reliable Service
Battery Management That Prevents False Readings
Replace batteries at the first sign of inconsistent measurements or dim display—failing batteries cause erratic readings that mimic equipment malfunction. Store spare batteries with your monitor for immediate replacement when needed. Always use the manufacturer-recommended battery type to prevent voltage fluctuations during measurement.
Integrate Monitoring Into Your Daily Routine Without Hassle
Morning Measurement Protocol That Works
Take readings before coffee but after you’ve been awake for 20-30 minutes—this captures your natural baseline before daily stressors accumulate. Place your monitor on your kitchen table so it becomes part of your morning routine. Consistency in timing provides the most valuable long-term data for tracking trends.
Evening Measurement Timing That Avoids Food Interference
Schedule evening readings at least two hours after dinner, when digestion won’t artificially elevate your pressure. Avoid measurements right before bed when fatigue might affect your position or focus. This timing captures your pressure after daily activities have wound down but before sleep alters circulatory patterns.
Key Takeaway: Accurate home blood pressure monitoring requires validated equipment, strict adherence to measurement protocols, and consistent data sharing with your healthcare team. By implementing these exact steps—selecting the right monitor, perfecting your positioning, taking multiple readings, and tracking trends—you transform from a passive patient into an active partner in your cardiovascular health. Start tomorrow morning with a properly positioned cuff and a full 5-minute rest period, then watch how your reliable data leads to better treatment decisions than office readings alone. Your heart health depends on measurements you can trust—make every reading count.


