
That persistent cough your child gets at night, the mysterious headaches after painting the nursery, or the musty smell in your basement after rain—these could all signal dangerous indoor air pollution. The EPA warns indoor air can be 2-5 times dirtier than outdoor air, yet most homeowners never test their air quality. This guide reveals exactly how to check air quality in home environments using proven DIY methods and smart tools, so you can identify hidden hazards like radon, mold spores, or toxic VOCs before they impact your family’s health.
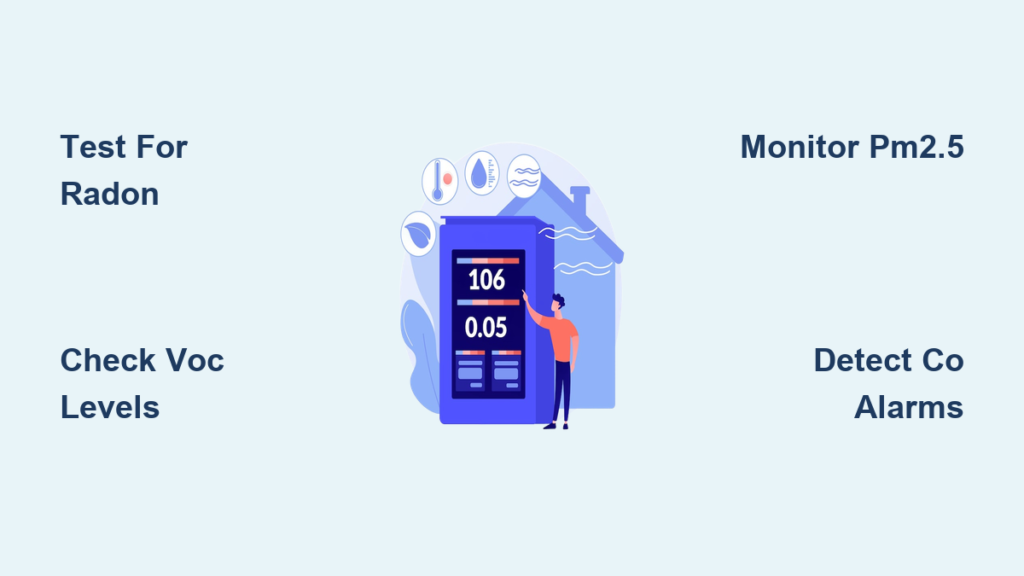
Pinpoint Dangerous Pollutants in Your Living Space
Why Mold Spores Multiply in Your Bedroom
Mold becomes a serious threat when humidity exceeds 60%—a common scenario in bedrooms where morning condensation forms on windows. These microscopic spores trigger asthma attacks within hours, especially when trapped in bedding or carpets. Check for visible discoloration on walls or a musty odor near baseboards. If you spot black, green, or white fuzzy patches, immediate testing is critical since dead spores still cause allergic reactions even after cleaning.
Gas Stoves and Cleaning Products: Silent Chemical Threats
Your kitchen holds two major hazards: gas stoves emit nitrogen dioxide that inflames lung tissue, while aerosol cleaners release volatile organic compounds (VOCs) like formaldehyde. These chemicals linger in upholstery and cabinets, causing dizziness or fatigue within 20 minutes of cooking or cleaning. Candle smoke and wildfire particles (PM2.5) penetrate deep into bloodstreams, worsening heart conditions. Radon—a radioactive gas from soil—seeps through foundation cracks and is the second-leading cause of lung cancer after smoking.
Humidity Extremes Warping Your Home’s Structure
Beyond health risks, physical factors silently damage your property. Humidity above 60% causes wooden floors to buckle and wallpaper to peel, while levels below 30% crack hardwood furniture and irritate skin. Temperature swings concentrate pollutants in specific rooms; for example, cold basements trap radon while hot attics intensify VOC off-gassing from insulation. These conditions create invisible cycles where moisture breeds mold, which then releases more moisture—accelerating structural decay.
Execute Reliable DIY Air Quality Tests
Radon Test Kits: Where to Place Them
Radon requires testing in your lowest lived-in level—typically the basement or ground floor bedroom. Place a charcoal canister (costing $15-$30) in an undisturbed area for 2-7 days with windows closed. Mail it to a certified lab for results in picocuries per liter (pCi/L). If readings exceed 4 pCi/L, conduct a long-term test (90+ days) for accurate annual averages. Never skip this step: radon causes 21,000 U.S. lung cancer deaths yearly.
VOC Detection After Renovations
After painting or installing new furniture, clip a passive sorbent badge to your clothing for 24-48 hours. Lab analysis (costing $80-$150) reveals individual chemical concentrations like benzene or toluene. Compare results against WHO guidelines—total VOCs above 500 µg/m³ indicate hazardous levels. Test all rooms where you’ve used adhesives or finishes, as VOCs peak 3-5 days post-application and linger for months.
Mold Swab Tests: Beyond Visual Inspection
Visible discoloration requires immediate swab testing, but hidden mold demands proactive checks. Set out settle-plate petri dishes in damp areas like under sinks for 48 hours. Lab identification of species (like toxic Stachybotrys) and spore counts (spores/m³) is essential—since 70% of “cleaned” mold returns due to missed colonies in wall cavities. Always pair results with moisture meter readings; any spot exceeding 16% moisture needs remediation.
Carbon Monoxide Alarms: Strategic Placement
Install UL 2034-compliant CO detectors within 15 feet of bedroom doors and near gas appliances like furnaces. Digital models showing real-time ppm readings ($20-$40) alert you to dangerous spikes before symptoms appear. Test units weekly by pressing the button—low-level exposure (15-30 ppm) causes chronic fatigue even without alarms. Replace every 5-10 years since sensor accuracy degrades over time.
Budget Particulate Sensors for Wildfire Seasons
Low-cost laser sensors ($30-$50) track PM2.5 from cooking or wildfire smoke. Calibrate them weekly by comparing outdoor readings (using AirNow.gov) to maintain ±10-20% accuracy. Place units in living rooms during fire season—readings above 15 µg/m³ require immediate action like closing windows and running HEPA purifiers. For reliable data, wipe sensor ports monthly with cotton swabs to prevent dust buildup.
Continuous Monitors for Ongoing Protection
Smart Monitors That Track Multiple Threats
Devices like the Airthings Wave Plus ($180) or Temtop M2000 ($150) monitor radon, CO₂, VOCs, and humidity via smartphone apps. They reveal daily patterns—like PM2.5 spikes during dinner prep or VOC surges after using oven cleaners—allowing preemptive fixes. Place units in main living areas for baseline data, but avoid kitchens where steam distorts humidity readings. Most sync to cloud dashboards showing 30-day trends critical for identifying chronic issues.
When to Invest in Professional-Grade Accuracy
For severe symptoms or post-flood testing, high-end models like the IQAir AirVisual Pro ($300) deliver medical-grade PM2.5 precision plus neighborhood air comparisons. These detect problems before symptoms appear—such as radon levels creeping toward 4 pCi/L over months. Pair them with PurpleAir indoor monitors ($230) during wildfire events to pinpoint which rooms need plastic sheeting seals. Recalibrate annually using outdoor CO₂ references (400-420 ppm) for trustworthy data.
Immediate Action Plan for Contaminated Air
Eliminate Pollution Sources in 24 Hours
Stop problems at the root: seal gas stove connections to halt nitrogen dioxide leaks, replace chemical cleaners with vinegar-based alternatives, and store paints in garage sheds. After water damage, fix leaks within 48 hours—mold colonizes drywall in 72 hours. For VOC-heavy renovations, ventilate rooms for 72 hours before occupancy using cross-breeze window techniques.
Ventilation Upgrades That Actually Work
Install bathroom exhaust fans venting outside (not into attics), as recirculating units spread moisture. Add kitchen range hoods capturing 90% of cooking pollutants—measure CFM ratings against stove size (100 CFM per 10,000 BTU). For whole-house solutions, energy recovery ventilators (ERVs) bring in fresh air without losing heat, sized using ASHRAE’s 0.35 air changes per hour standard.
Targeted Air Cleaning Solutions
Use HEPA purifiers in bedrooms during wildfire season (size for room square footage × 5 air changes/hour). For VOC removal, choose units with 2+ lbs of activated carbon—replace filters every 3-6 months. Install UV-C lights in HVAC ducts to kill mold spores, but only after fixing moisture sources since UV doesn’t remove particles.
Emergency Testing Protocols

Post-Flood Mold Assessment
Test for mold spores within 24 hours of water damage using settle-plate kits. Run dehumidifiers below 50% humidity during drying, and re-test after 72 hours. If spore counts exceed 1,000 spores/m³ or show Aspergillus species, hire professionals—DIY cleanup risks spreading toxins.
Wildfire Smoke Response
Deploy portable PM2.5 monitors in all rooms when smoke arrives. Seal window gaps with temporary weather-stripping, run HEPA purifiers on high, and avoid cooking. Ventilate only when outdoor Air Quality Index drops below 50—check EPA AirNow app hourly.
Cost-Effective Testing Strategy

Start with a $150 smart monitor for real-time data on core pollutants (PM2.5, VOCs, humidity). Add targeted tests only when needed: a $25 radon kit for basements, or $100 VOC tests after renovations. Professional assessments ($400-$800) are justified only for persistent health issues or pre-purchase inspections. Never skip CO detectors—every bedroom needs one at $25 each.
Quick Action Checklist
☐ Install CO alarms outside all bedrooms this week
☐ Test basement for radon within 30 days
☐ Run continuous monitor for 14 days to establish baseline
☐ Replace HVAC filters every 90 days
☐ Fix plumbing leaks within 48 hours of discovery
☐ Switch to GREENGUARD-certified low-VOC cleaners
☐ Re-test after installing new furniture or renovations
Don’t gamble with invisible threats. Checking air quality in home environments takes less effort than scheduling a dentist visit, yet protects your family’s long-term health and your home’s structural integrity. Start with one $25 CO alarm today—then expand your testing as symptoms or renovations dictate. Clean air isn’t optional; it’s the foundation of a healthy home.


