
Is your shower suddenly losing pressure or does your tap water taste faintly metallic? These frustrating signs mean your whole house water filter is overdue for replacement. Most homeowners don’t realize that skipping regular filter changes can reduce water pressure by up to 50% while allowing sediment, chlorine, and contaminants to flow freely through every faucet and appliance in your home. Changing your home water filter is a simple 25-minute DIY project that costs under $50—far cheaper than calling a plumber for a $150 service call.
This guide cuts through the confusion with precise, model-specific instructions for Brio systems and standard housings. You’ll learn exactly when to replace filters based on your water source, avoid common installation mistakes that cause leaks, and implement pro sanitizing techniques that extend filter life. Whether you’re on city water or a well system, you’ll complete this task confidently without special skills or expensive tools.
Spotting Critical Filter Failure Signs
Don’t wait for cloudy water or strange tastes before acting—these indicate your filter has already failed. For Brio systems, check the pressure gauge monthly; anything below 12 PSI means immediate replacement is required to prevent bacterial growth inside the housing. City water users typically see filters last 10-12 months, but well water systems demand changes every 3-6 months due to heavy sediment loads that clog filters twice as fast.
How to Diagnose Flow Problems
- Sudden pressure drop: Open an outdoor faucet—if flow is strong there but weak indoors, your filter is clogged
- Discolored water: Brown or yellow tints signal iron buildup in well systems
- Taste/smell changes: Musty odors indicate biological growth inside saturated filters
- Visible particles: Sand or rust specks in ice cubes prove filter bypass
Pro Tip: Keep a maintenance log noting your initial pressure reading. A 20% drop from that baseline means it’s time to change filters—don’t wait for complete failure.
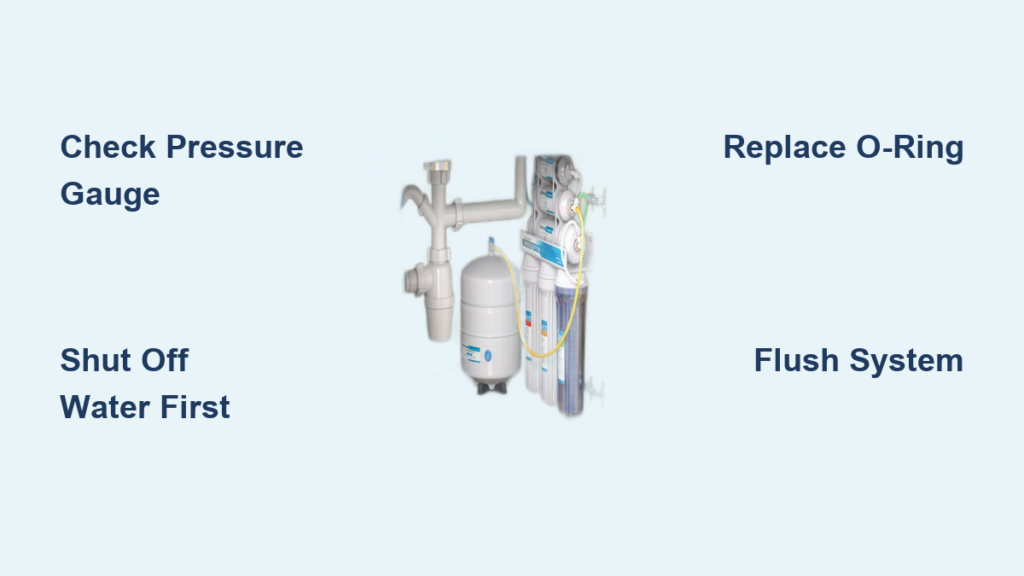
Gather Model-Specific Tools Before Starting
Using the wrong wrench or skipping sanitizing steps guarantees leaks. For standard 10-inch housings (like Brio or Pentek Big Blue), you’ll need:
– 5-micron string wound cartridge (4.5″ x 10″ size—verify your model number)
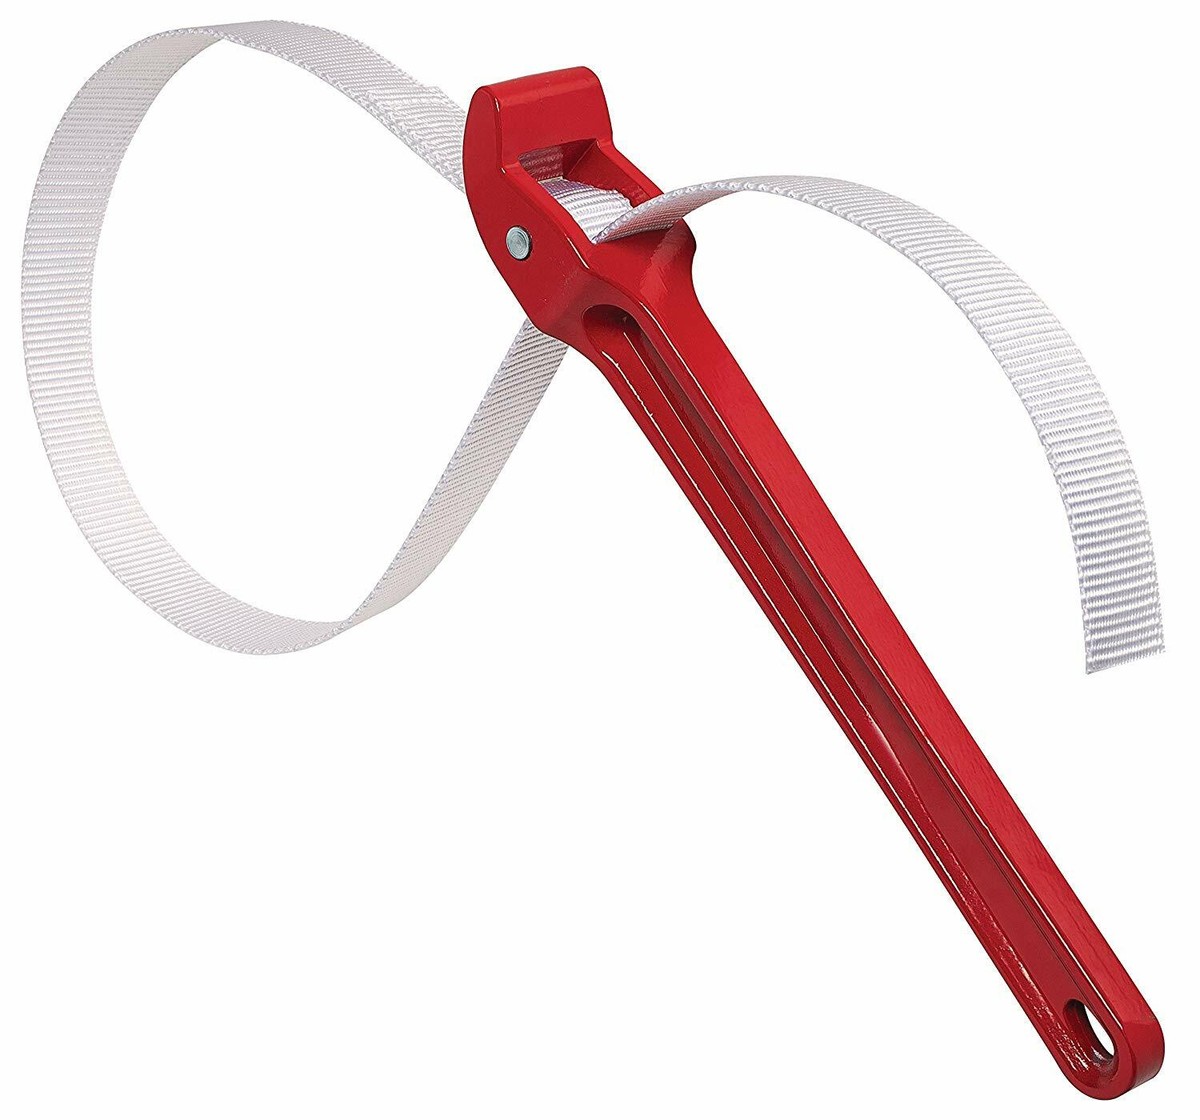
– Housing-specific wrench (Brio uses a 12″ strap wrench; Pentek requires a socket wrench)
– Rectangular tote (holds 5+ gallons vs. a bucket’s 2 gallons—critical for heavy housings)
– 10:1 bleach solution (1 tbsp bleach per gallon of water for sanitizing)
– Food-grade petroleum jelly (for O-ring lubrication only—never use oil)
Why Tool Choice Matters
Using a standard pipe wrench risks cracking plastic housings. The rectangular tote prevents spills when lowering the 8-10 lb water-filled housing. Skipping the bleach solution invites bacterial growth in wet crevices—especially dangerous for well water users. Always verify your filter’s micron rating matches your system; a 1-micron filter on well water clogs in weeks.
Critical Safety Prep You Can’t Skip
Never assume your water is safe to handle during filter changes. Test for bacteria first if you’re on a well system—exposure to contaminated water during housing removal risks serious illness. For city water users, simply run a glass of water; if it’s cloudy or smells like chlorine, let it sit 10 minutes before starting.
Flow Rate Safety Check
Select replacement filters rated for double your household’s peak flow (e.g., 16 GPM for a 4-bedroom home). An undersized filter strains your plumbing and reduces effectiveness by 40%. If you’re uncomfortable handling pressurized systems or spot rusted valves, hire a certified plumber—forcing a corroded housing can cause catastrophic flooding.
Shut Off Water Using Your System Type
Your shutoff method depends entirely on valve configuration. Never skip this step—residual pressure can blast the housing off with 80+ PSI force.
Standard Dual-Valve Systems
Turn clockwise to close both the inlet (cold water supply side) and outlet (house side) valves. Verify shutoff by opening a downstairs faucet; no water should flow.
Single-Valve or Main-Shutoff Systems
Close the main house valve near your water meter, then open the highest faucet (like an upstairs shower) to drain pressure. Continue until water sputters out.
Well Pump Systems
Turn off the pump at the breaker, then attach a garden hose to an outdoor spigot to drain lines completely. Residual pressure in well tanks can hold 50+ PSI even when pumps are off.
Release Pressure Without Messy Surprises
Position your tote directly under the housing before touching valves. Press the red relief button firmly for 10-15 seconds—you’ll hear a hiss as pressure drops. For systems without buttons (like older Pentek), crack open a cold faucet at the nearest sink until water stops flowing.
Warning: The Silent Danger
If no water releases from the button, stop immediately. Residual pressure means valves aren’t fully closed—a common issue with corroded single-handle valves. Recheck shutoff points before proceeding.
Remove Housing Without Spills or Damage

Slide your wrench onto the housing’s base groove (not the filter head). Turn counter-clockwise slowly—expect heavy resistance as the O-ring breaks its seal. After the first quarter-turn, pause to let water drain into the tote. Continue unscrewing in small increments until the housing lowers completely.
Pro Technique for Heavy Housings
Place one hand under the housing base as you unscrew. When water stops flowing, lift the housing 1 inch to break the vacuum seal before fully removing it. This prevents sudden water surges that flood basements.
Inspect and Clean Components Thoroughly
Remove the old filter and dump remaining water into the tote. Pull the O-ring from its groove—it should snap back into shape when stretched. Discard if it shows any:
– Flat spots from compression
– Tiny cracks at the seam
– Permanent stretching beyond 10%
Sanitizing Protocol
Mix 1 tbsp bleach per gallon of water. Submerge the housing in this solution for 10 minutes, scrubbing the O-ring groove with a toothbrush. Rinse 3x with clean water—residual bleach causes cloudy water for days. For iron-heavy well water, substitute CLR solution but rinse 5x to prevent chemical taste.
Install New Filter with Precision

Place the new filter over the center post, ensuring the open end faces down. Press firmly until it seats completely—you should feel it click into the base. For Brio systems, verify the alignment stand isn’t bent; a misaligned filter creates 30% less flow.
Critical Seating Check
Hold the housing horizontally and shake it—if you hear the filter rattle, it’s not seated. An improperly installed filter allows unfiltered water to bypass around the edges, defeating the entire system.
Reassemble to Prevent Costly Leaks
Apply a thin petroleum jelly coat to the new O-ring (or cleaned replacement). Position it evenly in the groove—no twists or pinches. Hand-tighten the housing clockwise until snug, then give one-quarter turn with the wrench. Overtightening cracks housings; undertightening causes leaks.
Torque Test
After tightening, try rotating the housing with your palm—you should feel firm resistance but not see valve movement. If it spins freely, tighten another 1/8 turn.
Restore Water and Verify No Leaks
Hold the pressure button down while slowly opening the inlet valve. When water flows steadily from the button, release it and open the outlet valve. Watch connections for 2 minutes—any drip means re-tightening is needed.
Air Purge Technique
Open the lowest faucet (like a basement sink) until water runs clear. Trapped air causes hammering noises in pipes if not purged properly.
Flush System for Optimal Performance
Run water for 5-10 minutes through an outdoor spigot (not indoor faucets) to flush carbon dust from new filters. Skipping this step leaves black particles in your ice cubes for weeks.
Troubleshoot Immediate Post-Change Issues
Zero Water Flow After Installation
- ✅ Check: Pressure relief button stuck open
- ✅ Fix: Press and release button 3x to reset
Persistent Leaks at Housing Seam
- ✅ Check: O-ring twisted during installation
- ✅ Fix: Drain housing, re-lubricate O-ring, reinstall
Slow Flow Despite New Filter
- ✅ Check: Incorrect filter seating
- ✅ Fix: Reinstall filter ensuring full contact with base post
Extend Filter Life with Smart Upgrades
Install a 50-micron pre-filter before your main housing if you’re on well water—this captures sand and extends main filter life by 4 months. City water users should add a pressure gauge ($15) to track performance; a 15 PSI drop signals early clogging. Families with 4+ members should change filters every 6 months regardless of pressure readings.
When to Call a Professional
DIY works for standard single-housing systems, but hire a plumber for:
– Multi-stage systems (e.g., carbon + UV combo units)
– Persistent leaks after 2 reinstallation attempts
– Rusted valves that won’t shut off completely
– Well systems with bacterial contamination concerns
Certified plumbers test water chemistry during service, adjusting filter specs for your exact contaminants—a $100 service that prevents $500 in appliance damage.
Track Changes with This Simple Template
| Field | Entry |
|---|---|
| Change Date | ___ |
| Filter Model | ___ |
| Water Source | City □ Well □ |
| Next Due Date | ___ |
| Pressure Reading | ___ PSI |
Tape this to your filter housing—it eliminates guesswork for future changes.
Changing your home water filter every 6-12 months protects your family from harmful contaminants while preventing $1,000+ in plumbing repairs from sediment damage. By following these precise steps—especially the sanitizing protocol and O-ring checks—you’ll ensure crystal-clear water flows through every faucet. Mark your calendar for the next change now, and enjoy the confidence of knowing your whole house filtration system operates at peak efficiency. For well water users, consider adding a pre-filter at your next change to double your main filter’s lifespan and keep maintenance costs minimal.


