
Dropped calls while talking to your doctor? Texts stuck in “sending” mode from your basement office? You’re not imagining things—nearly 40% of homes have at least one “dead zone” where cell signal fails. The good news is you can solve this without switching carriers or moving houses. This guide reveals exactly how to boost cell phone signal at home using proven methods that work for any carrier.
Stop wasting money on gimmicks that promise miracles. Whether you’re dealing with one bar in your bedroom or complete signal loss throughout your house, you’ll discover practical fixes ranging from 60-second tweaks to professional-grade installations. Most homeowners see dramatic improvements with solutions costing less than $500—making dropped calls a thing of the past.
Diagnose Your Home’s Cell Signal Weak Spots in 10 Minutes
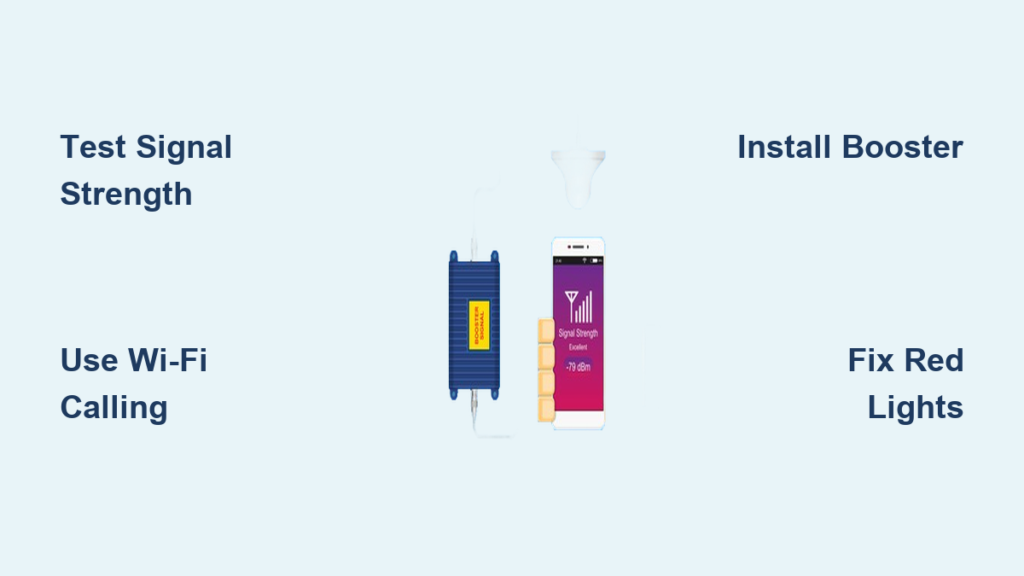
Test Your Current Signal Strength Like a Pro
Before spending a dime, pinpoint exactly where your signal fails. Grab your phone and follow these steps:
Android users: Go to Settings > About Phone > Status > Signal Strength (varies by model). Look for the “dBm” reading—this is your true signal strength indicator.
iPhone users: Dial 3001#12345# to enter Field Test Mode. Tap “LTE” then “Serving Cell Meas” to find “rsrp0.” Ignore the bar icons—your actual signal strength is this negative number.
Signal strength decoder:
– -50 dBm = Excellent (full bars)
– -70 dBm = Good (reliable calls)
– -85 dBm = Fair (occasional drops)
– -100 dBm or lower = Poor (frequent dropped calls)
Walk slowly around your property while watching this number. You’ll likely discover surprising variations—sometimes gaining 15 dBm (3+ bars) just by moving near a window or up one floor.
Map Dead Zones with Free Signal Apps
Download OpenSignal or Network Cell Info Lite to visualize your coverage gaps. These apps create color-coded maps showing exactly where signal fails in your home. Most users find their strongest signal comes from a specific direction—often south-facing windows where towers are clustered.
Pro tip: Test at different times of day. Network congestion between 5-7 PM can reduce effective signal by 10-15 dBm even if tower signal remains strong.
Free Fixes That Improve Cell Signal Immediately
Optimize Phone Settings for Maximum Reception
Toggle Airplane Mode for 15 seconds—this forces your phone to reconnect to the strongest available tower. It’s the fastest fix for temporary signal drops and takes less than 30 seconds.
Enable Wi-Fi Calling if you have reliable internet. This routes calls through your home network instead of cellular towers. Most carriers support it on iPhone 6+ and Android 7.0+. Go to Settings > Phone > Wi-Fi Calling on iPhone or Settings > Network & Internet > Mobile Network > Advanced > Wi-Fi Calling on Android.
Remove thick phone cases, especially those with metal components. Even standard cases can reduce signal by 5-8 dBm—enough to push you from one bar to no service in marginal areas.
Position Yourself for Stronger Signal in Seconds
Stand near windows when making important calls. Glass blocks signal 40-60% less than drywall—often the difference between 1 bar and full reception. South-facing windows typically provide strongest signal in North America.
Move upstairs for critical calls. Each floor gains 8-12 dBm on average. In a two-story home, you might jump from -105 dBm (no service) in the basement to -85 dBm (reliable calls) on the second floor.
Avoid interference zones—stay 6+ feet from microwaves, baby monitors, and cordless phones during calls. These devices operate on 2.4 GHz frequencies that directly interfere with cellular bands.
Choose the Right Signal Booster for Your Home Size

weBoost Home MultiRoom: Best for Large Houses
This $450 system covers up to 5,000 sq ft when installed properly. Its 65 dB max gain (FCC limit) works with all carriers simultaneously—ideal for households with mixed carriers. Requires at least -100 dBm outside signal. Installation takes 2-3 hours and delivers 20-30 dBm improvement in dead zones.
What to watch for: The external antenna must be mounted 20+ feet vertically from the indoor antenna. Less separation causes oscillation (red lights on the unit), which creates more problems than it solves.
SureCall Fusion4Home: Ideal Budget Option
For $350, this booster covers 3,000-4,000 sq ft with 72 dB max gain. It’s the most popular DIY model because it includes all necessary cables and antennas. Works best when you have -95 dBm or better outside signal.
Installation shortcut: Mount the external antenna on your roof ridge line—this typically gains 10-15 dBm over ground-level placement. Use the included compass to align directional antennas toward the nearest tower.
Install a Cell Signal Booster in 4 Steps
Locate Strongest External Signal Point First
Use your phone’s field test mode to find the highest dBm reading around your property perimeter. Walk to your roof edge (safely!) or highest outdoor point. Most homes see 15-25 dBm improvement by moving the antenna just 10 feet higher.
Critical check: If your strongest outdoor signal is worse than -105 dBm, boosters won’t work effectively. Consider femtocells instead (see comparison below).
Mount External Antenna for Maximum Gain
Yagi antennas (directional) provide 8-12 dB more gain than omnidirectional models but must be precisely aimed. Use OpenSignal’s tower map to point within 5 degrees of the nearest tower.
Mounting tip: Attach to chimney or roof peak using non-penetrating mounts to avoid leaks. Keep antenna 18+ inches above roofline—signal improves significantly above obstructions.
Run Cable and Install Amplifier Properly
Use the included LMR-400 cable (not standard RG-6) to minimize signal loss. Route through attic spaces whenever possible—avoid running near electrical wiring to prevent interference.
Mount the amplifier in a cool, ventilated area like a basement or utility closet. Heat degrades performance—keep it away from water heaters or HVAC units. Connect the indoor antenna (panel type for directional coverage, dome for 360°).
Test and Optimize Your New System
Power on and check indicator lights:
– Solid green = optimal operation
– Flashing yellow = oscillation—increase antenna separation
– Red = overload—reduce gain or add attenuator
Walk through your home testing signal in each room. Most users see 15-25 dBm improvement (2-4 bars) in previously dead zones within minutes of proper installation.
Fix Red Light Errors on Your Signal Booster
Solve Oscillation Problems Causing Dropped Calls

When your booster shows yellow or red lights, it’s fighting itself—receiving its own broadcast signal. This causes dropped calls and network interference.
Quick fix: Increase vertical separation between antennas to 25+ feet. If impossible, add physical barriers like floors or concrete walls between them. Reduce amplifier gain by 5 dB using the control dial.
Pro tip: If mounting on a single-story home, run the indoor antenna cable through a window to a table—this often provides enough separation when roof mounting isn’t feasible.
Address Overload Issues Near Cell Towers
If you live within 1 mile of a tower, strong signal can overload your booster, causing shutdowns.
Solution: Install an attenuator between the outdoor antenna and amplifier. Start with 10 dB attenuation and test—too much will weaken your boosted signal. Alternatively, switch to a directional Yagi antenna pointed away from the strong tower.
Future-Proof Your Home for 5G Signal
Upgrade to Sub-6 GHz Boosters Now
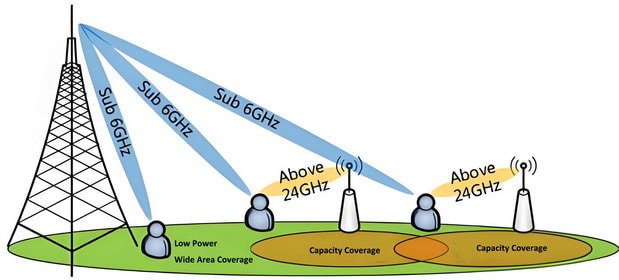
Newer boosters like the weBoost Home 600 support 600 MHz-6 GHz frequencies covering all current 5G bands. Older models only handle 4G/LTE frequencies, leaving you with weak 5G signal.
Must-have feature: Ensure your booster explicitly lists “Sub-6 GHz” or “n71/n41” frequency support. Without this, your 5G speeds will remain sluggish even with a strong signal indicator.
Maintain Your Signal System for Long-Term Results
Monthly Checkup Routine That Prevents Problems
Tighten all coax connections—vibration and temperature changes loosen fittings over time. A single loose connector can cause 10+ dB signal loss.
Inspect cables for damage—UV exposure degrades outdoor cables after 3-5 years. Look for cracks in the outer jacket or discoloration indicating water intrusion.
Clean antenna elements with a soft brush—dirt and bird droppings can reduce signal capture by 5-8 dBm.
Final tip: Start with free fixes like Wi-Fi calling and strategic positioning. If those fail, a properly installed $400 booster typically solves 95% of home signal problems. Remember to register your booster with your carrier within 60 days—FCC rules require it, and it’s free. With these steps, you’ll transform frustrating dead zones into reliable calling areas in less time than it takes to watch a movie.


