
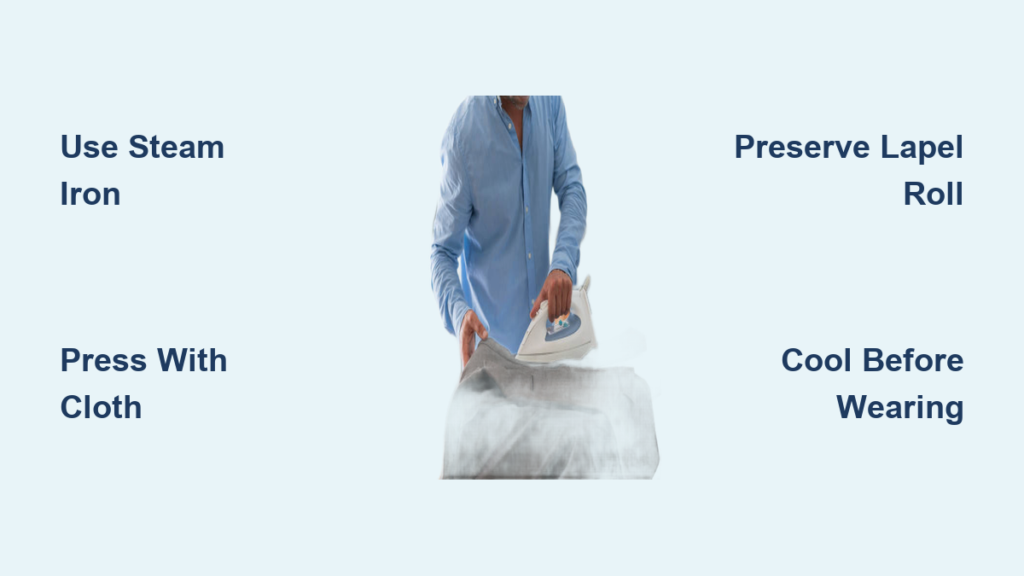
Your navy suit looks like it survived a boxing match, and the dry cleaner is closed until Monday. Tomorrow’s job interview hangs in the balance. The good news? You can achieve professional pressing results at home with the right technique—no expensive equipment or tailoring degree required. This guide reveals the exact methods professional tailors use to eliminate wrinkles while protecting delicate fabrics.
Skip the guesswork that leads to shine marks, distorted lapels, or melted polyester. You’ll learn fabric-specific temperature settings, how to maintain your suit’s natural silhouette, and emergency tricks for last-minute wrinkles. Most importantly, you’ll gain the confidence to handle your $1,000 suit without fear.
Essential Equipment That Prevents Costly Mistakes
A 1200W+ steam iron with variable temperature control is non-negotiable for home suit pressing. Cheap irons scorch wool and fail to penetrate fabric layers. Look for models with precise steam burst buttons—this feature relaxes deep wrinkles without direct heat contact. Your ironing board must adjust between 32-38 inches to match your height; bending over creates uneven pressure that sets new creases.
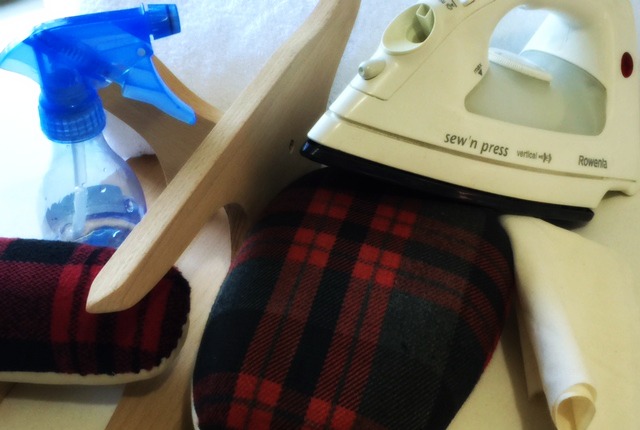
An 18×18 inch 100% cotton pressing cloth is your suit’s armor against shine marks. Never press wool directly—this single barrier prevents the polished appearance that ruins expensive jackets. A tailor’s ham (that curved, pillow-shaped tool) replicates your body’s contours when pressing lapels and sleeve heads. Without it, you’ll flatten the jacket’s natural shape.
For sleeve perfection, a narrow sleeve board slides inside jacket sleeves and trouser legs, eliminating diagonal creases. Complete your arsenal with a distilled water spray bottle (tap water leaves mineral spots), horsehair clothes brush, and wide-shouldered wooden hanger. These tools pay for themselves after one avoided dry cleaning bill.
Fabric-Specific Temperature Settings That Avoid Disasters
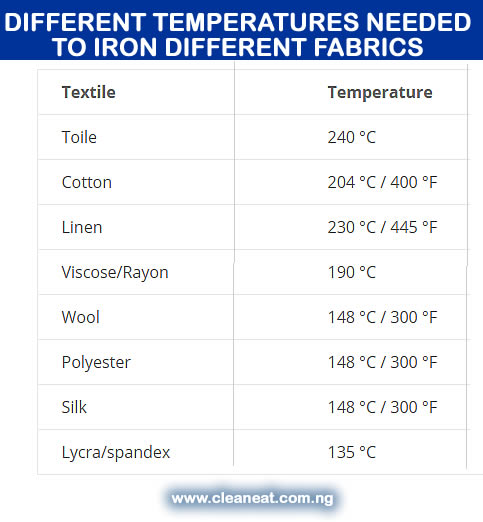
Wool suits demand 300°F with full steam—any hotter melts fibers and creates permanent shine. Cotton suits tolerate 400°F but require constant steam to prevent scorching. Linen’s high 445°F setting needs frequent re-steaming to avoid yellowing. Polyester blends melt at 300°F, so use 275°F with minimal steam. Silk requires 250°F with mandatory pressing cloth—direct contact leaves irreversible water spots.
How to Test Settings Safely
Mist your pressing cloth with distilled water and press for 5 seconds. If it sizzles violently, the heat’s too high. For mystery fabrics, start at 250°F and test on the jacket’s inner hem. Increase heat in 25° increments while checking for fabric stiffness—wool should feel supple, not crisp. Never assume care labels are accurate; always verify with a hidden test area first.
Pre-Pressing Protocol to Avoid Permanent Damage
Empty every pocket—a forgotten receipt creates a permanent impression when pressed. Fasten all buttons and zippers to maintain the jacket’s engineered shape. Brush the entire suit downward with horsehair bristles to lift embedded dust that causes shine marks. Identify the lapel roll line (where lapel meets collar) before pressing—this natural curve must be preserved.
Steam Relaxation Technique for Stubborn Wrinkles
Hang the suit in your bathroom during a 15-minute hot shower. The steam relaxes compressed fibers, reducing ironing time by 40%. Works especially well for wool suits fresh from overnight packing. Remove immediately after showering—prolonged humidity causes moisture damage. Never skip this step for suits worn more than 4 hours.
Jacket Interior Pressing That Preserves Structure
Turn the jacket inside-out before touching the iron to fabric. Press the back lining first using downward strokes from center seam outward—this prevents puckering at the shoulders. Insert your tailor’s ham into sleeves before pressing linings; flat pressing creates permanent sleeve creases. Never press directly on shoulder pads—use the ham’s curve to support natural shoulder shape while steaming from beneath.
Shoulder Pad Protection Method
Place the ham under the shoulder seam with the rounded side up. Hold the iron 1 inch above the fabric and use 3-second steam bursts. The rising steam relaxes wrinkles while the ham maintains the jacket’s silhouette. Pressing directly on pads flattens them permanently, destroying the jacket’s drape. This technique works for all suit weights without risking heat damage.
Perfect Lapel Pressing Without Killing the Roll

Locate the natural lapel roll line—this subtle curve where lapel meets collar should never be pressed flat. Position your tailor’s ham under the lapel to support its 3D shape. Press only the underside of the lapel through your cotton cloth using light, gliding motions. Roll the lapel over the ham as you press to maintain the original curve. Check both sides against a light source—consistent shadow indicates proper roll.
Why Flat Lapels Ruin Your Suit
Amateurs press lapels like shirt collars, creating a cardboard-like appearance. Professional lapels roll naturally from collarbone to button, creating visual depth. If your lapels lay completely flat after pressing, you’ve destroyed the jacket’s intended silhouette. Correct this by re-steaming the roll line and shaping over the ham—never use direct pressure.
Sleeve Pressing That Maintains Natural Hang
Insert the sleeve board with the seam at the bottom—this aligns the fabric’s natural fold line. Press sleeve heads first using the ham’s rounded surface; this area must stay rounded, not creased. Work in 8-inch segments from shoulder to cuff, lifting the iron after each pass—never back-and-forth dragging. Maintain the existing sleeve crease by aligning the seam with the board’s edge.
Critical Sleeve Head Technique
The sleeve head (where sleeve meets shoulder) is the suit’s most vulnerable area. Place the ham inside the sleeve cap so the rounded top supports the fabric. Hold the iron vertically and steam upward into the fibers. Pressing flat here creates permanent dents that disrupt the jacket’s drape. This method preserves the tailored shape while removing wrinkles.
Trouser Crease Creation That Looks Tailored
Align inner and outer leg seams perfectly before pressing—mismatched seams create visual imbalance. Fold 1/4 inch toward the outside from center front—this offset placement creates a flattering line. Press from waist to hem in one continuous motion with medium pressure. Verify both legs hang identically before cooling; mismatched creases look amateurish.
The 1/4 Inch Crease Formula
For classic suits, measure 1/4 inch toward the outer thigh from the trouser’s center front seam. Pin this line, then remove pins before pressing. This placement follows traditional tailoring standards while creating a slimming visual effect. Cotton suits benefit from light spray starch on the crease line—test first on the inner waistband.
Stubborn Wrinkle Removal Without Scorching
Hold the iron 2 inches above fabric and blast steam 4 times in quick succession—this relaxes fibers without heat contact. For deep wrinkles in wool, mist with 1:3 white vinegar/water solution before steaming. Press both sides of the fabric—inside then outside—for complete wrinkle release. Allow 2 minutes cooling time between passes; rushing causes heat damage.
Vinegar Solution Trick for Wool Suits
Mix one part white vinegar with three parts distilled water in your spray bottle. Lightly mist wrinkled areas, then steam from both sides. The vinegar breaks down fiber stiffness while the steam penetrates. Press through a dry cloth to set the fibers. This technique removes set-in wrinkles without shine risk—test on an inner seam first.
Post-Pressing Storage That Locks in Results
Hang suits immediately on wide-shouldered wooden hangers—wire hangers distort shoulders within hours. Leave 3 inches between garments in your closet; overcrowding transfers wrinkles. Use breathable cotton garment bags—plastic traps moisture causing mustiness. Place cedar blocks inside pockets to absorb humidity and deter moths.
The 30-Minute Cooling Rule
After pressing, let your suit hang undisturbed for 30 minutes before wearing. This allows fibers to set in their new position. Rushing to wear the suit resets wrinkles immediately, especially in humidity. During cooling, check lapels and creases under bright light—touch up any inconsistencies before the fibers set.
Emergency Wrinkle Solutions for Last-Minute Disasters
Hang your suit in the bathroom during a 20-minute hot shower—steam relaxes wrinkles in 15 minutes. Use a handheld steamer vertically with downward strokes for spot treatment. For travel emergencies, mist with wrinkle release spray then hang in a steamy bathroom. Never use a hair straightener—this creates permanent shine marks on wool.
Travel Steamer Protocol
Fill the steamer with distilled water and preheat for 2 minutes. Hold the suit taut with one hand while steaming with the other. Start at shoulders and work downward using gravity to pull wrinkles out. This method removes packing wrinkles in 8 minutes flat—ideal for business trips when dry cleaners are unavailable.
Mastering home suit pressing saves $300+ annually while extending your suit’s life. You’ll never face a wrinkled suit crisis again—whether it’s 2 AM before a job interview or post-flight before a client dinner. Start with an older suit to build confidence, then press your best pieces using these professional techniques. Your sharp appearance—and peace of mind—will show immediately.


