
That pocket knife you carry daily deserves your initials. Your grandmother’s vintage locket could hold a secret message. Metal engraving at home transforms ordinary objects into personalized heirlooms without requiring a professional workshop. Whether you’re crafting custom jewelry or adding signatures to handmade tools, this guide reveals exactly how to engrave metal at home using affordable tools and proven techniques. You’ll learn which metals won’t frustrate beginners, discover foolproof design transfer methods, and master the step-by-step process that produces crisp, professional results. Forget expensive courses—your first successful engraving is just one afternoon away.
Essential Tools for Home Engraving
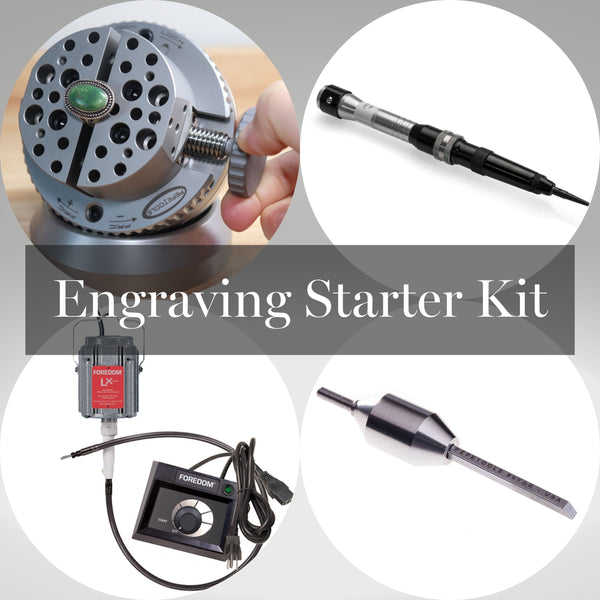
Hand Engraving Starter Kit
Start with seven critical items that form your engraving foundation. A set of graving burins with V-shaped and flat tips creates everything from delicate lines to bold lettering—these hardened steel tools must be razor-sharp to prevent metal tearing. Pair them with a 2-4 oz lightweight hammer that delivers controlled strikes without damaging delicate work. Secure your piece using a bench pin clamped to your work surface and a rotating engraving block to hold awkward angles steady. 10x magnification reveals microscopic details, while LED ring lighting eliminates shadows that cause costly mistakes. Keep Arkansas stones nearby for frequent touch-ups, and apply a drop of light machine oil to prevent rust on your investment.
Power Tool Options
Rotary tools like Dremels with carbide bits cut through copper and brass at 15,000-25,000 RPM, but add a flexible shaft attachment to reduce hand fatigue during long sessions. For jewelry work, pneumatic engravers offer unmatched precision with air-powered systems like GraverMax, while laser engravers provide computer-controlled perfection for stainless steel. Don’t overlook electrochemical etching—this low-tech method uses salt water and 12-24V DC power to create crisp designs on challenging metals like titanium. Serious hobbyists eventually upgrade to micro motor systems with foot pedals for speed control that mimics cruise control in your car.
Budget-Friendly Consumables
Stock up on brass sheets for practice—they show contrast better than copper and won’t break the bank. Dykem Blue layout fluid makes design lines pop against metal surfaces, while carbon paper transfers printed designs with zero tech requirements. Essential safety items include cut-resistant gloves for handling sharp edges and safety glasses with side shields—never skip these even for quick projects. A $5 bottle of denatured alcohol works better than acetone for degreasing most home metals and doubles as a transfer medium for laser-printed designs.
Choosing and Preparing Your Metal
Beginner-Friendly Metals
Copper and brass engrave beautifully under hand pressure alone, making them perfect training materials that won’t destroy your tools. Aluminum works well with rotary tools but requires frequent bit cleaning as it clogs faster. Pewter engraves like butter but scratches easily—ideal for decorative pieces that won’t see daily use. Avoid stainless steel and titanium initially; these hard metals demand diamond-tipped bits and will frustrate beginners. Save them for after you’ve mastered softer metals and invested in proper tooling.
Surface Preparation Steps
Begin by degreasing metal with denatured alcohol—finger oils prevent clean cuts and cause design slippage. Sand progressively from 400 to 1000 grit until surfaces feel silky smooth, eliminating scratches that show through engravings. Apply layout fluid with a cotton swab, let it dry completely, then transfer your design using carbon paper and a sharp pencil. Secure your workpiece firmly in an engraving block or with clamps—any movement during engraving ruins designs and creates dangerous kickbacks. This preparation prevents 90% of beginner failures.
Design Transfer Methods That Work
Simple Transfer Techniques
Carbon paper method: Tape your design over carbon paper on the metal, then trace firmly with a ballpoint pen for instant results. Acetone transfers work brilliantly—laser print your design on magazine paper, place face-down on clean metal, and rub with acetone-soaked cotton until toner transfers. For repeatable designs, create vinyl stencils with a Cricut machine. Direct scribing works for simple monograms—just draw directly on the layout fluid with a sharp scribe. Always test transfers on scrap metal first to avoid wasting your final piece.
Digital Design Tips
Create crisp vector designs in free Inkscape software—raster images (like JPEGs) won’t translate well to metal. Size artwork precisely using millimeters; small details below 0.5mm often disappear during engraving. Print multiple copies so you can practice transfers without starting over. For rotary tools, simplify complex designs by removing tiny details that won’t engrave cleanly. Remember: what looks good on screen often needs adjustment for physical metal—always test on scrap brass first.
Hand Engraving Techniques
Basic Cutting Methods
Line cuts form your foundation—hold the graver at 45° and push steadily for consistent depth. Shading cuts create depth through parallel lines spaced closer for darker areas. Stippling adds texture using controlled dot placement with a round graver. Relief cuts remove background metal to make designs pop—perfect for logos. Start shallow and deepen gradually; rushing causes tool slippage and ruined pieces. For clean lines, always cut away from yourself and follow the metal grain when possible.
Grip Techniques That Matter
Use a pencil grip for curved lines, rotating the metal rather than your hand. For straight cuts, try the palm push method—brace the graver against your palm and push with steady pressure. Hammer and chisel techniques work best for deep lettering on harder metals like nickel silver. Keep your non-dominant hand behind the cutting edge at all times—this simple positioning prevents 95% of hand injuries. For intricate work, rest your tool-holding elbow on the table to eliminate hand tremors.
Power Engraving Methods
Rotary Tool Mastery
Select carbide bits for soft metals, switching to diamond-tipped bits for stainless steel. Run at 15,000 RPM for brass, dropping to 5,000 RPM for stainless to prevent overheating. Take multiple light passes rather than grinding deep—this prevents bit breakage and produces cleaner lines. Cool your work with bursts of compressed air or a drop of cutting oil; overheated bits dull instantly and melt design edges. For crisp corners, stop the bit completely before changing direction to avoid rounding.
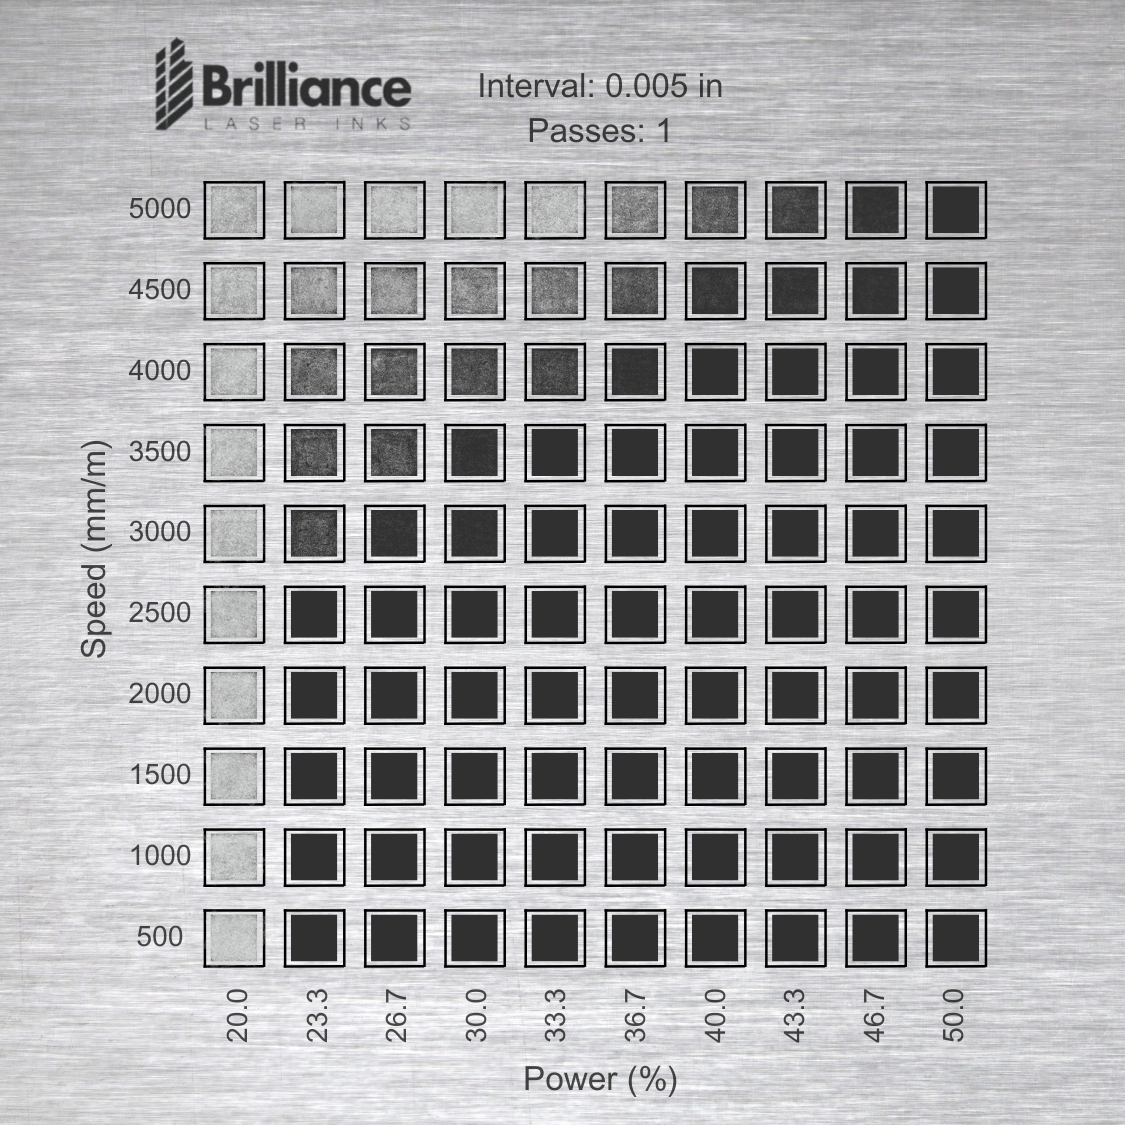
Laser Engraving Parameters
For annealing stainless steel, set power to 20-50% and speed around 300mm/s to create dark marks without cutting. Deep engraving requires 50-80% power at 100-500mm/s depending on depth. Use air assist to prevent oxidation marks that ruin finishes. Always test settings on scrap metal first—laser results vary wildly between brass and aluminum. Never leave a running laser unattended; fires can ignite in seconds with improper settings.
Step-by-Step Engraving Process
Planning Your Project
Choose designs matching your skill level—start with straight lines before attempting curves. Test first on scrap metal identical to your final piece. Mark precise boundaries with a ruler and scribe to keep everything centered. For jewelry, rehearse the motion in air 10 times before touching metal—muscle memory prevents mistakes.
Execution Sequence
- Clean and sand metal to 1000 grit (critical for clean cuts)
- Apply layout fluid and let dry completely
- Transfer design using your chosen method
- Outline lightly to establish the design framework
- Deepen cuts gradually, checking depth with magnification
- Add details like shading last for maximum control
- Remove burrs with a burnisher or 2000-grit sandpaper
- Polish or apply patina for contrast (liver of sulfur works instantly)
Quality Checkpoints
Check line consistency from multiple angles—depth should remain uniform. Verify spelling before final polishing; mistakes here are irreversible. Remove sharp edges that could cut users—run a fingernail along engraved areas to feel for snags. Hold your piece under angled light; shadows reveal uneven depths invisible in flat lighting.
Common Mistakes to Avoid
Tool-Related Errors
Dull tools create ragged lines—sharpen every 15 minutes of use. Excessive pressure causes tool breakage; let the sharp edge do the work. Wrong bit selection ruins projects—match carbide bits to soft metals only. Never force a tool; if it won’t cut cleanly, stop and sharpen.
Design Problems
Transfer failures happen when surfaces aren’t perfectly clean—wipe with alcohol twice. Scale mistakes occur from measuring in inches instead of millimeters—double-check units. Registration errors stem from loose clamping—tighten everything securely before starting. Always transfer designs right before engraving; layout fluid degrades over time.
Finishing Touches That Impress
Surface Finishing
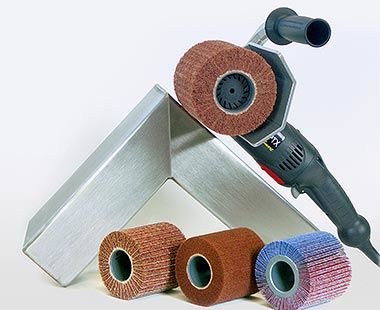
Progressive polishing from 400 to 2000 grit reveals mirror finishes. Use jeweler’s rouge on soft buffing wheels for professional shine. Sandblasting creates matte backgrounds that make engravings pop dramatically. For pocket knives, satin finishes hide scratches better than high-polish.
Enhancement Techniques
Fill engraved areas with black epoxy for dramatic contrast—wipe excess with a toothpick. Gold inlay adds luxury: hammer thin gold wire into undercut grooves using a plastic mallet. Liver of sulfur creates antique patinas in seconds; dip for 10-30 seconds depending on desired darkness. For jewelry, stone setting in engraved cavities elevates simple pieces.
Your first successful engraving—perhaps simple initials on a brass tag—will spark a creative addiction. Start with $100 in hand tools, practice 20 minutes daily on scrap brass, and you’ll create heirlooms within weeks. Master straight lines before curves, always prioritize safety over speed, and remember: every professional engraver began exactly where you are now. The metal doesn’t judge mistakes—it only reveals your next opportunity to improve. Grab that pocket knife and make it uniquely yours before the day ends.


