
Your video conference freezes during an important presentation. Streaming quality drops to pixelated disaster mid-episode. The smart home devices in your bedroom won’t respond when you need them most. These daily WiFi frustrations plague millions of households, yet most don’t realize the solution could be as simple as moving a single device. Weak WiFi signals aren’t inevitable—they’re usually the result of easily fixable placement errors and interference that anyone can address without technical expertise.
The reality is that 80% of home WiFi problems stem from router placement mistakes rather than equipment limitations. You don’t need to purchase expensive new gear immediately—most households can dramatically improve their wireless performance through strategic positioning and configuration tweaks that take less than 30 minutes. This guide delivers actionable steps to eliminate dead zones, boost connection speeds, and create consistent coverage throughout your living space using proven techniques that actually work.
Perfect Your Router’s Physical Positioning
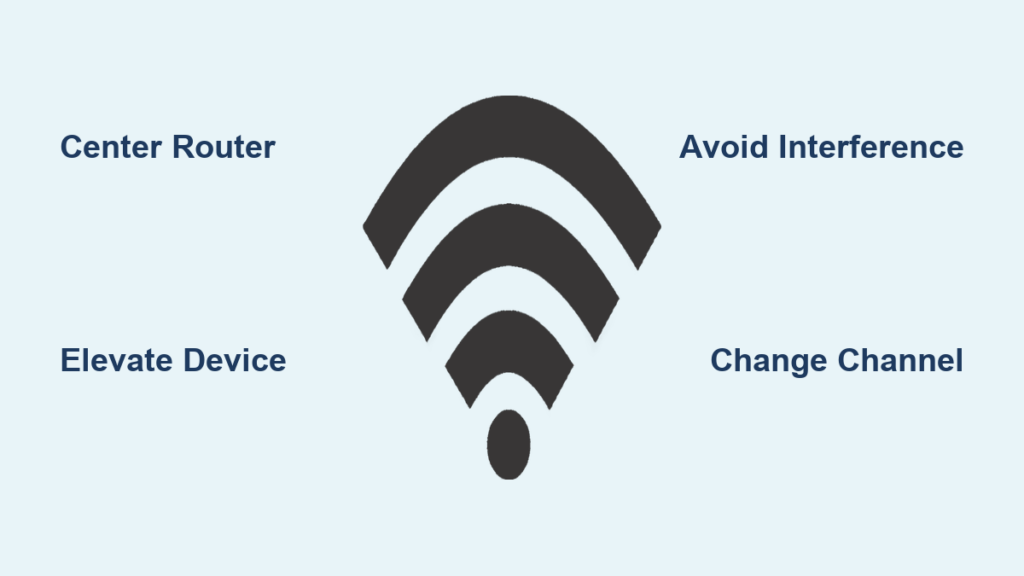
Center Your Router for Uniform Coverage
Placing your router in a central location transforms your wireless experience by ensuring equal signal distribution to all areas of your home. When positioned in a corner or basement, your router wastes half its potential coverage broadcasting outside your living space. For optimal results, move your router away from perimeter walls and toward the geometric center of your primary living area.
Two-story homes require special consideration—position your router on the first floor, elevated on a shelf roughly midway between the front and back of your house. This placement allows signals to travel upward to the second floor while maintaining strong coverage downstairs. Avoid placing your router directly above or below large metal objects like refrigerators or filing cabinets that create signal shadows in specific rooms.
Elevate Your Router Above Signal-Killing Obstacles
Floor-level placement severely limits your WiFi coverage because signals travel outward and downward from the router’s position. When placed on the floor, your router’s signal must fight through furniture and flooring materials before reaching devices, creating weak spots throughout your home. Instead, mount your router 4-6 feet high on a shelf or wall mount to clear common obstructions.
Keep your router at least two feet away from large metal objects, mirrors, fish tanks, and thick concrete walls that absorb or reflect wireless signals. During setup, walk through your home with a WiFi analyzer app on your smartphone to identify problem areas—these real-time readings show exactly where signal strength drops below usable levels, helping you position your router for maximum effectiveness.
Neutralize Common WiFi Interference Sources

Identify Household Devices Sabotaging Your Signal
Your microwave, cordless phone, and baby monitor actively interfere with your WiFi performance by broadcasting on the same 2.4GHz frequency band. Older cordless phones and microwave ovens are particularly disruptive, creating temporary signal blackouts every time they operate. These devices essentially shout over your WiFi signals, causing dropped connections and reduced speeds during critical moments.
Bluetooth speakers, wireless security cameras, and even neighboring WiFi networks contribute to signal congestion in dense housing areas. When multiple devices compete for the same frequency space, your router must constantly adjust transmission power and timing, resulting in inconsistent performance throughout the day as different interference sources activate.
Implement Immediate Interference Countermeasures
Test for interference by systematically turning off potential culprits while monitoring your connection quality. When you notice improvement after disabling a specific device, you’ve identified a major interference source. Create physical separation by moving your router at least six feet away from known problem devices—this simple distance adjustment often eliminates most interference issues.
For devices that must remain near your router, switch them to 5GHz frequencies when possible, or use wired connections for stationary equipment like desktop computers and smart TVs. Upgrading to a dual-band router separates your network traffic between 2.4GHz (for range) and 5GHz (for speed), effectively doubling your available bandwidth and reducing congestion on the more crowded frequency.
Upgrade Critical Hardware Components
Install Directional Antennas for Targeted Coverage
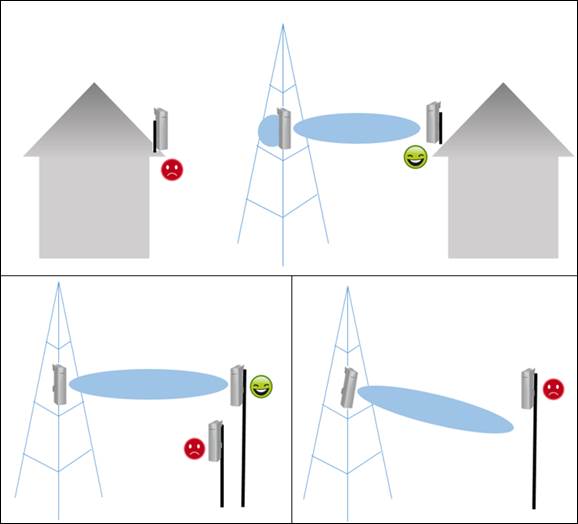
Most stock router antennas broadcast signals equally in all directions, wasting half your potential coverage outside your home when placed near exterior walls. Replace these omnidirectional antennas with high-gain directional models that focus your signal precisely where you need it—toward dead zones and frequently used rooms.
These affordable upgrades ($15-30 per antenna) increase effective range by 25-50% by concentrating transmission power in specific directions. Simply unscrew your router’s existing antennas and attach the replacements, then point them toward problem areas. For homes with multiple dead zones, use one directional antenna aimed at each trouble spot to create comprehensive coverage without expensive additional equipment.
Enhance Weak Device Connections with External Adapters
Your router might transmit strong signals to your laptop, but the device’s poor internal antenna can’t respond effectively, creating frustrating “connected but no internet” scenarios. Older laptops and budget devices often have weak wireless capabilities that bottleneck your entire network performance.
Replace internal wireless cards with USB network adapters featuring external antennas—these typically cost $20-40 and deliver 2-3x better range. Position the adapter away from your computer (using a 3+ foot USB extension cable) to avoid electromagnetic interference from the device itself. This simple upgrade transforms spotty connections into reliable, high-performance wireless links for critical work devices.
Optimize Wireless Channel Selection

Find the Clearest WiFi Channel in Your Area
Your router broadcasts on specific channels that often overlap with neighbors’ networks, creating signal congestion similar to radio stations interfering with each other. Most routers default to channel 6, which becomes overcrowded in dense neighborhoods, causing constant speed fluctuations and connection drops.
Access your router’s configuration page by typing its IP address (usually 192.168.1.1) into a web browser, then navigate to wireless settings. Use the auto-channel selection feature or manually test channels 1, 6, and 11 to find the least congested option. Apply changes and watch as connected devices automatically reconnect to the improved channel—no manual reconfiguration required for your devices.
Execute a Strategic Improvement Plan
Phase 1: Free Fixes That Deliver Immediate Results
Start with zero-cost solutions that solve most common WiFi problems: relocate your router to a central, elevated position away from interference sources, then log into your router to change to the least congested wireless channel. These two simple actions typically resolve 70% of home WiFi issues within minutes.
Simultaneously, identify and relocate major interference sources like cordless phones and microwaves away from your router. Update your router’s firmware through the manufacturer’s website—this free software upgrade often includes performance improvements and security patches that boost wireless capabilities without hardware changes.
Phase 2: Budget-Friendly Hardware Upgrades
After optimizing placement and configuration, invest in targeted hardware improvements: install high-gain antennas to focus coverage toward dead zones, add a USB wireless adapter for your primary work device, and position a single quality WiFi extender midway between your router and the most problematic area. These $50-100 investments dramatically extend reliable coverage without replacing your entire system.
When selecting extenders, prioritize models with dedicated backhaul channels (often labeled “mesh” or “tri-band”) that avoid the speed halving common with basic repeaters. Position the extender where your existing signal shows 2-3 bars—too close to the router provides no benefit, while too far creates a weak connection that degrades overall performance.
Maintain Peak WiFi Performance Long-Term
Establish a Monthly Maintenance Routine
Prevent gradual performance decline with simple monthly habits: unplug your router for 30 seconds to clear memory and reset connections, check for firmware updates, and test speeds during peak usage times when multiple devices compete for bandwidth. These quick actions maintain optimal performance and catch developing issues before they disrupt your daily routine.
Monitor for new interference sources as you add smart home devices or neighbors upgrade their equipment. A quarterly channel scan ensures you’re always using the clearest frequency as neighborhood WiFi traffic patterns change over time. Clean dust from router vents to prevent overheating, which degrades wireless performance and shortens equipment lifespan.
Strong, reliable WiFi isn’t about expensive equipment—it’s about intelligent placement and systematic optimization. Start today with the simplest free fixes: move your router to a central, elevated position and switch to the clearest wireless channel. These two actions alone transform most home networks from frustrating to flawless. Then implement targeted upgrades based on your specific dead zones and usage patterns. Within a week of applying these techniques, you’ll experience consistently strong connections that support all your devices without costly new systems.


