
That sharp twinge when you stand up. The dull ache that won’t quit during your morning walk. Knee pain can sideline anyone—from weekend warriors to busy parents. Before you panic about surgery or expensive treatments, know this: most knee pain responds remarkably well to home care. The key is knowing exactly what to do, when to do it, and what signs mean you need professional help.
This guide walks you through proven, cost-effective strategies that actually work. You’ll learn the same techniques physical therapists recommend, plus insider tips for faster healing. Whether you’re dealing with a sudden injury or chronic arthritis flare-up, these methods can reduce your pain within days and prevent future problems.
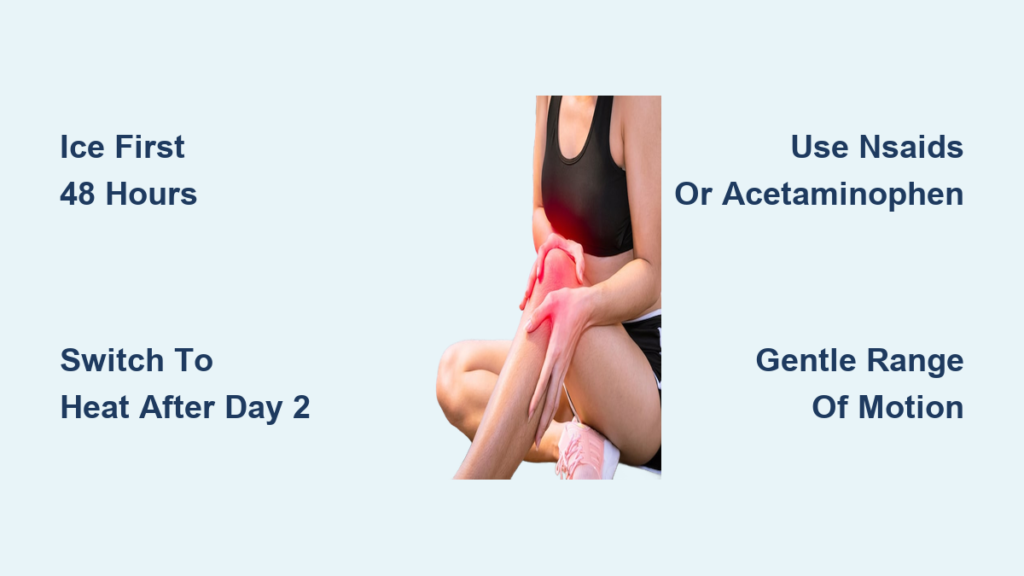
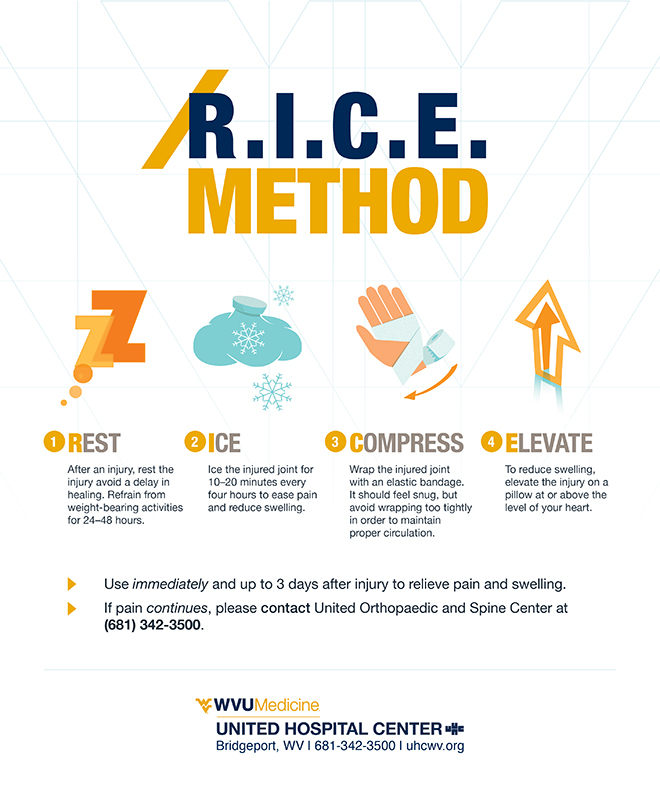
Stop Pain Fast with R.I.C.E. Protocol
Apply Ice Correctly First 48 Hours
Ice works like magic for fresh injuries, but timing matters. Grab ice cubes, frozen peas, or a gel pack—anything cold works. Wrap it in a thin towel (never apply directly to skin) and press against your knee for exactly 15-20 minutes. Set a timer—longer isn’t better and can damage tissue.
Repeat every 2-3 hours while awake during the first two days. For chronic conditions like arthritis, switch to ice during flare-ups. Most people under-ice initially, then over-ice later. Trust the process: aggressive icing early prevents weeks of lingering pain.
Pro tip: Keep multiple ice packs rotating in your freezer. Commercial gel packs refreeze faster than bags of peas.
Compress Without Cutting Circulation
Elastic bandages provide crucial support, but wrap them wrong and you’ll create new problems. Start wrapping just below your kneecap, overlapping each layer by half the bandage’s width. Work upward toward your thigh—never downward.
The wrap should feel snug, like a firm handshake. If your toes tingle, your foot gets cold, or you see skin color changes below the wrap, it’s too tight. Remove compression before sleeping—you need circulation during rest.
Quick test: Can you slide one finger under the wrap easily? If not, loosen it immediately.
Elevate Above Heart Level
Gravity becomes your ally when you elevate properly. Stack two or three pillows under your entire leg, not just the knee. Your heel should be higher than your hip. This position drains fluid from the joint space, reducing swelling dramatically.
Maintain elevation for 2-3 hour blocks when possible, especially after activity. Even propping your leg on a coffee table while watching TV makes a difference. The key is consistency—brief elevation helps, but sustained elevation heals.
Switch to Heat Therapy After Day 2
When Heat Beats Ice
Once the initial 48-hour inflammation window passes, heat becomes your new best friend. Warmth increases blood flow, delivering healing nutrients to damaged tissues. Use heating pads, warm towels straight from the dryer, or hot water bottles—just ensure they’re warm, not scalding.
Apply heat for 15-20 minutes, 2-3 times daily. Moist heat penetrates deeper than dry heat, so consider microwaving a damp towel. Never use heat on swollen, red, or warm joints—that signals active inflammation where ice still rules.
Warning sign: If heat increases pain or swelling, return to ice immediately.
DIY Heat Solutions
No heating pad? No problem. Fill a clean sock with uncooked rice, tie the end, and microwave for 60-90 seconds. This homemade pack molds perfectly around your knee. Add a few drops of lavender oil for bonus relaxation.
For chronic conditions, take warm Epsom salt baths. Add 2 cups of Epsom salts to bathwater and soak your legs for 15-20 minutes. The magnesium absorbs through skin, reducing inflammation from the inside out.
Choose Right Medication Strategy
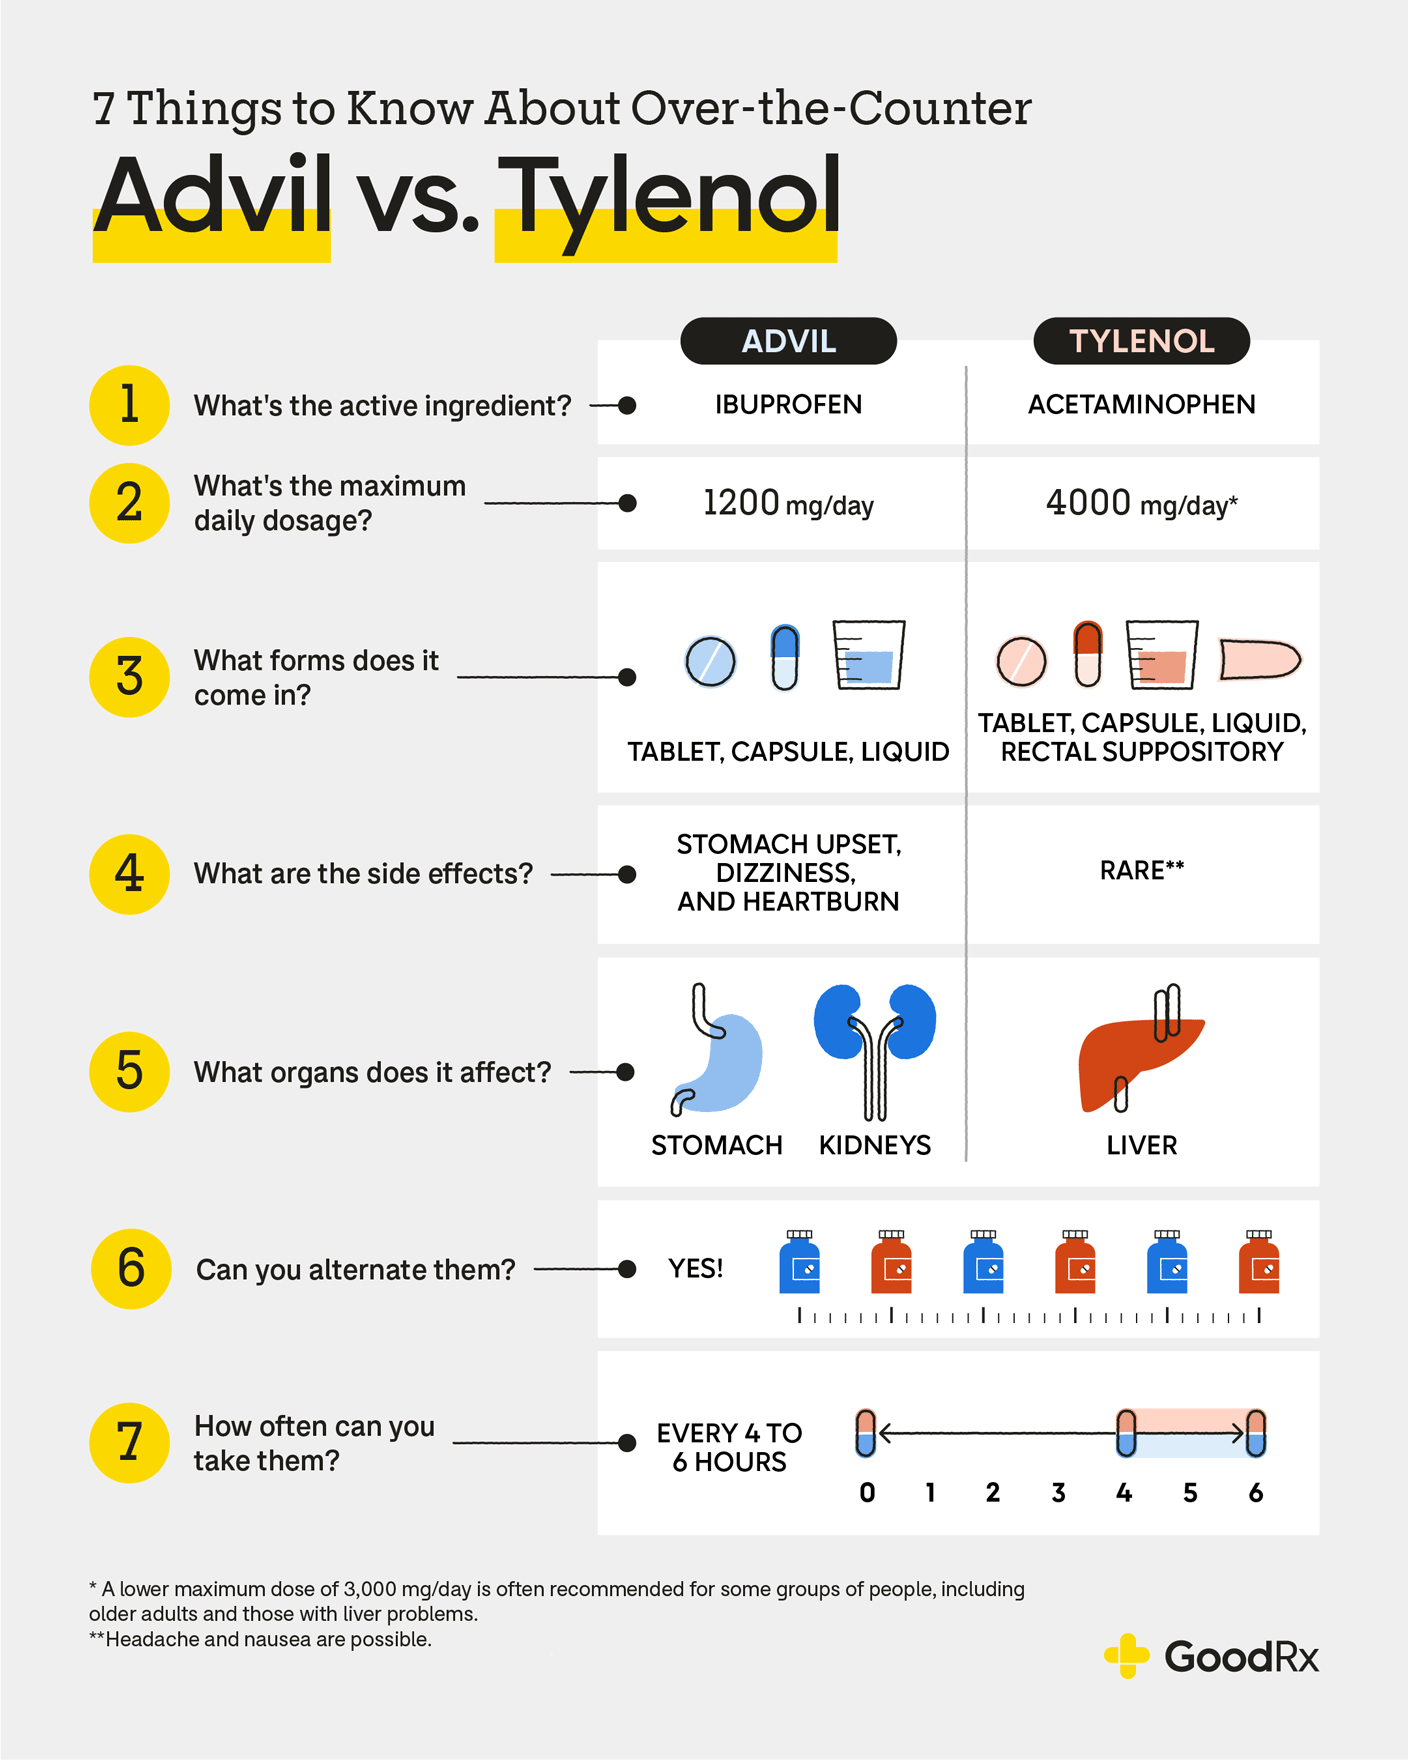
NSAIDs vs. Acetaminophen
Over-the-counter medications work differently, so choose based on your specific situation. NSAIDs like ibuprofen (200-400mg every 6-8 hours) tackle both pain and inflammation—perfect for swollen, injured knees. Take with food to prevent stomach upset.
Acetaminophen (325-650mg every 4-6 hours) manages pain without reducing inflammation. It’s gentler on your stomach and safer if you take blood thinners. Both have daily maximums—2400mg for ibuprofen and 3000mg for acetaminophen.
Smart strategy: Alternate between NSAIDs and acetaminophen every 3-4 hours for stubborn pain. This provides continuous relief while staying within safe limits for each medication.
Topical Treatments That Actually Work
Creams and gels deliver medicine directly where you need it, with fewer side effects than pills. Diclofenac gel (1%) works like oral NSAIDs but stays local—apply 4 times daily to the painful area. Expect results within a week of consistent use.
For natural options, capsaicin cream (0.025-0.075%) gradually reduces pain by depleting substance P, your body’s pain messenger. The initial burning sensation is normal—consistency over 2-4 weeks brings results. Wash hands thoroughly after application to avoid accidentally touching your eyes.
Pro tip: Apply topical treatments after ice or heat therapy when skin pores are open for better absorption.
Begin Gentle Range of Motion
Heel Slides for Flexibility
Stiffness makes knee pain worse, but gentle movement prevents the joint from freezing up. Lie on your back with legs extended. Slowly slide your heel toward your buttocks, bending your knee only as far as comfortable. Hold for 5 seconds, then slide back down.
Start with 10-15 repetitions, 2-3 times daily. This exercise maintains flexibility without stressing healing tissues. Stop immediately if you feel sharp pain—mild discomfort is normal, sharp pain means you’re pushing too hard.
Progression marker: When you can pull your heel within 8-10 inches of your buttock without pain, you’re ready for strengthening exercises.
Quad Sets Prevent Muscle Loss
Muscle wasting happens fast when knees hurt, but you can prevent it without moving the joint. Sit or lie with your leg straight. Tighten your thigh muscle by pressing your knee down toward the floor. Hold for 5-10 seconds—you should see your kneecap move slightly.
Perform 10-15 repetitions, 3 times daily. This exercise keeps your quadriceps strong without bending your knee. Strong quads support and protect your joint, making recovery faster and preventing future injuries.
Support Your Knee Properly

Choose Right Brace Type
Knee braces aren’t one-size-fits-all. Sleeve braces ($10-50) provide compression and warmth—perfect for mild arthritis or minor strains. Measure your knee circumference 4 inches above the kneecap for proper sizing.
Hinged braces ($50-300) offer serious support for ligament injuries or instability. These have metal supports on each side of your knee, preventing sideways movement. They’re bulkier but essential for certain injuries.
Quick tip: Start with a basic sleeve brace. If you need more support, you’ll know quickly—and your wallet won’t take a $200 hit unnecessarily.
Use Canes Correctly
Canes aren’t just for grandparents—they’re smart tools that reduce knee stress by 20-30%. Use the cane on the opposite side of your painful knee. When stepping with your bad leg, move the cane forward simultaneously.
Proper height matters: when your arm hangs naturally, the cane handle should reach your wrist crease. Start with the cane bearing 10-20% of your weight, gradually decreasing as your knee improves. Single-point canes work for most people—upgrade to quad canes only if you need maximum stability.
Create Ideal Sleep Setup
Pillow Positioning Secrets
Poor sleep positions can undo a full day of good knee care. Back sleepers should place a pillow under their knees, creating a gentle bend that reduces joint stress. This position allows the knee to rest in its natural alignment.
Side sleepers need a pillow between their knees to keep hips aligned. Your top leg should remain parallel to the mattress—if it drops forward, you’re twisting your knee. Consider a full body pillow for complete support.
Mattress alert: Medium-firm mattresses provide optimal knee support. If your mattress sags or feels like quicksand, it’s time for replacement (every 7-10 years).
Recognize Warning Signs
When to Call Doctor Immediately
Some symptoms scream “call now.” Seek immediate care if you cannot bear any weight on your leg, see visible deformity, or hear a loud pop at injury time. A knee that repeatedly “gives out” or buckles needs professional evaluation.
Red flags include fever with knee pain (possible infection), severe redness and warmth (inflammation beyond home care), or numbness/tingling below the knee (nerve involvement). These situations require medical intervention, not home remedies.
Schedule Appointment Timeline
Most knee pain improves within a week of proper home treatment. Schedule a doctor visit if pain persists beyond 7 days despite following this guide, or if swelling lasts more than 48 hours. Morning stiffness lasting over 30 minutes suggests arthritis requiring professional care.
Documentation tip: Keep a simple pain diary. Rate pain 0-10 daily and note what activities make it better or worse. This information proves invaluable to healthcare providers.
Final Note: Most knee pain responds brilliantly to these home treatments, but some conditions need professional help. If you’ve followed this guide faithfully for 2 weeks without improvement, it’s time to see a doctor. Your knees will thank you for taking action—whether that’s healing at home or getting expert care.


