
Your AC quit in the middle of July, and the house is already climbing past 80°F. Before you panic and call a $200 service visit, know this: nearly 70% of common AC failures are simple fixes you can handle with basic tools and safety precautions. This guide walks you through exactly how to diagnose and repair your home air conditioner—from the first “why isn’t it working?” moment to getting that blessed cool air flowing again.
You’ll learn to spot the difference between a $20 capacitor replacement and when you really do need a pro, plus get step-by-step procedures that take the mystery out of AC repair. No vague advice—just the exact steps working HVAC techs use daily.
Safety First: Turn Off Power Completely
Never work on a live AC system. This isn’t negotiable—240 volts can kill you in seconds, and capacitors hold lethal charge even after power is off.
Power Down Procedure
- Main breaker: Flip the double-pole breaker labeled “AC” or “Heat Pump” to OFF
- Outdoor disconnect: Pull the shut-off switch near your condenser unit
- Verify with multimeter: Test both the contactor and air handler to confirm zero voltage
- Capacitor discharge: Wait 5-10 minutes, then short capacitor terminals with insulated screwdriver
Know Your Limits
- DIY-OK: Capacitors, contactors, thermostats, cleaning, basic electrical
- Pro-only: Refrigerant handling, compressor replacement, major electrical work
- Warranty warning: DIY repairs may void manufacturer coverage—check first
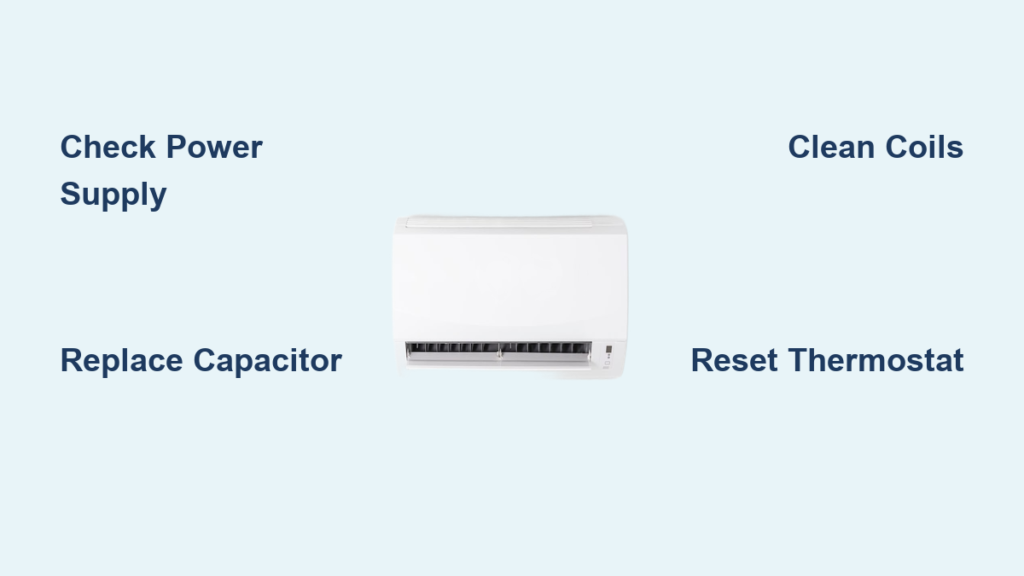
Quick Diagnostic: Why Your AC Stopped Working
5-Minute System Check
- Thermostat: Set to “COOL” and 5°F below room temperature
- Air filter: Remove and hold up to light—can’t see through it? Replace immediately
- Circuit breakers: Check both indoor air handler and outdoor condenser breakers
- Disconnect switches: Ensure outdoor disconnect is in “ON” position
- Listen carefully: Note any humming, clicking, or grinding sounds
Rapid Symptom Decoder
| What You Notice | Likely Issue | Fix Difficulty |
|---|---|---|
| Complete silence, no display | Power issue | Easy |
| Humming but fan won’t spin | Bad capacitor | Medium |
| Fan runs but warm air | Low refrigerant | Pro needed |
| Ice on refrigerant lines | Blocked airflow or low refrigerant | Medium/Pro |
| Clicking but no start | Bad contactor | Medium |
Replace Failed Capacitors: Most Common Fix
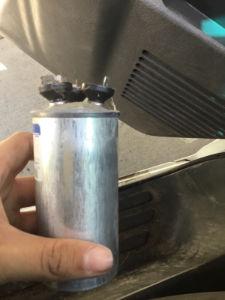
Capacitors fail more than any other AC component—luckily, they’re cheap and straightforward to replace. When your outdoor unit hums but doesn’t start, a bad capacitor is almost always the culprit. This simple repair takes 15 minutes and costs less than $50 for parts.
Spotting Capacitor Failure
- Symptoms: Loud humming, fan won’t start, compressor struggles
- Visual signs: Bulging top, oil leakage, burnt smell
- Quick test: Push fan blade with stick—if it starts spinning, capacitor’s shot
Test and Replace Process
Testing:
1. Power down and discharge capacitor (5-minute wait)
2. Remove wires and take photo of connections
3. Set multimeter to capacitance (μF) mode
4. Test against labeled rating—readings outside ±10% mean replacement needed
Replacement specs:
– Voltage: Must match exactly (370V or 440V)
– Microfarads: Match or exceed original rating
– Dual capacitors: Match both fan and compressor ratings
Installation:
1. Mount new capacitor securely
2. Connect wires exactly as original (use your photo)
3. Ensure terminals are tight—loose connections cause failures
4. Test system operation
Fix Electrical Issues: Contactors and Thermostats
Contactor Replacement
The contactor is your AC’s main electrical switch—when it fails, nothing starts. This critical component handles high-voltage power to your compressor and fan motor, so failure means complete system shutdown.
Diagnosis:
– Visual: Pitted, burned contacts or melted plastic
– Audible: Chattering sound when thermostat calls for cooling
– Test: Should click closed with 24V applied
Replacement steps:
1. Take detailed photo of all wire positions
2. Note contactor amperage rating (usually 20-40A)
3. Match 24V coil voltage exactly
4. Transfer wires one at a time to new contactor
5. Test 24V control voltage at coil
Thermostat Troubleshooting
Quick fixes:
– Dead display: Replace batteries (even hardwired units often have backup)
– Wrong settings: Check “COOL” mode and temperature differential
– Location issues: Thermostat near heat source? Move it.
Replacement compatibility:
– Match system type (heat pump vs. conventional)
– Check for C-wire requirement (smart thermostats)
– Label all wires before disconnecting anything
Clean Coils and Restore Airflow
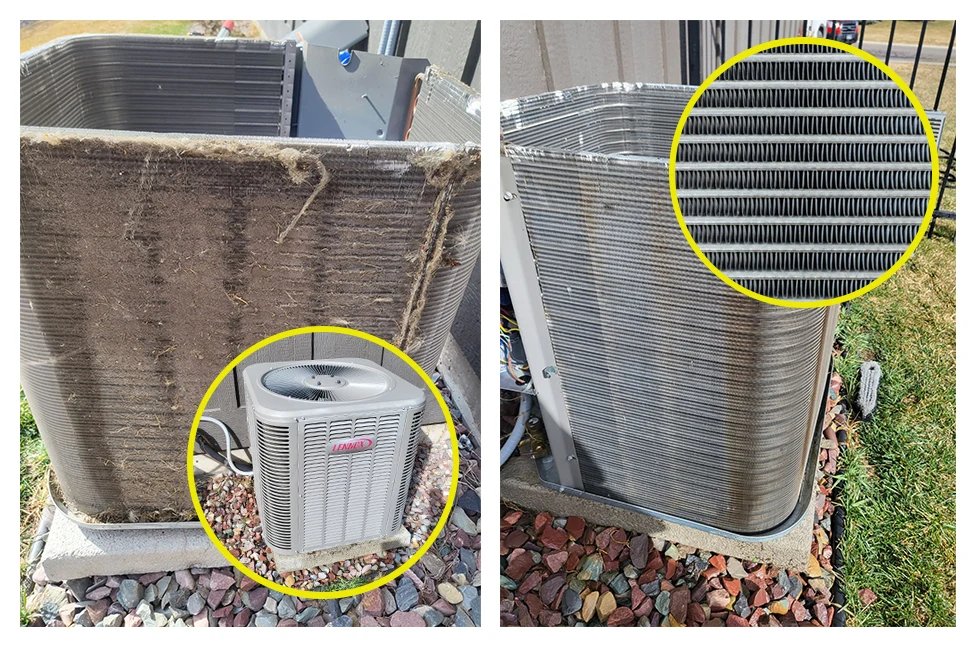
Dirty coils cause 40% of AC efficiency problems—and complete failures in extreme cases. Restricted airflow forces your system to work harder, increasing energy bills by up to 15% while reducing cooling capacity.
Condenser Coil Cleaning
When to clean: Annually minimum, quarterly in dusty areas
Procedure:
1. Kill power at disconnect switch
2. Remove top grille (4-6 screws usually)
3. Spray coil from inside out with garden hose
4. Use commercial coil cleaner for heavy buildup
5. Straighten bent fins with fin comb
6. Clear debris from unit base
7. Reassemble and test
Evaporator Coil Access
Warning: Often requires removing significant ductwork—consider professional cleaning if coil isn’t easily accessible.
DIY cleaning (if accessible):
1. Turn off air handler power
2. Remove access panel (usually below coil)
3. Apply no-rinse coil cleaner spray
4. Let foam drain into condensate pan
5. Clean drain line with wet/dry vacuum
6. Check condensate pump operation
Prevent Ice Formation Issues
Why Coils Freeze Up
- Restricted airflow: Dirty filters, blocked vents, dirty coil
- Low refrigerant: Requires professional repair
- Blower problems: Weak airflow from failing motor
Quick Thaw Procedure
- Turn off cooling: Set thermostat to “FAN ONLY”
- Check filter: Replace immediately if dirty
- Clear vents: Ensure all supply and return vents are open
- Wait it out: Thawing takes 2-6 hours—never chip ice
- Restart carefully: If ice returns within hours, call a pro
Diagnose Motor Problems
Blower Motor Issues
Symptoms: Weak airflow, overheating smell, noisy operation
Testing sequence:
1. Power test: Verify 120V at motor terminals
2. Capacitor check: Test blower capacitor (5-15μF typical)
3. Bearing test: Motor should spin freely by hand
4. Amp draw: Use clamp meter—shouldn’t exceed nameplate rating
Replacement indicators:
– Excessive vibration or grinding
– Overheating housing (too hot to touch)
– Repeated capacitor failures (sign of motor drag)
Condenser Fan Motor Replacement
Critical specs to match:
– Horsepower rating (usually 1/4 to 1/2 HP)
– RPM (typically 825 or 1075 RPM)
– Frame size (48-frame most common)
– Rotation direction (clockwise viewed from top)
Installation tips:
– Position blade 1/2″ from condenser coil
– Ensure clockwise rotation (reverse wire if needed)
– Use new capacitor sized for new motor
When to Call Professional Help
Refrigerant Issues
- Low charge symptoms: Warm air, ice formation, long cycles
- Why it’s pro-only: EPA certification required, special equipment needed
- Cost factors: R-22 systems cost 3x more to recharge than R-410A
Major Component Failures
- Compressor replacement: $1,500-3,000—often better to replace entire system if over 10 years old
- Refrigerant leaks: Finding and repairing leaks requires specialized equipment
- Electrical panel work: Main breaker issues need licensed electrician
Age-Based Decisions
Replace if:
– System over 12-15 years old
– Repair cost exceeds 50% of replacement value
– Using expensive R-22 refrigerant
– Energy bills climbing despite maintenance
Essential Tool Kit for AC Repairs
Must-Have Tools
- Digital multimeter with capacitance measurement
- Clamp meter for motor current testing
- Fin comb set for straightening coil fins
- Nut drivers (1/4″ and 5/16″ most common)
- Refrigeration gauges (for pressure testing only—no DIY charging)
Budget-Friendly Starter Kit
- Basic multimeter: $30-50
- Capacitor assortment: $60-100
- Fin comb: $10-15
- Coil cleaner: $15-20
- Contactors: $25-50 each
Maintenance Schedule: Prevent Future Breakdowns
Monthly Tasks (5 minutes)
- Replace/clean air filters
- Clear debris around outdoor unit
- Check thermostat operation
Annual Maintenance (2-3 hours)
- Clean both evaporator and condenser coils
- Tighten all electrical connections
- Test capacitor values
- Lubricate motor bearings (if applicable)
- Flush condensate drain line
Seasonal Prep Checklist
Spring startup:
– Remove condenser cover
– Clean outdoor coil thoroughly
– Replace air filter
– Test complete system operation
Fall shutdown:
– Clean outdoor unit
– Install breathable cover
– Turn off disconnect switch
– Replace air filter
Quick Reference: Emergency Fixes
System Won’t Start
- Reset breakers (indoor and outdoor)
- Replace air filter immediately
- Check thermostat batteries
- Look for ice on refrigerant lines
- Test capacitors if comfortable with electrical work
Temporary Cooling While You Wait
- Close all blinds and curtains
- Run ceiling fans counterclockwise
- Avoid cooking/heat-generating activities
- Seal obvious air leaks with tape/towels
- Set up portable fans in occupied rooms
Key Takeaway: Most AC repairs fall into three categories—simple electrical fixes, cleaning/maintenance, or professional refrigerant work. By learning to safely diagnose and handle the first two, you’ll save hundreds in service calls while knowing exactly when to call the pros. Your house will be cool again, your wallet will thank you, and you’ll never feel helpless when the AC quits on a 95°F day.


