
Your favorite ring spins constantly on your finger, threatening to slip off during everyday tasks. Maybe you inherited a family heirloom that’s slightly too large, or your fingers have changed size due to seasonal shifts or weight fluctuations. Before spending $50-$150 at a jeweler, you can tackle minor ring resizing at home using simple household items. This guide reveals proven DIY methods that safely adjust ring size without damaging precious metals or stones—saving you money while keeping your jewelry secure on your finger.
Most minor sizing issues can be resolved with temporary fixes or semi-permanent solutions you can implement in under 30 minutes. We’ll cover exactly which techniques work for different metals, how to avoid costly mistakes, and when professional help is truly necessary. Whether you need to shrink a loose band by half a size or temporarily expand a ring over a swollen knuckle, these practical home methods deliver real results without specialized tools.
Confirm Your Ring Size Before Resizing
Before attempting any home resizing, verify whether your ring actually needs adjustment. Many people mistake normal finger movement for a poor fit. Your ring should slide over your knuckle with gentle pressure but feel snug at the base of your finger without rotating freely. Test your ring after wearing it for 30 minutes at room temperature—cold fingers shrink temporarily, creating false tightness.
Measure Your Current Size Accurately
Wrap a thin strip of paper or dental floss around your finger where the ring normally sits. Mark the overlap point, then measure the length in millimeters. Compare this measurement to standard ring size charts—most adult sizes range between 5-12 (15.7-19.8mm diameter). This precise baseline determines how much adjustment you actually need. If your measurement falls between standard sizes, note whether you need to increase or decrease by half-sizes.
Account for Natural Finger Changes
Fingers swell up to 10% throughout the day due to temperature, hydration, and activity. Test your ring fit both in the morning (when fingers are smallest) and evening (when they’re largest). If the difference is dramatic, opt for reversible solutions like silicone fillers instead of permanent alterations. Significant knuckle-to-finger base differences often require specialized approaches like ring guards rather than full resizing.
Make Rings Smaller Using Home Methods

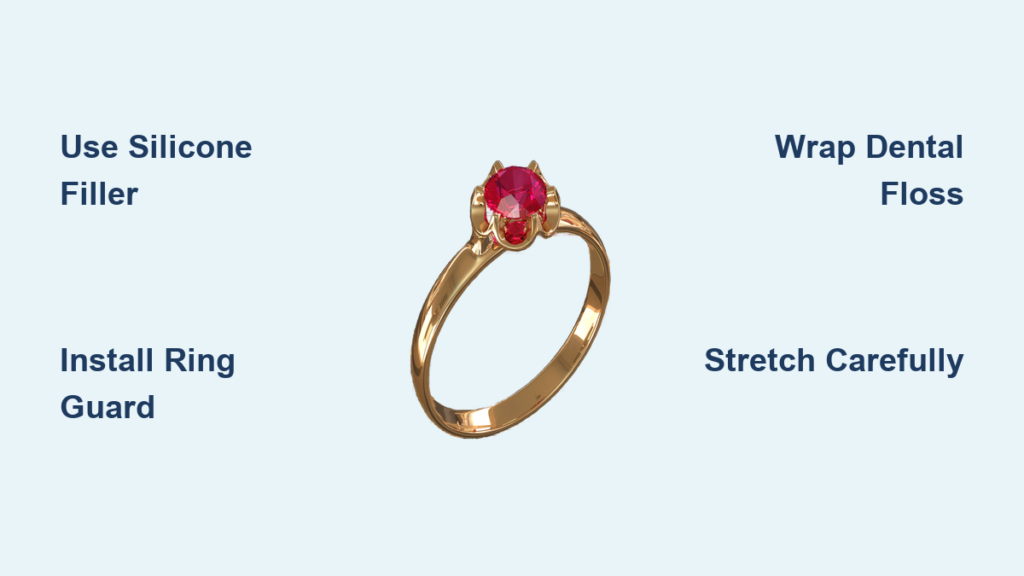
Apply Clear Silicone for Invisible Sizing
Clear silicone creates a comfortable, nearly undetectable barrier inside your ring that lasts 6-12 months. This method costs under $10 and works for gold, silver, and other solid metal bands without stones.
What you’ll need:
– Aquarium-safe clear silicone (NOT regular caulk)
– Rubbing alcohol and cotton swabs
– Toothpick or fine brush
Follow these steps:
1. Clean the ring’s interior thoroughly with alcohol
2. Apply a pea-sized silicone bead along the bottom half of the shank
3. Use a damp finger to smooth into a crescent shape (avoiding the top)
4. Let cure undisturbed for 48 hours before wearing
Pro tip: Apply silicone only to the underside—this maintains comfort while preventing visible buildup. Start with one thin layer; you can add more if needed after testing the fit.
Install Metal Ring Guards for Adjustable Fit
Metal ring guards clip inside your band, providing ½-2 size reduction without damaging the ring. Match the guard metal to your ring (gold-filled for gold, silver for silver) to prevent corrosion.
Installation guide:
– Select a guard matching your ring width (2-6mm)
– Position it at the 6 o’clock position opposite any stones
– Gently squeeze with flat-nose pliers until snug
– Test fit and file any sharp edges with an emery board
These $3-$15 accessories are removable for cleaning and work surprisingly well for bands with moderate looseness. They’re particularly effective for wedding sets where rings rotate against each other.
Use Dental Floss for Immediate Fix
When you need instant results for a special event, unwaxed dental floss creates a temporary grip inside your ring. This costs nothing and works for 1-3 days.
Apply correctly:
1. Wrap floss tightly 15-20 times around the shank interior
2. Secure with a tiny knot using tweezers
3. Trim excess with nail scissors
4. Replace every 48 hours to prevent fraying
Warning: Never use waxed floss—it leaves sticky residue. This method is ideal for smooth bands but avoid it on rings with intricate interior details where floss could snag.
Safely Expand Rings at Home
Understand Stretching Limitations
Critical rule: Only plain metal bands without stones can be stretched at home. Attempting this on set-stone rings risks loosening prongs and losing gems. Even for plain bands, limit stretching to ¼-½ size maximum.
Safe stretching technique:
– Place ring on a tapered wooden mandrel (or thick candle)
– Tap gently with a rawhide mallet around the circumference
– Check size every 2-3 taps using a ring sizer
– Stop immediately if you feel increased resistance
Over-stretching thins the metal and may cause cracks—especially in harder metals like platinum. Practice on a cheap band first to develop a feel for the process.
Try Emergency Expansion Methods
When your ring won’t slide over a swollen knuckle, these quick fixes help:
Hand cream trick: Apply thick lotion to reduce friction while sliding the ring on. Wipe excess after positioning.
Ice method: Submerge your hand in cold water for 30 seconds to temporarily reduce swelling. Dry thoroughly before attempting to remove the ring.
Reverse floss technique: Wrap dental floss tightly around your finger just below the knuckle, then slide the ring over the compressed area. Unwrap the floss slowly once past the knuckle.
Match Methods to Your Ring Material
Gold Ring Adjustments
14k gold responds best to DIY sizing due to its workable hardness. For white gold rings, note that stretching may require professional rhodium replating later. Always avoid heating gold rings near gemstones—heat can damage opals, emeralds, or pearls.
Best home approach: Use silicone fillers for minor reductions. Ring guards work well for gold bands, but never attempt stretching on gold rings with more than 14k purity—they deform easily.
Silver Ring Solutions
Silver’s softness makes it ideal for careful stretching (up to ¼ size), but it shows wear quickly. Tarnish often reveals solder lines if you attempt permanent resizing.
Critical caution: Stretch silver rings only when warm—cold silver cracks easily. For sizing down, silicone fillers are preferable to ring guards, which can scratch the soft metal. Never resize engraved silver bands at home—the stretching distorts patterns.
Platinum and Titanium Warnings
Do not attempt DIY resizing on platinum or titanium rings. Platinum requires specialized high-heat torches that home users lack, while titanium’s extreme hardness (nearly double steel) demands industrial equipment. Even professional jewelers often decline titanium resizing due to fracture risks. If these rings don’t fit, seek professional replacement rather than risking destruction.
Essential Tools for Home Resizing

Build a $25 Basic Kit
- Tapered ring mandrel: Use a wooden dowel or candle as a budget alternative
- Rawhide mallet: Prevents metal marring (substitute with hammer + soft cloth)
- Measuring calipers: A ruler works for basic sizing checks
- Jeweler’s files: Emery boards smooth rough edges after adjustments
This kit handles 90% of minor home resizing tasks. For silicone applications, add cotton swabs and rubbing alcohol to your existing kit.
Avoid Costly DIY Mistakes
Don’t Resize Stone-Set Rings at Home
Attempting to resize rings with diamonds or gemstones risks catastrophic damage. The heat from soldering or physical stress from stretching can loosen prongs, causing stones to fall out. Even “simple” silicone applications inside set-stone rings can trap moisture against settings, accelerating corrosion.
Never Use Improper Materials
Regular silicone caulk contains acetic acid that corrodes metals. Medical tape leaves sticky residue that attracts dirt. Hot glue melts against skin and damages finishes. Stick strictly to aquarium-safe silicone and jewelry-specific ring guards.
Skip Aggressive Sizing Attempts
Trying to resize a ring more than ½ size at home almost always fails. You’ll either create uncomfortable pressure points or weaken the metal structure. If your ring needs 1+ size change, professional resizing protects your investment.
Know When to Call a Professional
Seek expert help immediately if:
- Your ring contains diamonds or precious stones
- You need more than ½ size adjustment
- The band has engravings or intricate patterns
- It’s made of platinum, titanium, or tungsten
- The ring has sentimental or high monetary value
Professional resizing costs $30-$60 for simple gold/silver adjustments but prevents $200+ in repair costs from failed DIY attempts. For valuable pieces, this is non-negotiable insurance.
Maintain Your DIY Resizing Results
Conduct Weekly Inspections
After any home resizing, check for:
– Silicone separation from the shank interior
– Loose ring guards or sharp filing edges
– Stone security in set-stone rings
– Skin irritation or discoloration
Most DIY sizing failures happen gradually—you’ll notice slight movement before complete failure.
Clean Properly After Modification
Never use ultrasonic cleaners on silicone-filled rings—they dislodge the filler. Instead, soak in warm soapy water for 5 minutes, then gently brush with a soft toothbrush. Remove ring guards monthly to clean trapped debris underneath.
Key Takeaway: Most minor ring sizing issues can be solved at home for under $15 using silicone fillers or ring guards. For valuable rings or significant size changes, professional resizing protects your investment while ensuring comfort and durability. Start with temporary solutions to test the new size before committing to permanent changes—your perfect fit might change with seasons or life events, making flexible DIY methods invaluable for maintaining your favorite jewelry’s comfort and security.


