
Your walls silently collect dust, fingerprints, and kitchen grease until one day you realize your once-bright living room looks dull and dingy. Knowing how to clean walls at home properly transforms your entire space without expensive professional services or risking paint damage. Whether you’re tackling crayon masterpieces from little artists or stubborn kitchen grease, this guide delivers room-specific techniques that work. You’ll discover why most homeowners ruin walls by using the wrong tools and learn the exact solutions for every surface type—saving you time, money, and frustration.
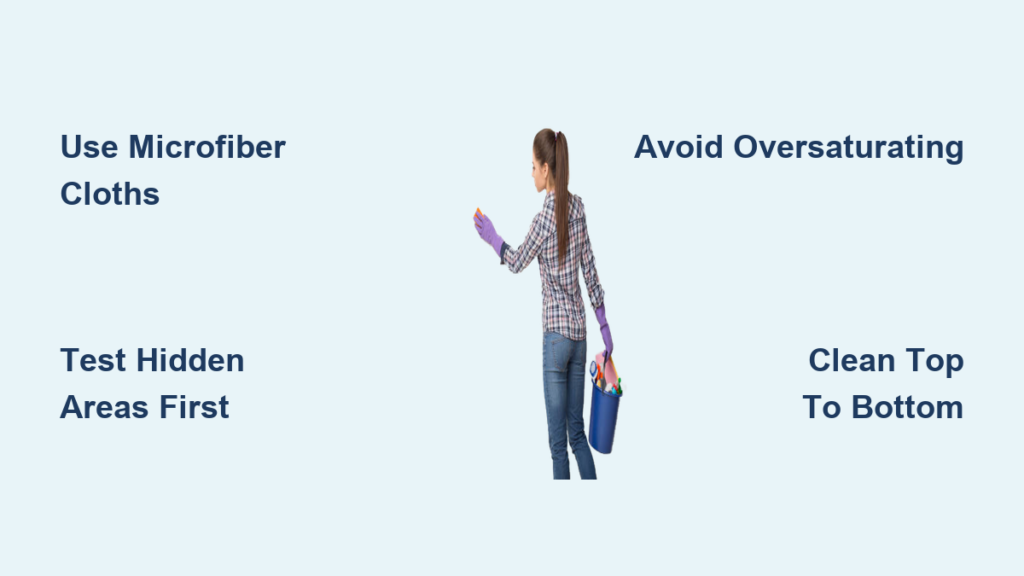
Must-Have Wall Cleaning Tools and Solutions
Essential Supplies You Already Own
Skip expensive specialty products and grab these everyday items:
– Color-coded microfiber cloths (red for heavy stains, blue for final polish)
– Non-scratch sponges that won’t mar delicate paint finishes
– 2-gallon bucket for mixing solutions without constant refills
– Rubber gloves to shield hands from chemicals and hot water
– Drop cloths that protect floors from drips and splatters
– Sturdy step stool for safe high-reach access without wobbling
– Soft-bristled brush for textured surfaces like knockdown ceilings
Targeted Cleaning Formulas for Every Stain
Match your solution to the specific problem:
– Grease-cutting soap mix: 1 tsp dish soap + 1 quart warm water
– Vinegar power spray: Undiluted white vinegar in spray bottle
– Baking soda paste: Equal parts baking soda and water
– Ink zapper: 70% isopropyl alcohol on cotton ball
– Scuff eraser: Damp Magic Eraser (use feather-light pressure)
– Mold killer: 1 part bleach to 3 parts water (for small areas)
Critical warning: Never combine bleach and ammonia—it creates deadly chlorine gas.
Identify Your Wall Surface Before Cleaning
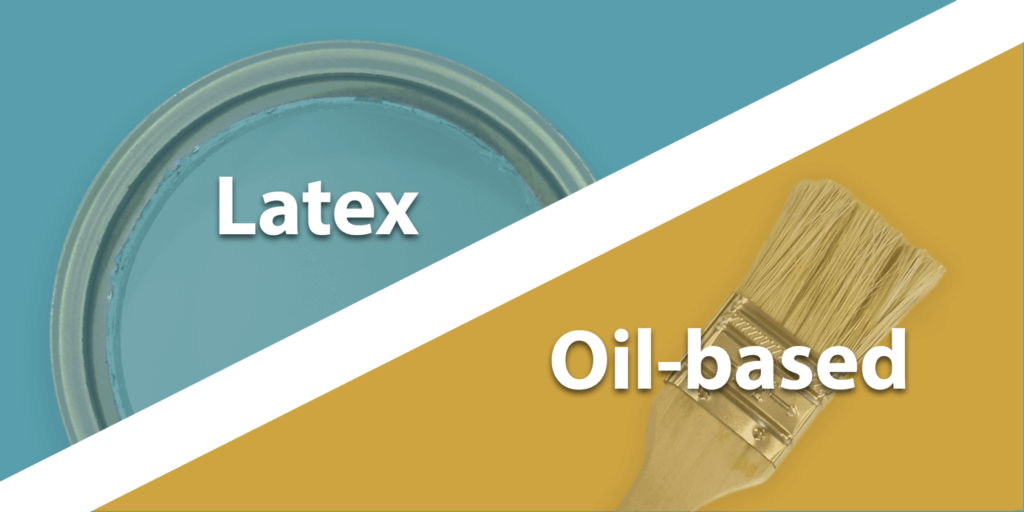
Painted Wall Identification Test
Your cleaning method depends entirely on paint type:
– Latex paint feels slightly sticky when rubbed with alcohol—use gentle soap solutions only
– Oil-based paint has a hard, glossy surface—handles vinegar mixes but avoids mineral spirits
– Test properly: Dab rubbing alcohol on hidden area (behind outlet cover)—if paint transfers, it’s latex
Wallpaper Survival Guide
Vinyl wallpaper tolerates light moisture—wipe with vinegar solution and dry immediately. Paper wallpaper requires absolute dry cleaning—any moisture causes irreversible peeling. Natural stone tiles need pH-neutral cleaners only, while ceramic tiles withstand baking soda scrubs. Conduct the water bead test: If droplets bead up, your surface is sealed and moisture-safe; if they soak in, proceed with extreme caution.
Painted Wall Cleaning Methods That Work
Latex Paint Deep Clean Protocol
Follow these steps to avoid water spots and paint damage:
1. Dust thoroughly using microfiber cloth from ceiling downward
2. Mix solution (1 tsp dish soap + 1 quart warm water) in bucket
3. Test hidden spot behind furniture—wait 1 hour for reaction
4. Clean 3×3 foot sections with barely-damp sponge using circular motions
5. Rinse immediately with clean water-dampened cloth
6. Dry completely with terry cloth towel—no streaks guaranteed
Oil-Based Paint Power Cleaning
These tougher surfaces handle stronger solutions:
– Use 50/50 vinegar-water mix for kitchen grease zones
– Apply mineral spirits sparingly for permanent marker (test first)
– Critical rule: Never saturate—oil paint shows water damage faster than latex
– Work top-to-bottom in 10-minute intervals to prevent drying marks
Emergency signal: If paint feels sticky or transfers to cloth, stop immediately and allow 24 hours drying time.
Wallpaper Care That Prevents Disaster
Vinyl Wallpaper Refresh Technique
Revive vinyl-covered walls safely:
– Spray 1/4 cup vinegar + 1 quart water solution lightly on surface
– Wipe gently with microfiber cloth using downward strokes
– Seam safety: Avoid scrubbing near edges to prevent lifting
– Dry within 60 seconds with clean towel to block moisture seepage
Paper Wallpaper Emergency Protocol
Water is forbidden on paper wallpaper—use these dry methods:
– Vacuum with soft brush attachment on lowest setting
– Lift surface dirt with dry-cleaning sponge (sold at hardware stores)
– Remove scuffs with art gum eraser using dabbing—not rubbing—motions
– If edges lift, apply tiny dot of wallpaper adhesive with toothpick
Target Stubborn Stains Like a Pro

Kitchen Grease Elimination System
Stop grease from spreading during cleaning:
1. Blot excess with paper towel—never rub
2. Apply baking soda directly, wait 10 minutes to absorb grease
3. Gently agitate with soft brush in circular motion
4. Wipe clean with vinegar-dampened cloth
5. Blend area by cleaning entire wall section to avoid clean spots
Mold and Mildew Removal Safely
Required gear: N95 mask, goggles, and gloves:
– Spray bleach solution (1:3 ratio) until saturated
– Wait 10 minutes for disinfection (do not rinse yet)
– Scrub with soft brush in well-ventilated area
– Rinse thoroughly with clean water
– Critical: Fix humidity source within 24 hours or mold returns
Stop immediately if mold covers more than 10 square feet—call professionals.
Scuff Mark Erasure Guide
Match your tool to the mark type:
– Shoe scuffs: Pink pencil eraser with light pressure
– Furniture marks: Damp microfiber cloth first, then baking soda paste
– Crayon art: Mayonnaise application—wait 5 minutes, wipe clean
Room-Specific Wall Cleaning Strategies

Kitchen Wall Maintenance Schedule
- Behind stove: Degrease monthly with vinegar solution
- Light switches: Spot clean weekly with Magic Eraser
- Backsplash: Wipe daily with vinegar spray
- Trash zone: Use baking soda paste for stubborn stains
Bathroom Wall Defense System
- Post-shower ritual: Squeegee walls in 30 seconds
- Weekly: Spray vinegar solution on water spots
- Monthly: Scrub grout with baking soda paste
- Daily: Run exhaust fan during/after showers
Living Area Refresh Routine
- Weekly: Dust with microfiber cloth (top to bottom)
- Immediately: Spot clean new marks before setting
- Quarterly: Deep clean behind furniture
- Always: Use felt pads on furniture legs
Safety and Damage Prevention Tactics
Space Protection Checklist
Before starting:
– Cover floors with canvas drop cloths (not plastic—it slips)
– Tape electrical outlets with painter’s tape
– Remove all wall art and hardware
– Test every solution in hidden area
Top 4 Wall Cleaning Mistakes
- Oversaturating walls—especially drywall (causes bubbling)
- Aggressive scrubbing—creates shiny spots in paint
- Infrequent water changes—transfers dirt between sections
- Skipping section cleaning—leaves obvious clean patches
Eco-Friendly Wall Cleaning Solutions
Homemade Power Formulas
- All-purpose cleaner: 2 cups water + 2 tbsp vinegar + 2 tbsp rubbing alcohol
- Heavy degreaser: ½ cup vinegar + ¼ cup baking soda + 1 gallon water
- Daily maintenance spray: Equal parts vinegar and water
Sustainable Practices
- Wash and reuse microfiber cloths 300+ times
- Compost natural cellulose sponges when worn out
- Choose plant-based commercial cleaners when needed
- Make solutions in glass spray bottles
When to Call Wall Cleaning Professionals
Critical Red Flags
Stop DIY efforts immediately if you see:
– Historic wallpaper or specialty finishes (flocked, grasscloth)
– Peeling paint in homes built before 1978 (lead paint risk)
– Water stains indicating roof or plumbing leaks
– Mold covering more than 10 square feet
– Valuable artwork mounted directly on walls
Simple Wall Maintenance System
Daily and Weekly Habits
- Immediate action: Clean spills within 1 hour
- Weekly: Dust high-traffic areas with microfiber cloth
- Monthly: Check behind furniture for hidden buildup
Seasonal Deep Clean Schedule
- Monthly: Kitchen and bathroom walls
- Quarterly: All living area walls
- Biannually: Behind wall hangings and furniture
Pro tip: Sync wall cleaning with daylight saving time changes—easy to remember and prevents buildup.
Prevention Pays Massive Dividends
- Keep touch-up paint for quick scuff repairs
- Install exhaust fans in kitchens and bathrooms
- Place felt pads on all furniture legs
- Conduct monthly wall inspections
Final truth: Clean walls instantly elevate your home’s appearance and air quality. By matching your cleaning method to your specific wall surface and stains, you’ll achieve professional results without damage. Start with the gentlest approach possible—you can always escalate cleaning intensity, but you can’t reverse paint damage. Implement these room-specific strategies today and notice the transformation before your next guest arrives.


