
Imagine transforming a rusty steel box into your dream home—affordable, sustainable, and uniquely yours. Shipping container homes have moved from industrial curiosity to mainstream housing solution, with costs starting at just $25,000 for a basic build. Whether you’re seeking an off-grid cabin or a modern urban dwelling, knowing how to make a shipping container home properly separates successful projects from costly failures.
This guide cuts through the hype to deliver exactly what you need: actionable steps used by experienced builders, common pitfalls to avoid, and insider strategies that save thousands. Forget Pinterest-perfect shortcuts—this is the real process that creates safe, code-compliant homes that last decades.
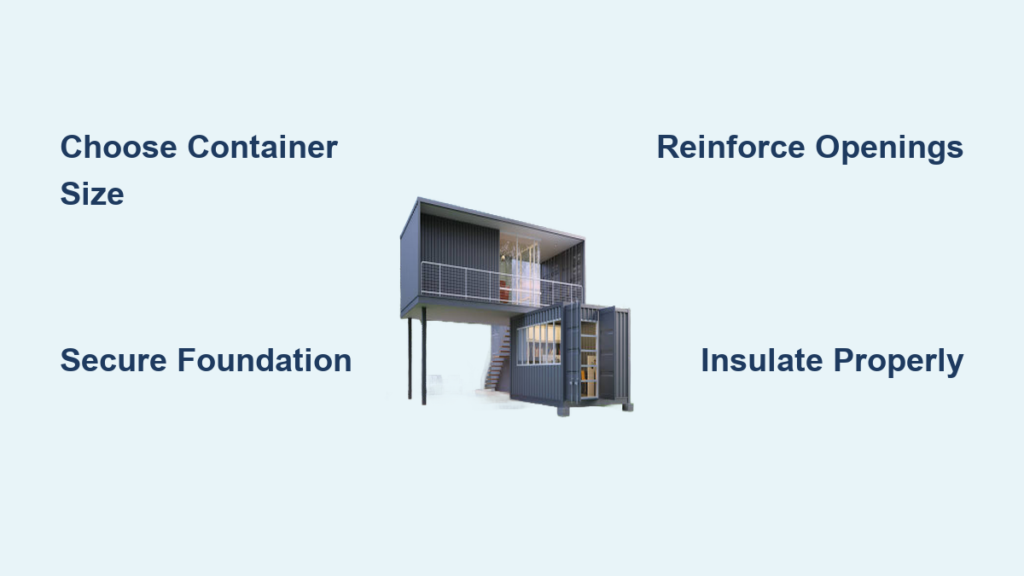
Select Your Container Configuration Wisely
:max_bytes(150000):strip_icc()/35-5c707656f4bd4a2194915c6fd727ea4b.jpg)
The container size and layout you choose determines your entire project’s scope, cost, and timeline—get this wrong and everything becomes more difficult.
Single vs. Multi-Container Layouts
Single-container homes work best for tiny living (160-320 sq ft) or weekend cabins. A 20-foot container ($1,200-$4,500) creates a cozy 160-square-foot studio, while a 40-foot unit ($1,500-$4,500) provides space for separate living areas. These configurations avoid complex engineering requirements and typically cost $25,000-$50,000 to complete.
Multi-container designs unlock larger living spaces through creative arrangements. Popular options include:
– Two 40-foot containers side-by-side for 640 sq ft of living space
– L-shaped configurations that maximize corner views
– Stacked arrangements creating two-story homes
Multi-container builds require professional engineering for structural connections and typically cost $50,000-$150,000+ depending on complexity. High-cube containers (9.5′ tall instead of 8.5′) add crucial headroom for comfortable living but cost 10-15% more.
Avoid These Critical Container Selection Mistakes
Never buy sight unseen—these inspection steps prevent expensive surprises:
- Check for structural dents deeper than 2 inches along the sides and roof. These weaken load-bearing capacity and become serious problems when cutting windows or doors.
- Test the floor thoroughly—most containers have chemically-treated plywood floors. Look for soft spots indicating rot, chemical stains, or strong odors from previous cargo.
- Assess rust carefully: Surface rust is normal and treatable, but structural rust appears as deep pitting or holes. Use a screwdriver to probe suspicious areas—if it penetrates the steel, walk away.
One-trip containers (used once for cargo) cost $2,500-$4,500 but save thousands in prep work compared to bargain units requiring extensive repairs.
Build a Foundation That Prevents Costly Problems
Your foundation choice dramatically impacts both cost and timeline—match it to your soil conditions and local codes rather than opting for the cheapest option.
Pier Foundations for Budget-Friendly Builds
Pier foundations work perfectly for single-container homes and cost $3,500-$7,000 total. This system uses concrete piers at each corner with anchor bolts to secure your container. The installation process requires:
1. Digging holes 2-4 feet deep below the frost line
2. Pouring concrete with embedded anchor bolts
3. Leveling all piers within 1/4 inch tolerance
4. Setting the container using a crane or roll-off truck
This approach excels on sloped lots and provides essential ventilation underneath the container. The 6-8 inch gap prevents moisture buildup and allows future plumbing access—critical for avoiding rust and mold problems down the road.
Master Structural Modifications Without Compromising Safety
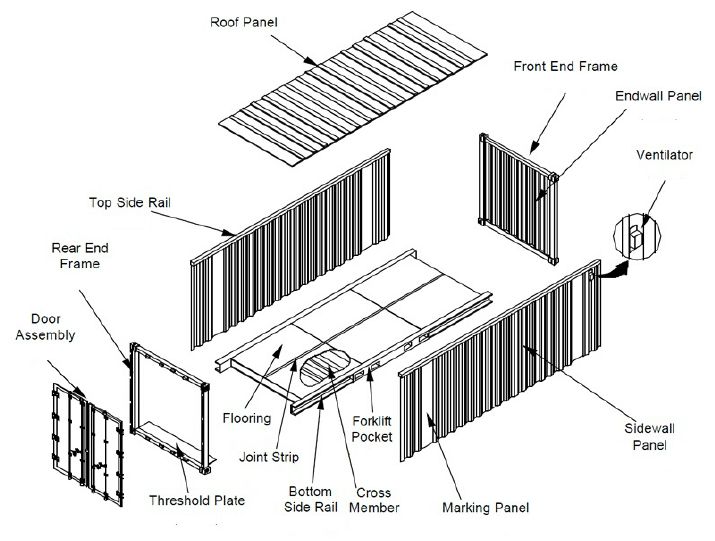
Cutting into your container’s walls requires understanding their structural role—each wall provides critical support that must be reinforced when modified.
Window and Door Cutting Rules You Must Follow
Maintain 6 inches minimum from corners when creating openings—corners contain the reinforced steel posts that carry the container’s weight. Cutting too close compromises this critical support system and may require expensive reinforcement later.
Professional cutting prevents warping—heat from plasma cutters or angle grinders can distort thin steel if not handled properly. Experienced modifiers complete cutting and immediate weatherproofing in the same day, typically charging $500-$1,500 per opening including framing reinforcement. Standard window sizes ($200-$800 each) avoid costly custom fabrication while providing adequate natural light.
Door installations require steel beam reinforcement above large openings to prevent the container walls from spreading under roof weight. Install flashing immediately after cutting to protect exposed steel edges from rapid rusting.
Insulate Against Condensation—The #1 Container Home Failure
Metal containers conduct temperature extremes rapidly—proper insulation prevents condensation that leads to mold, rust, and health hazards.
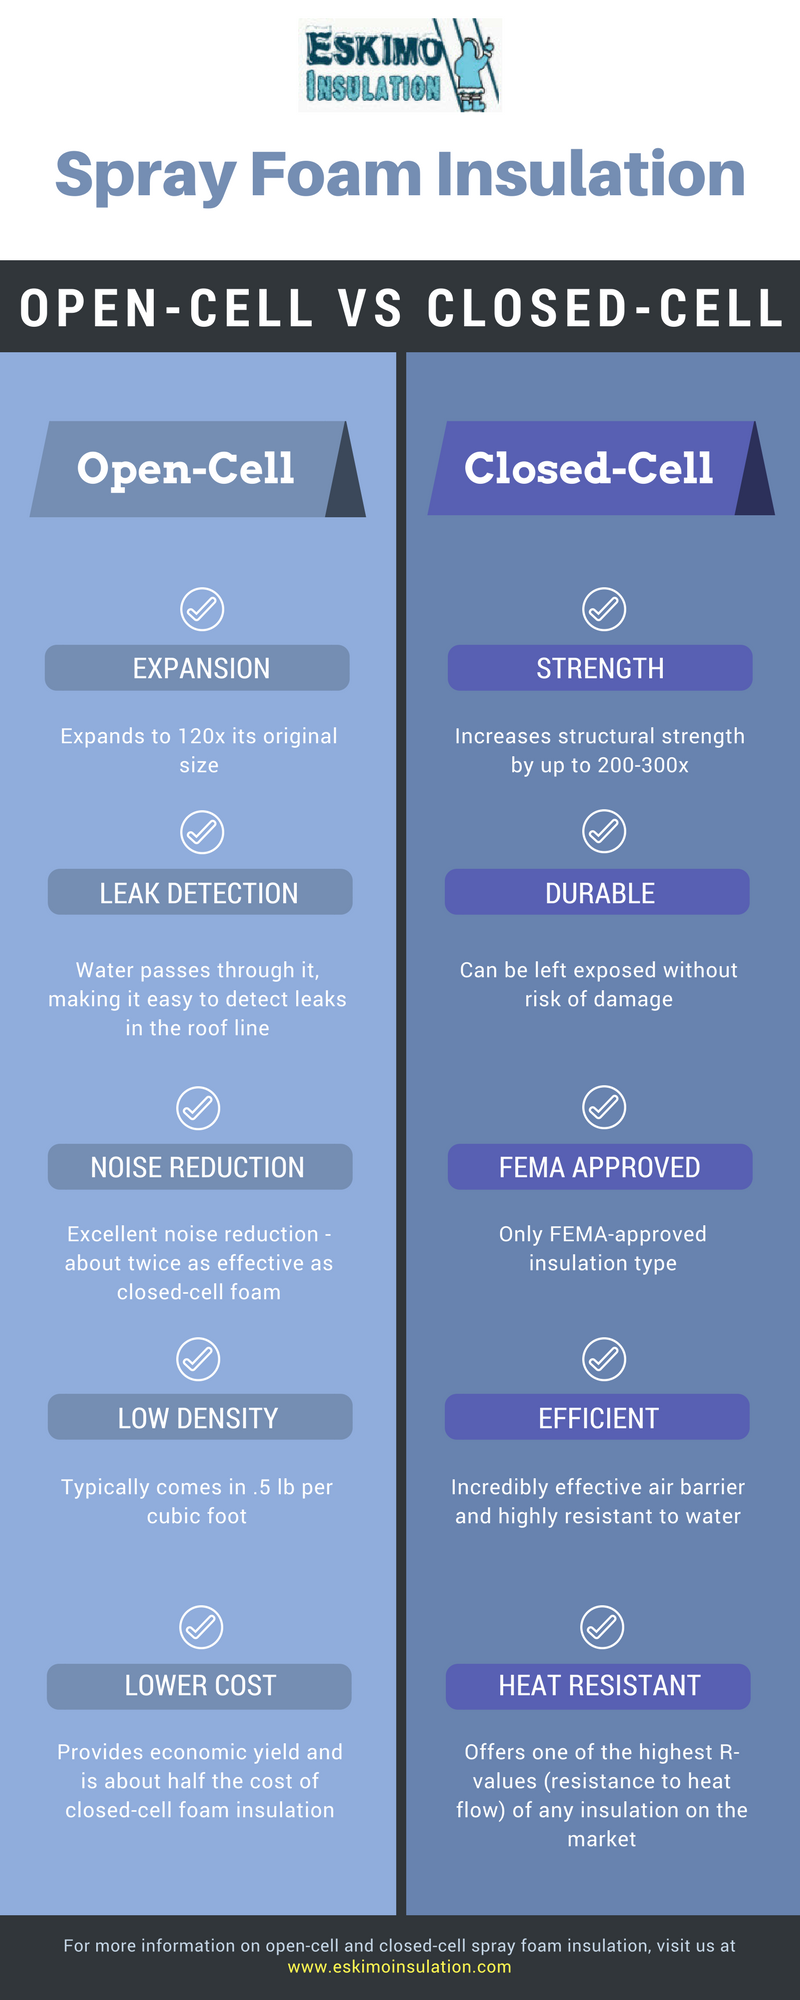
Spray Foam vs. Rigid Board Insulation
Closed-cell spray foam delivers R-6 per inch—the best option for container irregularities. At 2-3 inches thick, you achieve R-12 to R-18 while sealing every gap. Cost ranges from $1.50-$3.00 per square foot with professional installation. The vapor barrier included with closed-cell foam prevents condensation between metal and insulation—a critical advantage over other methods.
Rigid foam board systems offer DIY-friendly installation at $0.75-$1.50 per square foot but require careful execution:
1. Install 1×3 furring strips vertically every 16 inches
2. Cut foam boards to fit between strips
3. Seal all edges with spray foam
4. Add 6 mil plastic vapor barrier
5. Install drywall or other interior finish
This method reduces interior space by 3-4 inches total but costs significantly less than spray foam. Never skip the vapor barrier—condensation inside walls causes catastrophic rust that’s expensive to repair.
Install Utilities Correctly the First Time
Container walls complicate electrical and plumbing routing—plan these systems before insulation to avoid costly rework later.
Electrical and Plumbing Must-Knows
Metal conduit is required for all electrical runs—standard Romex wiring isn’t permitted in steel structures. Budget $3,000-$8,000 for complete electrical installation. Pre-wire for solar during initial installation—it costs $200-$500 now versus $1,500+ later to retrofit conduit through finished walls.
PEX tubing is the plumbing gold standard for container homes due to its freeze resistance and flexibility. Implement the “wet wall” concept by grouping kitchen, bathroom, and laundry along one wall—this minimizes plumbing runs, reduces material costs, and limits potential leak points. Tankless water heaters maximize space efficiency with wall-mounted units providing endless hot water.
Budget Realistically to Avoid Project Failure
Container homes cost less per square foot than traditional construction—but only with smart planning and realistic expectations.
True Cost Breakdown
Basic builds ($25,000-$50,000) include:
– Used container ($1,500-$3,000)
– Simple pier foundation ($3,500-$5,000)
– DIY insulation and interior ($8,000-$15,000)
– Basic utilities ($5,000-$10,000)
Mid-range builds ($50,000-$100,000) add:
– Newer containers ($3,000-$4,500)
– Concrete slab foundation ($8,000-$12,000)
– Professional modifications ($10,000-$20,000)
– Higher-end finishes ($15,000-$30,000)
Money-saving pro tip: Phase construction to spread costs—complete the weatherproof shell first, then finish interior as budget allows. Salvage materials from Habitat ReStores and construction salvage yards can reduce costs by 50-80% for doors, windows, and fixtures.
Building a shipping container home successfully requires treating it as legitimate construction—not just placing boxes on a lot. Start with thorough planning, invest in quality containers, and never cut corners on structural modifications or weatherproofing. The cheapest container isn’t always the best value—a $3,000 one-trip unit saves thousands in prep work compared to a $1,000 rusted container requiring extensive repairs.
Remember that proper insulation and vapor barriers prevent the condensation that ruins most container homes. Plan utility routing before insulation, and always verify local zoning requirements before purchasing containers. With realistic budgeting and careful execution, your shipping container home can provide decades of affordable, sustainable living that turns industrial steel into your dream home.


