
That cracked patio or wobbly fence post didn’t fail because of bad luck—it was weak concrete. When you learn how to mix concrete at home properly, you create surfaces that withstand decades of weather and use instead of crumbling within months. Skip the guesswork and costly contractor fees: this guide delivers the exact steps to achieve professional-grade concrete strength with basic tools. You’ll discover why water ratios make or break your project, the mixing method that prevents weak spots, and the one-hour deadline you can’t ignore—all from proven techniques that turn DIYers into concrete experts.
Most failed home concrete projects stem from two mistakes: sloppy water measurement and rushed mixing. But with the right approach, you’ll pour slabs that stay crack-free for 20+ years. This isn’t theoretical—we’re breaking down field-tested methods used by contractors for small-scale home applications. By the end, you’ll know precisely how to mix concrete at home for fence posts, patios, or stepping stones without expensive equipment.
Essential Safety Gear Before Touching Concrete
Concrete isn’t just messy—it contains caustic chemicals that cause severe burns and respiratory damage. Skipping safety steps risks permanent injury, not just a ruined project. Always gear up before opening your first bag.
Required Protection Equipment Checklist
- Alkali-resistant rubber gloves (standard work gloves won’t protect against chemical burns)
- Safety glasses with side shields to block flying dust and splatter
- Long-sleeved cotton shirt and pants (synthetics can trap chemicals against skin)
- Disposable N95 dust mask when handling dry mix (remove after water addition)
Critical Safety Protocol You Must Follow
Work exclusively in well-ventilated areas—never mix indoors without exhaust fans. If wet concrete contacts skin, immediately rinse with clean water for 15+ minutes; chemical burns can develop hours later. For eye exposure, flush continuously while seeking emergency care. These aren’t recommendations—they’re non-negotiable steps that prevent hospital visits. Remember: concrete remains caustic until fully cured.
Choosing the Right Concrete Mix for Your Project
Pre-blended bagged mixes like Quikrete or Sakrete eliminate measurement errors while delivering reliable strength. Skip complicated ingredient calculations—these ready-to-mix options only require water.
Bag Size Quick Reference Guide
- 40 lb bag = 0.30 cubic feet finished concrete (ideal for planters)
- 80 lb bag = 0.60 cubic feet finished concrete (standard for slabs)
Mix Types Matched to Real Projects
- General-purpose mix: Perfect for 90% of home tasks like fence posts or walkways
- Crack-resistant mix: Contains fibers for driveways or areas with temperature swings
- 5000 PSI high-strength mix: Mandatory for structural elements like footings
- Countertop-specific mix: Creates ultra-smooth, dense surfaces for outdoor bars
Pro tip: For colored concrete, add liquid pigments to your mixing water or powdered pigments after combining dry materials—then mix thoroughly to avoid streaks.
Calculate Materials Accurately to Avoid Mid-Pour Disasters
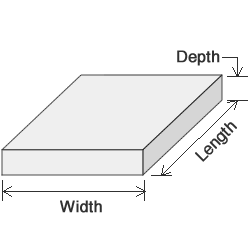
Running short mid-project creates weak “cold joints” where new concrete won’t bond properly. Use this foolproof formula:
Total cubic feet needed ÷ 0.60 = number of 80 lb bags required
Real-world example: A 6.5′ × 6.5′ × 4″ slab needs 14 cubic feet → 14 ÷ 0.60 = 24 bags. Never guess—measure twice. One standard mixer handles ~14 cubic feet per hour, so plan large pours in timed phases.
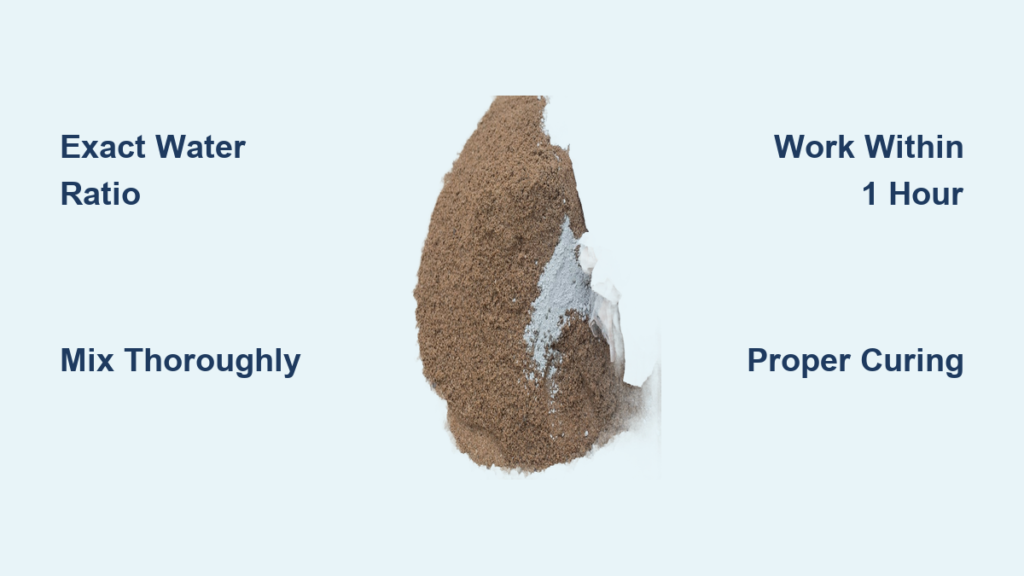
Perfect Water-to-Mix Ratio That Maximizes Strength

Water is concrete’s silent killer. Too little makes it unworkable; too much sacrifices up to 40% strength. Each 80 lb bag demands exactly 3 quarts (96 oz) of water—no exceptions.
How to Test Workable Consistency
- Hand squeeze test: Gloved hand forms thick oatmeal-like shape that holds briefly
- Ball test: Mix forms cohesive ball that crumbles under light finger pressure
Warning: Adding just one extra quart per bag weakens concrete catastrophically. Stop mixing immediately when uniform—no dry streaks or clumps—and use within 30 minutes.
Four Field-Tested Mixing Methods for Any Project Size
Hand Mixing in Wheelbarrow (No Power Tools)
Best for: 60-80 lb batches like fire pits or small slabs
Tools: Wheelbarrow, garden hoe, marked water bucket
Step-by-step:
1. Empty bag into wheelbarrow, create depression in center
2. Pour 2/3 of water (2 quarts for 80 lb bag) into depression
3. Hoe mix outward, gradually adding remaining water
4. Stop when uniform—typically 5 minutes of vigorous mixing
5. Work immediately before setting begins
Bucket Mixing for Tiny Projects
Best for: ≤30 lb batches like stepping stones or planters
Tools: 5-gallon bucket, margin trowel
Process:
1. Add mix to bucket, form center well
2. Add 3/4 of water first, then adjust remainder
3. Mix with trowel until lump-free (2-3 minutes)
Drum Mixer for Serious Pours
Best for: Patios, sidewalks (2+ bags)
Critical limits: Max 2 × 80 lb bags per batch
Pro sequence:
1. Add 3/4 water to drum first
2. Start mixer, add bags slowly while covering drum
3. Mix 3 minutes, rest 1 minute, tap drum with mallet
4. Check consistency, adjust water, mix 1 minute more
5. Never exceed 12 batches/hour to prevent cold joints
From-Scratch Mixing (Advanced Only)
Ratio: 1 cement : 2 sand : 3 gravel
Method: Combine dry ingredients on tarp, form well, add water gradually while folding inward until uniform. Not recommended for beginners—pre-blended bags prevent costly ratio errors.
Critical Work Time Limits That Prevent Weak Spots
Concrete waits for no one—once mixed, you have exactly 1 hour before setting begins. Hot weather reduces this to 45 minutes. Plan accordingly:
– Small batches: Complete placement before next mix
– Large pours: Stage multiple mixing stations
– Always work in ≤1-hour segments to avoid weak cold joints
Avoid These Costly Mixing Mistakes
| Mistake | Consequence | Prevention |
|---|---|---|
| Excess water | 40% weaker concrete, severe cracking | Add water sparingly; test consistency |
| Under-mixing | Dry pockets, inconsistent strength | Mix until completely uniform (no streaks) |
| Over-mixing | Aggregate separation, weak spots | Stop after 3-4 minutes post-water addition |
| Delayed placement | Cold joints, poor bonding | Work in ≤1-hour batches |
Clean Equipment Immediately to Save Tools
Hardened concrete destroys mixers and wheelbarrows. Within 5 minutes of finishing:
1. Rinse all tools with water while concrete is still wet
2. Scrub residue with stiff brush (no metal—it damages surfaces)
3. Inspect mixer drum for buildup
4. Store equipment covered and dry
Never let concrete harden on tools—removal becomes impossible and ruins equipment.
Advanced Pro Techniques for Lasting Results
Vibration for Maximum Density
Use a handheld concrete vibrator during placement to eliminate air pockets. This increases density by 15% and is critical for structural pours over 4″ thick—simply insert vibrator until surface sheen appears, then slowly withdraw.
Proper Curing Process That Doubles Strength
Keep concrete moist for minimum 7 days—this single step increases final strength by up to 50%. Cover with plastic sheeting or burlap, and mist with water 2-3 times daily. Skipping curing sacrifices decades of durability for a few hours of convenience.
Strong concrete isn’t magic—it’s precision. Measure water exactly, mix thoroughly, and work within the 1-hour window. When you master how to mix concrete at home, your fence posts won’t wobble, your patio won’t crack, and you’ll save thousands versus hiring contractors. Next time you face a concrete project, remember: the difference between a 5-year fix and a 50-year solution is in that wheelbarrow. Grab your gloves and get mixing—your rock-solid foundation awaits.


