
That coffee filter you just tossed? Those banana peels heading for the landfill? They’re not trash—they’re free fertilizer waiting to happen. With food waste driving 8% of planet-heating emissions and landfill methane being 84 times more destructive than CO2, learning how to start composting at home is your simplest climate action. This guide cuts through the confusion to show exactly how to transform kitchen scraps into black gold for your garden—whether you’ve got acres of yard or just a kitchen counter. In 7 days, you’ll have your first pile bubbling with life while shrinking your trash can by 30%.
Pick Your Perfect Composting System in 10 Minutes
Build a Backyard Compost Pile That Works Overnight
Skip complicated setups—your first pile needs just three ingredients: browns (dry leaves/cardboard), greens (veggie scraps/coffee grounds), and water. Choose a 3×3 foot spot 2 feet from fences with 3-4 hours of daily sun. Layer 3 inches of shredded cardboard, then 1 inch of food scraps, then 3 inches of dry leaves. Water each layer until damp like a wrung-out sponge. Top with a thick brown layer to block flies. By day 3, stick your hand in—you should feel heat as microbes awaken. This $0 system turns scraps into compost in 4 months with weekly turning.
Fix Apartment Composting Frustrations Now
No yard? Red wiggler worms in a 5-gallon bin devour 2 pounds of scraps weekly right under your sink. Drill 10 quarter-inch holes in a plastic tote, fill with shredded newspaper and coconut coir, add worms, then bury coffee grounds under the bedding. Within days, you’ll harvest nutrient-dense castings—zero odor if you skip citrus and oils. Or try Bokashi: Ferment ALL food waste (yes, even meat) in a sealed bucket with bran inoculant. Drain the “compost tea” weekly to feed houseplants, then bury the fermented waste in a garden corner for 2 weeks. Both systems fit in closets and eliminate kitchen odors when managed correctly.
Stop Wasting Money on the Wrong Bin
Tumblers promise speed but fail when overloaded—fill only halfway for easy spinning. DIY pallet bins work great but need chicken wire lining to keep rodents out. Skip expensive “aeration” bins; a $5 garden fork turned every 7 days works better. For tight spaces, choose a sealed 18-gallon bin with a bottom door—this lets you harvest finished compost without disturbing active decomposition. Pro tip: Place bins near your back door so adding scraps becomes as easy as taking out the trash.
Stock Your Browns & Greens: What Actually Goes In

Grab These Free Browns Before Your Next Coffee Run
While you’re sipping coffee, collect these carbon powerhouses: Shredded paper egg cartons (tear into 1-inch strips), crushed toilet paper rolls, and dried leaves from sidewalk piles. Save non-glossy cardboard packaging—break down Amazon boxes into 4×4 inch squares. Store in a covered bin by your compost pile. Need 3x more browns than greens? Keep a “brown emergency kit” of shredded newspaper ready to fix slimy piles instantly.
Save These Kitchen Scraps While Cooking Tonight
Toss ALL fruit/vegetable scraps (including onion skins and citrus rinds) into a countertop container. Freeze coffee grounds in an old yogurt tub—just dump the whole frozen block into your pile weekly. Crush eggshells with a hammer (they decompose faster) and add with tea bags (staples removed). Even hair from your brush goes in—just keep quantities small. Never wash containers first; that moisture helps decomposition.
Avoid These 7 Compost-Killing Mistakes Immediately
Stop adding meat or dairy—they attract raccoons and create rancid smells. Skip pet waste from dogs/cats (full of pathogens). Never bury diseased plants—they’ll reinfect next year’s garden. Avoid glossy mail—plastic coatings don’t break down. Don’t trust “compostable” labels—most require industrial facilities. Keep citrus away from worm bins—it burns their skin. Never add oily foods—they coat materials and block oxygen. When in doubt, leave it out—your pile thrives on simplicity.
Fix Slimy Compost in 5 Minutes: Perfect Your 3:1 Ratio

Rescue a Smelly Pile Before Dinner
If your compost reeks like ammonia, you’ve got too many greens. Grab your “brown emergency kit” and mix in 3 buckets of shredded cardboard. Turn the pile thoroughly with a garden fork—this adds oxygen and distributes carbon. Within 24 hours, the stench disappears as beneficial bacteria take over. Pro tip: Freeze kitchen scraps until you have enough browns to balance them—this prevents daily imbalances.
Use the Squeeze Test for Perfect Moisture
Grab a handful of compost and squeeze hard. Ideal: Only a few drops of water escape (like a damp sponge). Too wet? Add dry leaves and turn daily. Too dry? Soak newspaper strips and mix in. In summer, water weekly; in winter, cover with a tarp to retain moisture. Your pile should steam when turned—that’s active decomposition at work.
Turn Your Pile Like a Pro (Without Breaking Your Back)
Use a compost aerator tool ($15) instead of a fork—just push and twist to inject oxygen deep into the pile. Turn only when the center cools below 100°F (check with your hand). Hot composting needs turning every 7 days; cold piles need it monthly. After turning, the pile should heat back up within 48 hours—this signals microbes are feasting.
Harvest Rich Compost in 60 Days (Not 6 Months)
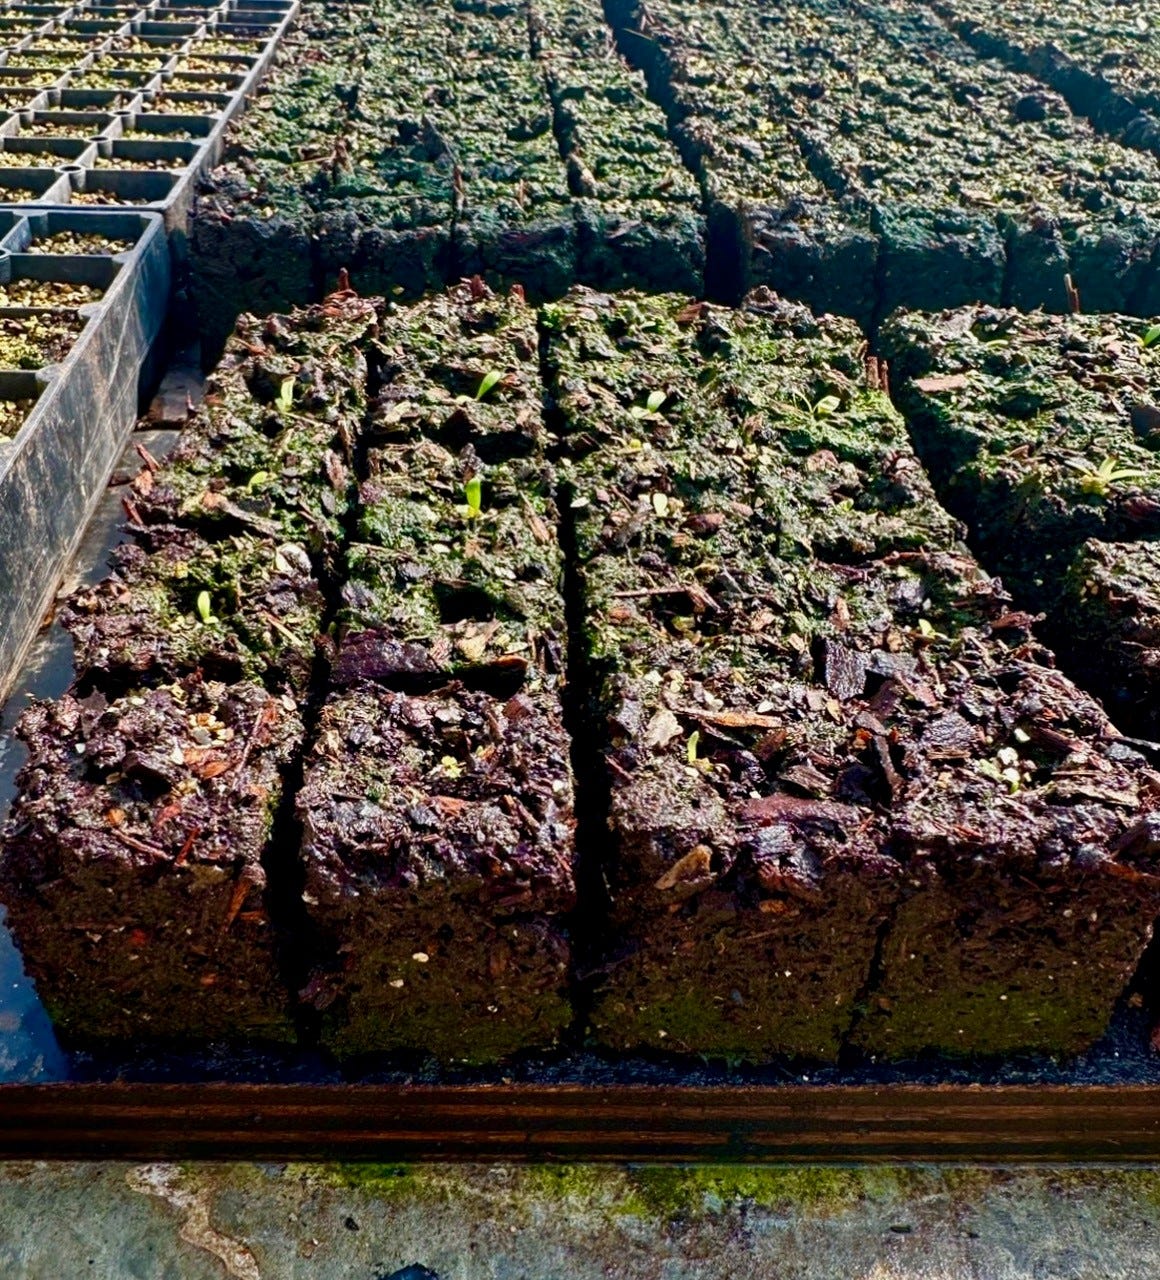
Recognize Ready-to-Use Compost Instantly
Finished compost looks like dark chocolate cake crumbs with an earthy, forest-floor smell. Original scraps should be unrecognizable except for rare eggshell bits. The pile stays cool throughout and shrinks to 1/3 its original size. If you see white fungal strands, it’s still curing—wait 1-2 more weeks.
Apply Compost Like a Master Gardener
For garden beds: Spread 1-2 inches thick and rake into the top layer. For potted plants: Mix 1 part compost to 3 parts potting soil. When planting tomatoes: Fill holes with half compost/half soil. For lawn repair: Sprinkle 1/4 inch over bare patches. Never use pure compost for seedlings—it’s too strong. Blend with soil for perfect seed-starting mix.
Store Extra Compost Without Waste
Keep surplus in a breathable container like a wooden crate with holes. It actually improves with age as microbes multiply. Share extras with neighbors—text your gardening group before your next harvest. Community gardens often accept donations (call first to confirm).
Troubleshoot 3 Common Disasters Before They Happen
Stop Raccoons Raiding Your Bin Tonight
Secure lids with bungee cords and line bin bottoms with hardware cloth. Bury fresh scraps under 4 inches of browns—never leave food exposed. If pests persist, sprinkle cayenne pepper on top (harmless to microbes). Never add meat or oily foods—they’re raccoon magnets.
Speed Up a Cold, Dead Pile in 48 Hours
Chop materials into 1-inch pieces using kitchen scissors (smaller = faster). Add a nitrogen boost: Pour diluted urine (1:5 water ratio) or fresh grass clippings onto the pile. Water thoroughly, then turn to mix. Within two days, temperatures should hit 130°F—hot enough to kill weed seeds.
Eliminate Fruit Flies in Your Kitchen Bin
Freeze scraps before adding them to outdoor piles. For indoor systems, cover fresh waste with 1/2 inch of shredded newspaper. Place a vinegar trap nearby (apple cider vinegar + drop of dish soap in a jar). Empty kitchen containers every 2 days—never let scraps sit longer.
Starting how to start composting at home requires less time than your morning coffee ritual. Your first pile begins with tonight’s coffee grounds layered under yesterday’s newspaper. Within weeks, you’ll pull nutrient-dense compost from what was once trash—feeding your garden while fighting climate change. Ignore perfection; even a lopsided pile that processes half your scraps beats landfill-bound waste. Grab that banana peel instead of the trash can, and begin your journey from food waste to garden gold today. Your soil (and the planet) will thank you at harvest time.


