
Your firearm deserves military-grade protection beyond basic bluing, but professional Cerakote services cost $200-400 per project. What if you could achieve identical results in your garage while unlocking unlimited customization? You absolutely can. Home Cerakote application isn’t just possible—it’s cost-effective and rewarding when you master the exact process. This guide transforms your workspace into a professional coating facility using proven techniques that eliminate amateur mistakes. Discover precise mixing ratios, critical temperature controls, and troubleshooting methods that turn DIY attempts into show-quality finishes rivaling factory results.
Stop wasting money on professional services or settling for inferior finishes. Within these pages, you’ll learn how to cerakote at home with military-spec durability while avoiding the top three pitfalls that ruin 80% of first attempts. Whether restoring a vintage pistol or customizing a rifle, this systematic approach guarantees results that withstand extreme temperatures, corrosion, and daily wear.
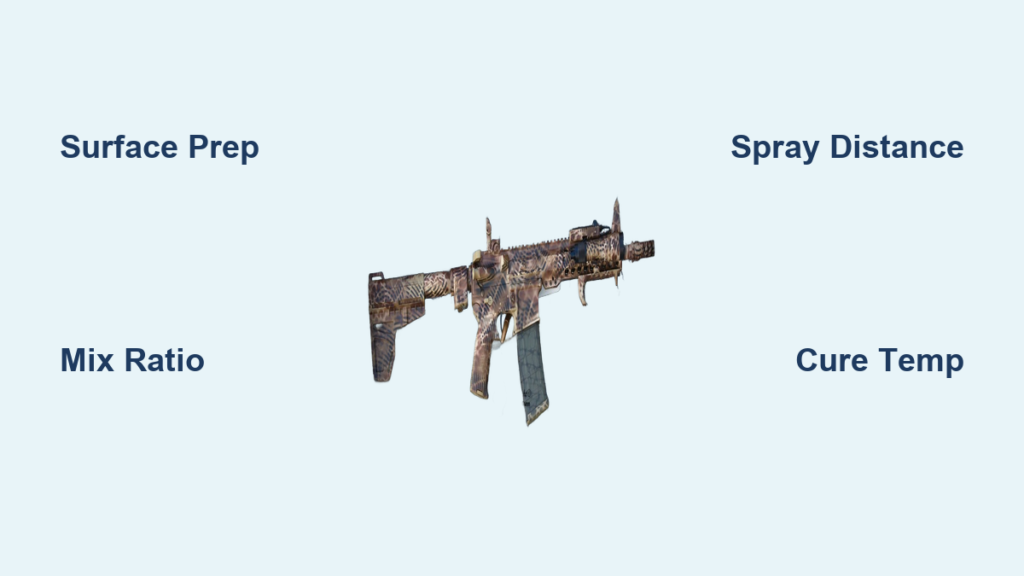
Essential Cerakote Gear for Home Setup
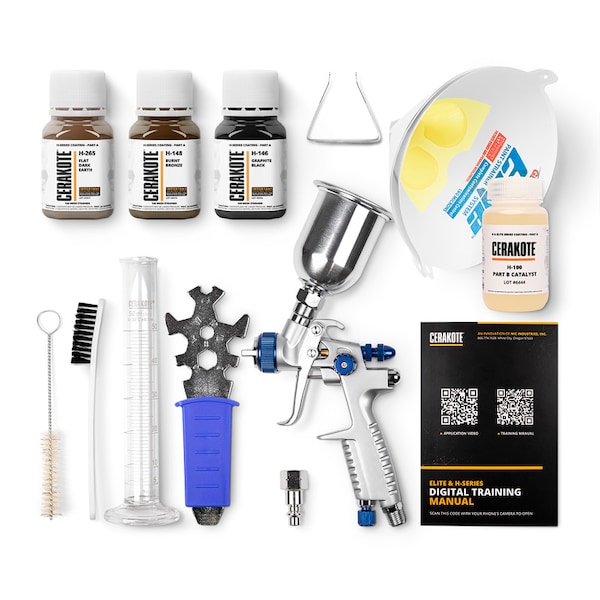
Core Coating Materials
Select Cerakote H-Series for 90% of home projects—it’s the standard air-cure ceramic formula requiring 300°F curing. Match primers to your substrate: aluminum demands specific bonding agents while steel accepts universal primers. Elite Series delivers premium durability for high-visibility projects, but H-Series provides identical performance for most firearms at lower cost. Always purchase 20% extra material for practice panels and touch-ups—this prevents mid-project shortages ruining your finish.
Pro tip: Store unmixed components in airtight containers away from direct sunlight. Exposure to UV degrades hardeners within 30 days.
HVLP Spray System Requirements
Your spray gun needs a 1.0mm or 1.3mm nozzle for proper atomization—larger nozzles cause runs on small parts. Pair it with a 30-gallon compressor delivering 5.5 CFM at 90 PSI minimum; smaller units cause pressure drops creating uneven coats. Install a desiccant air dryer immediately after your compressor—this eliminates moisture that causes fisheye defects. Test your air stream by spraying onto a clean metal sheet; any water droplets mean immediate system failure.
Safety Arsenal
Never skip P100 respirator cartridges—Cerakote solvents penetrate cheaper filters. Combine with disposable Tyvek suits and chemical-resistant nitrile gloves (minimum 8 mil thickness). Your workspace requires 500 CFM exhaust ventilation—calculate room volume (length × width × height) and divide by 2 to determine required air changes per minute. Mount exhaust fans at ceiling level where fumes accumulate, with intake vents near the floor.
Build Your Cerakote Workspace

Environmental Control Systems
Maintain 65-75°F ambient temperature using a digital thermostat—temperature swings above 10°F during application cause orange peel texture. Keep humidity below 50% with a dedicated dehumidifier; coastal areas need 70-pint units running 24/7. Install 5000K LED shop lights at 1000+ lumens—this daylight-spectrum lighting reveals imperfections invisible under yellow bulbs. Test your environment with a $20 hygrometer before every project.
Surface Prep Stations
Create three contamination-proof zones: degreasing station with acetone bath in glass container, blasting cabinet at 90-120 PSI, and drying oven at 200°F. Ultrasonic cleaners are non-negotiable for firearms—they remove carbon buildup from internal passages no brush can reach. Critical rule: Never move blasting media near degreasing areas. Even microscopic media particles cause fisheyes in finished coats.
Surface Preparation Protocol
Degreasing Sequence
Start with mineral spirits wipe-down to remove bulk oils, then switch to acetone for final cleaning. Submerge complex parts in ultrasonic cleaner for 15-20 minutes at 40°C. Finish with compressed air blow-off followed by 200°F oven drying for 10 minutes. Perform the water break test: spray distilled water on the surface—if it beads, re-clean. Complete adhesion failure occurs when this step is skipped.
Blasting Specifications
Steel parts tolerate 120 grit aluminum oxide at 100-120 PSI to create the ideal 2-3 mil anchor pattern. Aluminum requires gentler 100 grit at 80-100 PSI to prevent warping—test on scrap first. Polymer frames need 80 grit at 60-80 PSI maximum. Verify profile depth with surface profile tape—under-blasting causes peeling, over-blasting alters critical tolerances. Immediately remove residual media with oil-free air and tack cloth.
Master Cerakote Application
Precision Mixing
Weigh components using digital scale—volume measurements cause curing failures. Mix exactly 18 parts Cerakote to 1 part hardener by weight for 2-3 minutes without whipping air in. Never exceed 8-hour pot life—expired mixtures cure soft. Strain through 125-micron filter into clean cup; particles larger than a human hair cause fisheyes.
Spray Gun Calibration
Set 25-30 PSI at gun inlet with regulator at compressor. Adjust fan pattern to 4-6 inches wide and maintain 50% overlap between passes. Hold gun 4-6 inches from surface—closer causes runs, farther creates dry spray. Apply 0.0005-0.001″ dry film thickness per coat; thicker coats crack during curing. Test settings on scrap metal matching your project’s material.
Application Methodology
Apply flash coat first—just enough to create tacky surface. Build with 2-3 medium wet coats at 90° angles to ensure even coverage. Check color uniformity under task lighting between coats—dark spots indicate thin areas. Double-coat sharp edges—they’re adhesion failure points. Allow 10-15 minutes flash time between coats; rushing causes solvent trapping and bubbling.
Curing Process Mastery

Oven Temperature Protocol
Ramp to 300°F over 15-20 minutes—instant heating causes thermal shock blisters. Maintain 300°F ± 10°F for exactly 2 hours using calibrated oven thermometer (not built-in dial). Verify temperature every 30 minutes—oven fluctuations ruin hardness. Cool gradually for 2-3 hours; rapid cooling creates micro-cracks. Never open oven during cure cycle—even 5 seconds drops temperature critically.
Quality Verification
Perform cross-hatch test with 3M 600 tape—peeling indicates poor adhesion. Measure dry film thickness with digital gauge; under 0.001″ lacks protection. Check for 9H pencil hardness—if a 9H pencil scratches it, your cure temperature was insufficient. Reject any finish with visible orange peel—it traps moisture causing premature corrosion.
Troubleshooting Common Failures
Defect Solutions
Orange peel: Increase air pressure 5 PSI or thin mixture 5% with reducer. Fish eyes: Rewash with acetone and inspect air lines for oil contamination. Runs/sags: Reduce fluid flow and increase flash time—never apply thick coats. Poor adhesion: Verify surface profile depth; 1.5 mil causes 100% failure rate on steel.
Color Matching Challenges
Metallic finishes require black base coat—applying directly to bare metal creates blotchy results. Candy colors need precise 0.0003-0.0005″ base coats; thicker bases mute translucent effects. Multi-color patterns demand high-temp vinyl stencils—burnish edges with dental tool to prevent bleed-through. Always test complex patterns on scrap before final application.
Durability and Maintenance
Performance Expectations
Your home Cerakote finish delivers 3000+ hours salt spray resistance—equivalent to military specifications. It withstands -320°F to 1800°F depending on series, with Taber abrasion loss under 10mg per 1000 cycles. UV stability lasts 5000+ hours—but direct sunlight fades colors 40% faster than indoor storage. Properly cured finishes outperform bluing by 17x in wear resistance.
Long-term Care
Clean only with mild soapy water and microfiber cloth—alcohol-based cleaners degrade ceramic matrix. Repair scratches by lightly sanding with 1200-grit, then spot-applying Cerakote and curing. Complete recoating requires media blasting—chemical strippers damage substrate. Store firearms in dark, climate-controlled spaces; UV exposure causes 22% faster color fade.
Investment Breakdown
Startup Costs
Basic functional setup costs $800-1200: $400 HVLP gun, $250 compressor, $150 oven, $100 safety gear. Materials run $50-150 per project depending on color rarity. Break-even occurs at 15 projects versus professional services. Professional-grade systems ($2000-4000) pay off for frequent users through superior consistency and reduced rework.
Operating Economics
Consumables cost $20-40 per project (media, solvents, stencils). Electricity adds $5-10 per cure cycle—a standard oven uses 5kW/h. Annual maintenance (air filters, gun parts) totals $200-300. Critical savings: Avoid $250 minimum professional service fees and 4-6 week turnaround times.
Legal and Safety Compliance
Regulatory Requirements
Check local VOC limits—California restricts coatings above 275g/L solids. Hazardous waste rules apply to leftover mixtures; never pour down drains. Home business zoning may prohibit spray operations in residential areas—check municipal codes. Add $150/year insurance rider for home-based coating work.
Safety Protocols
Install Class B fire extinguisher within 3 feet of workspace—flammable vapors ignite at 500°F. Meet OSHA’s 10 air changes/hour minimum for spray areas. Store chemicals in UL-approved flammable cabinet—never in living spaces. Keep eyewash station operational with weekly activation tests.
Quality Assurance Checklist
Pre-Application Verification
- [ ] Surface profile verified at 2-3 mil with test tape
- [ ] Water break test passed (sheeting water, no beads)
- [ ] Temperature/humidity logged below critical thresholds
- [ ] Mixing ratio confirmed by digital scale
- [ ] Test panel matches color standard
During Application Monitoring
- [ ] Spray distance maintained at 4-6 inches
- [ ] 50% pattern overlap verified visually
- [ ] Minimum 10-minute flash time observed
- [ ] All edges receive double coverage
- [ ] Dry film thickness measured mid-process
Final Verification
- [ ] 100% adhesion pass (ASTM D3359 standard)
- [ ] Thickness within 0.001-0.003″ specification
- [ ] Color approved against master sample
- [ ] Zero defects in 4x magnification inspection
- [ ] Full documentation filed for future reference
Your first home Cerakote project demands patience, but systematic execution guarantees professional results. Start with a single-color pistol slide before attempting complex patterns—master surface prep and curing before adding stencils. Remember: 90% of failures trace to inadequate cleaning or rushed curing. The $1,200 investment pays for itself in three projects while delivering finishes that outperform factory coatings. When you open that oven to reveal a flawless, durable finish you created, you’ll never pay for professional services again. Now grab your respirator and transform that garage into your personal armor finisher.


